Family house
Initial construction difficulties
Anyone who has already gained sufficient experience in smaller construction jobs as a handyman will more easily approach the construction of a family house or apartment. This does not mean that he himself carries out the construction, because it is a job that requires certain specialists. But it is certainly good for the >>investor<< to be familiar with these tasks as well and to take part in simpler matters himself, and possibly members of his family or friends as well. Here we shall speak precisely about participation in “large” construction projects, i.e. about preparations for construction.
For construction, the land must first be secured. It is not enough to merely “look at” the land before buying it. In order to ensure the best conditions for the future building, it is necessary to obtain information about several matters related to the land. It is advisable to consult an expert before purchase. The location of the land, the terrain, the slope, the composition and character of the ground, ground conditions, wind directions, the dimensions and shape of the land, the existing flora on the land, the location and condition of access roads and utilities are very important factors and significantly affect the design and execution of work during construction. (For example, a high groundwater level will require additional waterproofing work, or on rocky ground the work of building foundations is more difficult). By considering these factors, it may turn out that the “cheaper” land is in fact “more expensive”.
Before purchase, the “legal status” of the land should also be examined. It should be checked in the land registers whether the land is actually free for sale and not accidentally burdened with debts, mortgage, etc. It is possible that there are special regulations concerning the land, such as the right, or obligation, to provide passage to other users, water or pipeline passage, expropriation, road construction, or other conditions (fig. 1). After examining the land registers, we should contact the competent municipal authority in order to obtain information about the possibilities for building on the land. There we will find out what kind of building we may, or must, erect on that site (ground-floor, multi-storey, etc.), whether building is allowed at all, and what the urban long-term development plans for the surroundings are (where kindergartens, nurseries, shops, etc. will be built). If the results of the detailed land inspection are favorable and if the condition in the land registers is in order, and the opinion of the competent construction authority is also favorable for us, i.e. there are no limiting factors or such facts that would increase construction costs, we can buy the land in accordance with the regulations for purchase and transfer of ownership. Such detailed preliminary information will spare us later disappointments and unnecessary costs, and may even prevent the construction plan from failing altogether.

FIGURE 1
After purchasing land, a building permit is required. The purpose of this permit is to ensure that the construction of the building is carried out in accordance with the existing regulations and that the owner, who has the right to build, carries out the construction in such a way that it does not interfere with the interests of neighboring owners and the community. Anyone who carries out construction without the prescribed building permit, or in an unprofessional manner, should expect the building to be forcibly demolished at their expense.
Along with the application for a building permit, a land registry extract should also be attached as proof that the applicant is the rightful owner of the land. It is also necessary to obtain a site plan of the land as well as the building design (site plan and details) with a technical description. It is advisable to obtain information from the competent authority about the project requirements too (scale, number of copies, etc.) when gathering information about the land. Unsuitable designs often present a serious problem. Designs may be prepared only by institutions, i.e. persons authorized to do so. It is not our intention to influence future “investors,” but we would like to point out that larger design organizations can provide ready-made standard designs, which are relatively inexpensive, modern and economical, prepared in several variations so that they can meet a wide range of requirements. Based on these designs, building permits that include a bill of quantities and cost estimate can be obtained more easily.
When building their own house, everyone has their own ideas. These ideas may be correct and realistic, but many of them are unrealistic because they are impractical, uneconomical and outdated, and often tasteless as well. When preparing the design, the designer must comply with certain federal regulations, standards and design rules (e.g. the entrance to the toilet must not be from the kitchen, the minimum room area is prescribed, the minimum height of interior rooms, the layout of rooms, cladding, window areas, etc. cannot be chosen at will), but at the same time must also meet the requirements of individuals, i.e. the owner. Purposeful and economical proposals by designers regarding the use of standardized elements (beams, doors, windows, etc.) should be valued.
The interests and preferences of individuals can be most strongly reflected in the choice and design of the facade, the grouping of rooms, the heating system, terraces, basements, auxiliary buildings, etc. We draw attention to the fact that the competent authority will not issue a building permit on the basis of unprofessional and uneconomic projects that do not comply with the regulations for residential construction, precisely because of the interests of the investor.
Once we have obtained the building permit, we should carefully prepare for construction. Good preparation will spare us later unnecessary work. In parallel with the process of obtaining the building permit, someone should be entrusted with preparing the bill of quantities and cost estimate. On the basis of the bill of quantities and cost estimate, we can determine the required amount of building material (taking into account the necessary waste as well). These documents are also needed to obtain a construction loan. If we have also secured the necessary loan (or cash for the start of construction), the next step is to procure the building material.
It is best to obtain the material from a trading company. There is also the possibility of purchasing material that has already been used — which is considerably cheaper — but this should definitely be agreed upon (and bought together) with a specialist. Namely, dirty bricks with mortar will later cause difficulties during masonry and plastering, because they will “show through” the plaster and paint. Wood beams, parquet floors and ship decks may contain fungi and insects, which after a year or two can cause enormous damage. Some roof tiles require twice the quantity of battens, so cheap roofing may end up being more expensive later. Likewise, soft, used limestone does not withstand frost, so we will not be able to use it for masonry and foundations. In general, great caution is required, whether the materials are new or old, often cheap building materials. One should always request and keep documents proving ownership, and all other receipts and documents should also be carefully preserved.

Before the first shipment of materials arrives, many things still need to be arranged on the plot. If the plot is not yet fenced, the fence should be erected after the boundaries have been reconciled with the neighbors and with the official records. We must build the fence facing the street, as well as the right side fence and the right half of the rear fence, all this seen from the street. The left side fence and the left half of the rear fence belong to the left, i.e. rear neighbor. By obtaining official documents on the fences, we will avoid any later disputes, and perhaps even litigation. In the direction of transporting building materials, it is advisable to make only a temporary and movable fence.
The basic prerequisite for construction is the presence of water on site, because water transport is expensive and complicated. If we have drilled a well and the water is sulfurous, bitter, salty or foul-smelling, help should be sought from a specialist for drilling an appropriate (deep) well or for neutralizing the water. Aggressive or dirty water cannot be used in construction, because after a short time it will ruin the concrete or mortar. A pit for lime should also be dug, so that it does not interfere with transport and is sufficiently far from the future walls. The base of the pit can be 3 x 2 m, and the depth 1,5 m.
A building is also needed for storing materials, tools, and for changing clothes. For this purpose, a temporary hut with a base of 3 x 3m should be built, made of wood, reed, or brick, with the possibility of closing it. But it is much better to build one of the auxiliary structures in advance, e.g. a fuel shed, for which we also have a building permit, and use it for storage. We must not forget the construction of a toilet in a place away from water. After delivering the tools and auxiliary materials (carpenter’s clamps, ropes, etc.), we can begin organizing the delivery of building material.
The truck should be hired so that it is fully utilized. For loose materials, dump trucks should be requested. We must avoid cheap but unauthorized transport. Delivered material should be placed around the future building so that it does not obstruct further transport, because in this way we will avoid unnecessary relocations. Cement must be stored under a roof or covered, bricks stacked in a bonded pattern, without risk of injury, and sand and gravel enclosed by bricks (to prevent scattering). Slaking lime is best entrusted to a specialist.
After this we can “mark out” the building site. This will be done by the master builder. He will determine the exact position of the building on the land, the position of the corners and the elevation data. The weeds and humus should be removed from the site where the building will be erected (for possible later use). The construction site should be level so that the master can determine the position of the foundations with a string. The width of the foundation trenches is marked with stakes. We can also take part, under the master’s supervision, in these tasks, while digging the trenches is entirely our job. On loose ground, supports are needed, and on firm ground we must make the trenches exactly to the given dimensions by trimming the sides of the walls. Let us try to level the excavated soil on site, 1-2 m from the trench, but it is usually necessary to transport it away. Soil transport is best solved as the return haul of the truck that delivers building materials. After digging the trenches, it is best to start making the foundations immediately (so that rain does not damage the trenches) (fig. 2).

FIGURE 2
Construction
The foundation depth should in any case be at least 30 cm below ground level, below the frost line. The fastest and at the same time most economical foundation is the so-called “floating stone,” which we can also make ourselves based on the mason’s instructions. A brick foundation is very expensive and can be built only by a specialist. In hilly areas, a stone-built foundation is the best choice. After making the foundations of the exterior main walls, the foundations of the middle and partition walls should be made.
Based on the foregoing, with careful work, we have already made the required foundations. For proper insulation, the craftsman will install two layers of bituminous insulating boards 150, and three layers of hot bitumen will ensure complete sealing. Attention should also be paid to the insulation being 3–10 cm wider than the wall and having at least 15 cm overlap at the joints. The horizontal insulation of the main walls should everywhere be connected to the horizontal insulation of the intermediate walls and the insulation under the floor. Many neglect careful insulation; however, insulation is one of the basic prerequisites for the usability of the building (fig. 3)

FIGURE 3
The start of the external main walls, internal main walls and partition walls should be at least 30, and even better 40 cm, above the level of the surrounding ground near the planned floor level. The craftsman who organizes the work and the so-called precision tasks can be greatly assisted during masonry work. For this reason, it is advisable to prepare masonry, one of the operations that requires a lot of work, well and to work out the plan for its course in detail and carefully.
Regardless of which material we use for masonry—bricks, hollow bricks, blocks, frost-resistant crushed stone, or dressed natural stone—the following golden rules will apply to every type of masonry.
- Let us not strive to do everything ourselves! Good masonry quality can be ensured only by qualified labor. If we have not learned the masonry trade, then let us help by carrying bricks, handing them over, mixing and carrying mortar, moving scaffolding, and the like (fig. 4).

FIGURE 4
2. The required load-bearing wall width is determined by the specialist already during the design stage. The required thickness for thermal insulation depends on the wall material, and the minimum value of this dimension is regulated by the applicable codes in accordance with load-bearing capacity. We must not save on wall thickness at any cost, because otherwise we will later have higher heating costs; moreover, in thin walls condensation of water vapor may occur, which is harmful to health and damages plaster and furniture. For our temperature conditions, brick walls with a width of 38 cm are desirable (without plaster). Stone walls should be at least 50 cm wide (also because of load-bearing capacity). There are also various other wall combinations, the best known being a combination of longitudinally laid hollow bricks and smaller bricks laid on edge. The thickness of these walls is 33 cm, but this requires careful workmanship. A good wall is perfectly vertical, and the individual elements in it are bonded. In brick walls, special attention should also be paid to ensuring that the courses of bricks are laid evenly and horizontally. To maintain the dimensions during masonry work, blocks, battens, cords and plumb lines should be used, and the correctness of the masonry should be checked frequently (at least after 2-3 courses).
3. Horizontal and vertical joints (for stone, the diagonal ones) should be about 1 cm, and these joints should be well filled with mortar. The mortar quality is determined by a specialist; usually mortar grade H4 or H6 is used. For building pillars and chimneys, cement-reinforced mortar is required. The mortar must be mixed very carefully so that there are no lumps of sand and lime in it. For mixing mortar, aged lime and sand free of clay, silt, and impurities should be used.
4. During masonry work, scaffolding is required above a height of about 1 m. Scaffolds may be built only by workers qualified for that purpose, or they are erected on the basis of the foreman’s instructions, and the scaffold material must be completely sound, with appropriate decking. Access planks with battens to prevent slipping should be placed on the scaffolds. The mortar box should be filled so that no spilling occurs during transport. Since a larger quantity of mortar is used during masonry, two boxes should be prepared for each mason.

5. We must not allow disorder on the construction site! During and after the work, the scaffolding should be cleaned so that the mortar on the floor does not set. The mortar boxes should also be cleaned and only as much mortar as will be used that day should be prepared. The bricks that have fallen should be collected and the site cleared of debris in order to free the transport routes. The bricks should be delivered and stacked so that they are at the mason’s hand, taking care that the pile does not collapse and fall.
6. One mason’s output is the installation of 800-1000 bricks in eight hours. If the work is organized so that one worker applies the mortar, another passes the bricks, the third (the master) lays them, i.e. builds the wall, and the others (family members) deliver the materials, it is possible to install as many as 7000 bricks in eight hours. In this way, the main walls of a family house can be completed in 4–5 days. Particular attention should be paid to the proper execution of wall joints, corners, and door and window openings, as well as to their careful adjustment and bond arrangement.
7. Partition wall thicknesses may be 6, 10, 12 and 25 cm (depending on structural and partitioning requirements). Partition walls should be built by a specialist, because these walls must be connected into the grooves of the main walls, and block partition walls should also be provided with reinforcement. Note that the thickness of block walls in “wet” rooms (bathroom, kitchen) should be at least 10 cm, because later, when the required grooves are made, walls of 6 cm will be ruined.
8. And finally, a few words about protecting the health of those involved in building a family house. At the workplace, facilities for washing, a small room for storing and drying sweaty work clothes, sun oil (for tanning), and a greasy skin-care cream should be provided. Chafed hands and hands eaten away by mortar should be washed carefully, wounds should be disinfected, and blisters should be treated with ointment. Against excessive sun exposure – especially for those not accustomed to heavy physical work – sun oil, a wide-brimmed hat and light clothing should be used. Children should be kept away from the construction site and from the lime-slaking pit. Such places, attractive for play, should be fenced off and arranged.
As a classic building material, brick is very important, so we devoted two figures to this material in order to show its characteristics, i.e. its »rules of use« (fig. 5 and fig. 6).

FIGURE 5
The numbers in the small boxes show how many bricks are needed for 1 m2 of walls of different thickness made of bricks of different dimensions. Those who build on their own will easily calculate the wall areas of the planned rooms. The calculation of wall volume is more complicated, and that is precisely why we have given the ratio of number of bricks to wall area (exceptionally, we have given the required number of bricks for a column of height 1 m).
When determining these data, we also took into account the space occupied by the mortar, and where the number of pieces for 1 m2 was not a whole number, we rounded up.

FIGURE 6
We would like to point out to builders that the required number of bricks at the corners for interlocking the walls is omitted if the calculation is made on the basis of internal surfaces. For this reason, the length of one wall in the assembly should be increased by the value of the wall thickness. Bricks laid in rows represent only a pile of material; only by bonding them with mortar will they become a wall. Mortar is a mixture of slaked lime, sand, water and cement, with the consistency of cream.
Application of various types of mortar
Mortar grade H4 - for lightly loaded walls.
Mortar class H6 - for less heavily loaded brick and stone foundations, for chimneys, for partition walls and for vaults.
Mortar grade H10 - for load-bearing walls 25 cm thick and less, and for columns with a cross-section smaller than 0,1 m2
Mortar designation H25 - for the main walls of basement spaces of buildings.
Mortar designation H50 - for brick pillars with reinforcement in the case of »aggressive« groundwater.
Mortar designation Н80 - for the case of »aggressive« groundwater.
Mortar designation H90 - for the case of very »aggressive« waters.
Besides these aspects, of course, the requirements in terms of strength are decisive.
Composition of individual mortar types
H10: 1,00 m3 of sand, 250 kg of cement grade 300 or 0,25 m3 of lime
200 kg kg of cement of grade 400
Н25: 1,00 m m3 of sand, 350 kg of cement grade 300 or 0,10 m m3 of lime
300 kg kg of cement of grade 400
H4: 1,00 m3 sand 0,25 m3 lime
H4f/100h: 1,00 m3 sand 100 kg cemt. grade 300 0,25 m3 lime
H4f/75n: 1,00 m3 of sand 75 kg cem. grade 400 0,25 m3 of lime
H4f/50 o: 1,00 m3 of sand 50 kg cem. brand 500 0,25 m3 of lime
Н6: 1,00 m m3 of sand 175 kg of cement grade 300 or 0,25 m m3 of lime
150 kg kg cem. brand 400
VP/100h: 1,00 m3 sand 100 kg cem. grade 300 0,33 m3 lime
a/250 h: 1,00 m3 sand 250 kg cem. grade 300 —–
o/225n: 1,00 m3 of sand 225 kg cem. grade 400 —–
Lime with lumps, or improperly mixed and poorly slaked lime, will cause craters on the wall in the form of grain marks.
Several types of concrete
It is good to know the characteristics and several types of concrete, with the note that the strength of the main binding material, cement, increases as the numbers increase (200, 300, 400, 500). The concrete designation from B50 to В500 denotes, however, its compressive strength. Here are several types for the »assortment«:
B - 50: 1,20 m3 of gravel 150 kg of cement grade 300 or 110 kg of cement grade 400
B - 70: 1,20 m3 gravel 190 kg of cement brand 300 or 150 kg cement brand 400
B - 100: 1,20 m m3 of gravel 250 kg of cement grade 300 or 200 kg of cement grade 400
В - 140: 1,20 m3 gravel 270 kg cement of grade 300 or 250 kg cement of grade 400
B - 200: 1,30 m3 gravel 278 kg cement of grade 500
If we have already become better acquainted with bricks and mortar, let us also mention that the method of bonding bricks by placing them lengthwise in the direction of the wall length is called the stretcher course (fig. 7, 1 part). There is also the header course (fig. 7, 3 part) and the so-called soldier course (fig. 7, 4 part) in the single-row variant.
Bricks can be split lengthwise and crosswise, but pieces of 1/4 and 3/4-th parts are often needed. These are used to form pillars. It is very important that the top layer of bricks be shifted by half a brick relative to the layer below it. This bond ensures the strength of the wall. It is also important that mortar be present not only between the individual courses, but also between individual bricks in the course in the lateral direction (fig. 7, lower part).

FIGURE 7
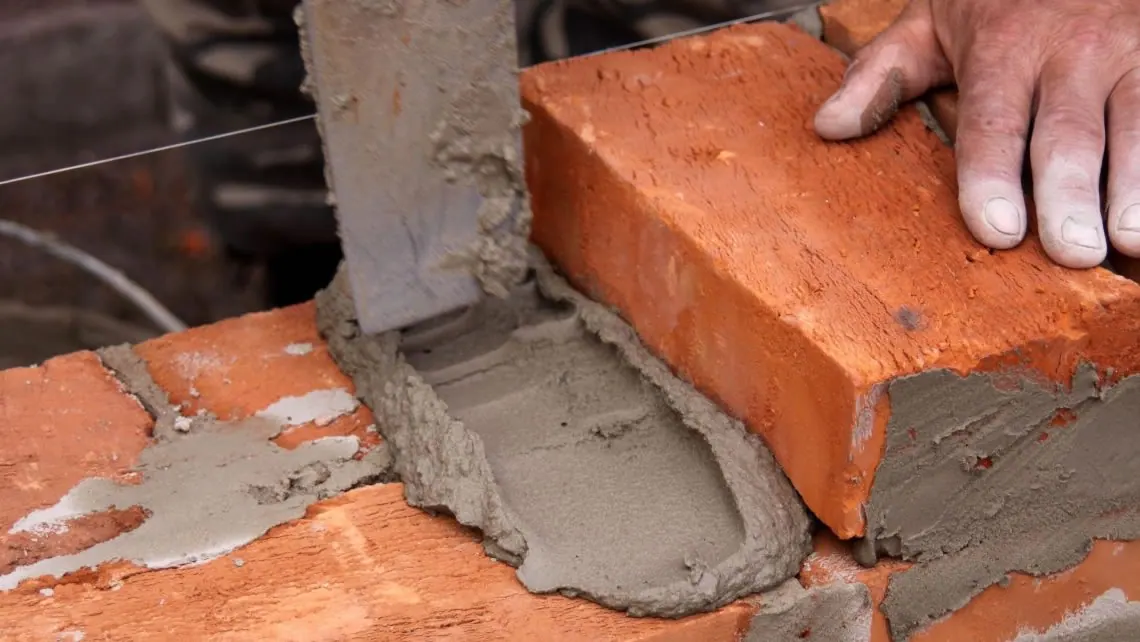
A uniform and fairly fluid layer of mortar, about 1 cm thick, should be applied with a trowel to the finished courses; the bricks should be laid on this layer (3), and mortar should also be applied to the ends of the bricks (2). The laid bricks should first be tapped into position from the top (4), and then from the side as well (5) (by tapping on the end that has not been coated with mortar). The fluid mortar will also seep into the vertical joints, thus achieving a good bond.
For splitting bricks in half, it is convenient to mark the length on the hammer handle, and this will allow us to easily mark the place for cutting half or quarter bricks. At the cutting point, a deeper line should be drawn on both sides of the brick, and by striking the middle of the part to be cut off, the brick is broken. During this operation, the brick should be held in the left hand.
Plastering requires even more experience than cutting bricks. Pouring the contents of the trowel onto the wall in a single hand movement is difficult to master for someone who rarely practices masonry. Therefore, it is better to place the mortar on a larger float and then, starting from the lower end of the wall—holding the float horizontally and at an angle of about 20° relative to the wall—apply the mortar to the surface with gentle pressure against the wall (figure 8).

FIGURE 8