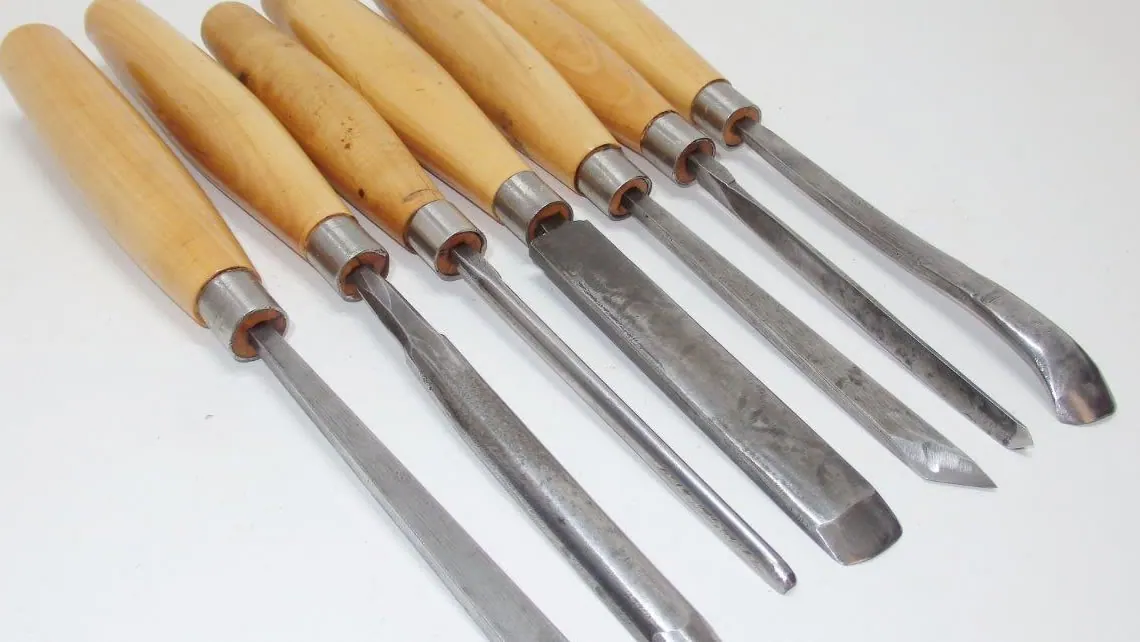
Working with chisels
Types of chisels and blade position
Home woodworking cannot be carried out fully without working with chisels. Joints made with mortises and tenons, fitting a lock and fitting hinges on doors cannot be done without using a chisel.
For ordinary operations, it is necessary to have about three or four different types of chisel. Chisels with more complex profiles, such as oblique or crescent-shaped ones, are used by sculptors and joiners for making period furniture.
The chisel blade is made of steel, while the handle and the mallet used to strike it are made of wood. The most important part of a chisel is its blade, which is usually at an angle of 25° (Figure 1, part 1).
The most commonly used chisels are:
- a flat chisel with a rectangular cross-section;
- a flat chisel with bevelled edges;
- a hollow woodworking chisel;
- a long mortising chisel.
The top of the chisel handle must have a metal ring around its slightly tapered upper section so that blows from the wooden mallet do not split the handle.
The chisel blade is flat (only the hollow chisel has a convex blade) and should be kept in the cutting plane. The bevelled side of the chisel should face the part of the wood that is being cut out and removed (Figure 1, parts 2–5).

Figure 1 — Blade position and the sequence of working with a chisel.
Cutting openings and maintaining chisels
When working with a chisel, pay attention to the direction of the wood grain, because a stronger blow may split the wood along the grain (Figure 1, parts 6 and 7).
When cutting a mortise with a chisel, first cut the section perpendicular to the grain and only then the section parallel to the grain (Figure 1, parts 2, 2/a, 3 and 3/a). The material must first be placed on a solid support to avoid vibration and clamped as close as possible to the area being cut, even if it has to be moved during the work. Hold the chisel firmly by the handle, with the fingers wrapped around it, not by the metal part.
A long, narrow chisel can be used to cut deeper square mortises. If the tenon is to pass through the material, it is better to cut the opening alternately from both sides. The cutting depth on each side will then be smaller.
A semicircular chisel is used for cutting circular openings and removing sharp wooden edges.
The part of the chisel opposite the blade is pointed and square and is used for setting it into the handle. Chisels most often break at the narrowed section below the handle. When a chisel breaks there, it becomes unusable. A failed chisel handle can be replaced easily. If the blade is damaged, it can be sharpened again by grinding.
The handle is fitted by first pressing the pointed end of the chisel into it, then gripping the handle and, while holding it in the air, striking its rounded end firmly several times with a hammer.
Drilling
Tools and preparation for drilling
One must know how to drill. Drilling may seem like the simplest woodworking operation, but in practice that is true only when the appropriate tool is available. A gimlet is the most necessary tool for drilling holes for screws and nails. A drill is also needed for larger openings, because working with larger gimlets or auger bits requires some practice (Figure 2).

Figure 2 — A hand drill and types of wood drill bits.
Because a small workshop cannot hold every tool, it is best to obtain a hand drill of the type known as an “American” drill. It can be used with both twist bits and smaller auger bits. The geared transmission means that turning the handle does not require much effort, so even an inexperienced person can operate it. Place a backing board under the material being drilled, whether using a hand drill or another drill, on the assumption that the bit will eventually pass through the material, and clamp everything firmly so the bit does not catch the material and begin to rotate it.
Always choose a lower rotational speed when drilling wood. If using an electric drill, even at the lowest speed, stop drilling every 15–20 seconds. During rapid drilling, the wood may become hot enough to change colour or even catch fire. A sharp sound, smoke in the form of a fine ribbon or the smell of burning wood is a warning. Periodically withdrawing the bit not only cools it but also helps remove swarf from the opening. Swarf jammed in the opening greatly reduces drilling efficiency.
Before drilling, make a small indentation at the drilling point with a nail or punch. This is particularly useful for beginners. This initial indentation, technically called a centre-punch mark, helps guide the bit during its first turns. Make sure the tip of the bit is not bevelled on one side, because that would produce an opening larger than expected.
Cutting a larger circular disc from thinner material is also called drilling, although it is an entirely different operation. An adjustable circle cutter is used. To “drill” with this tool, first drill a small hole at the centre of the cut-out and place the cutter’s point there. Set the blade to the required distance according to the diameter of the opening. Turn the blade several times; it then begins to travel like a needle on a record, always at the same distance from the centre while cutting the board (Figure 3).
Drilling larger and blind openings

Figure 3 — Cutting a circular disc with an adjustable cutter.
If the drill must pass through the wood, begin from the face of the material. The opening remains neat and even on that side, with sharp edges, while on the other side the bit splits the material as it breaks through. When drilling for a countersunk or oval-head screw, a countersink bit must be used to recess the upper part of the opening for the screw head. If no special bit is available, a thicker bit whose point has been ground to a wider angle will also serve. Carry out the countersinking carefully so that it does not penetrate too deeply into the material.
If the opening does not pass through the material, mark the bit in advance at the required depth, for example with a coloured pencil or nail varnish. This avoids repeatedly withdrawing the bit to measure the depth (Figure 4).

Figure 4 — Marking a drill bit to control drilling depth.
Planing
Choosing and sharpening planes
The only way to avoid planing is to buy material that has already been planed. Because such material cannot always be obtained and edges often also have to be worked, it is best to have a plane in the home workshop. Three planes are needed: one for rough work, or a large plane, one for fine work and one for grooves. The large plane can be omitted, because large rough surfaces will rarely be worked. When this is necessary, the fine plane can be used, although the work will take longer.
The heart of the plane is a well-sharpened iron (Figure 5) with a straight cutting edge. Its cutting angle is 25°. During work, the iron must be protected from contact with a metal object. A forgotten nail or its shank, for example, can damage the cutting edge and make it unusable. If planing is entrusted to a craftsperson and a hidden nail or a piece of hardware is left in the material through our carelessness, the cost of the saw or plane iron must be reimbursed for each such piece.

Figure 5 — The plane and the position of its parts.
Sharpen the plane iron on the largest possible grinding stone so that the cutting edge does not become concave or visibly take on the curvature of the stone. A guide made from a small board at an angle of 25° can be used to hold the plane iron while sharpening, because even an experienced craftsperson finds it difficult to judge a 25° angle by eye.
After sharpening the iron on a round grinding stone, flatten the cutting edges on a flat sharpening stone. The plane’s task is to level the surface of the board as neatly as possible, which it can do only if the cutting edge is perfectly straight. A flat sharpening stone can be obtained from hardware shops. Sharpening on a wet flat stone should be done by drawing the blade over it in circular movements, as with an ordinary knife. The sharp corners of the cutting edge should then be ground off so that they do not leave sharp marks in the material during planing. A beginner should not be embarrassed to learn this knowledge from a craftsperson.
Setting the plane iron
The plane iron is secured in the plane’s opening by a wooden wedge. When setting it, hold the iron and wedge with the left thumb. Use small blows from a hammer held in the right hand to set the iron. This must be done skilfully while holding the plane in the air with the palm and the remaining fingers of the left hand.
The iron should project only slightly from the sole of the plane, and its edge must be level with it. It is best for the iron not to project at all when it is inserted; after fitting the wooden wedge, use small hammer blows to set it. If the iron projects too far, this does not make the work faster because it can easily cut too deeply into the material. It is easier to move the iron so that it cuts more than to move it back. It is important to tap the iron from the side so that the cutting edge takes the correct position. This operation is again performed “in the air”, with the plane held in the left hand (Figure 6).

Figure 6 — Setting the position of the plane iron.
To remove the iron, strike the back of the plane body several times with a hammer while the plane is raised.
An important part of the plane is the cap iron, or chipbreaker, which is attached to the iron with a screw. Its task is to break the shavings that collect in front of the iron; otherwise, the opening for the shavings would quickly become blocked.
Direction and procedure of planing
The planing operation proceeds as follows: grasp the rear of the plane with the right hand so that the thumb lies to the left and the other fingers together lie to the right of the wedge. With the left hand, hold the plane by the front end of its handle and guide it. The right hand supplies sufficient working pressure. Plane evenly, moving the plane back and forth in long strokes without pressing too hard. On the return stroke, tilt the plane slightly onto its edge to preserve the iron.
Always plane in the direction of the wood grain, because even the best cap iron cannot save a board or batten from tearing if planing is carried out against the grain. Take the time to position the board properly. If the grain changes direction, the plane must always be set in the grain direction, so the work alternates between directions but always runs down the grain (Figure 7).
The most difficult operation is planing an end-grain surface, because the iron must cut across the fibres and therefore breaks and tears them. This occurs at the ends of boards. In such cases, plane from the outer edges towards the centre. This is not particularly easy because the plane jerks the hands (middle of Figure 7).

Figure 7 — Planing direction and support for the workpiece.
A cabinet scraper is used for smoothing planed surfaces. It is a rectangular steel plate with a sharp edge, held in both hands and drawn over the planed surface to remove remaining irregularities.
Planing requires the workpiece to be clamped firmly and braced securely in the planing direction, because strong jerking occurs during the work. Place the workpiece on a workbench, or on a sturdy work table if there is no joiner’s bench, and fasten it with a screw clamp. Do not use a polished table with thin legs; choose a heavier, covered kitchen table. Brace the table against a wall or, better still, brace the end of the board being worked. In this case, however, there is a risk that the left thumb may become trapped between the wall and the front of the plane through inertia.
A practical solution is to place a stool covered with a thicker cloth between the work table and the wall, so that the edges of the table and stool do not strike each other and impacts against the wall are softened. Clamp the workpiece to the table, which is covered with a blanket. A thinner piece of board can also be placed between the edge of the stool and the wall (bottom of Figure 7).
When planing across the grain, clamp the workpiece in a vice so that the fibres run vertically. There must be no object near the hand that could cause injury.
Rasps and files for woodworking
Wooden surfaces can be worked with rasps and files without special expertise. The workpiece should be secured at elbow height (Figure 8). Hold the tip of the file with the left hand and its handle with the right, and press it onto the workpiece while moving it back and forth so that the full length of the file passes over the surface. Short strokes are also effective when levelling parts of a surface. A file is generally used for finishing edges and drilled openings, rounding, fitting and working end grain. Here too, a smaller or larger piece of wood may break away. Clamping the workpiece between two similar pieces of wood reduces the risk of edge breakage.

Figure 8 — Position of the workpiece during planing and filing.
Resin from the wood and fine swarf quickly clog the teeth of a file and are difficult to clean. One cleaning method is to use a wire brush. However, the wire brush damages the teeth and still does not clean them completely. A better method is to immerse the file in hot water and then clean it with an ordinary brush. This removes resin and swarf from plastic materials as well. After cleaning, wipe and dry the file or it will rust. If it will not be used for a long time, it can be coated with a thin layer of oil, which is removed before the next use by filing a piece of scrap material.