Wood screws
According to the shape of the head, they can be classified into four main groups: screws with a round head (og); with a countersunk head (ug); with a raised countersunk head (sg); and with an angular head (Figure 1). The heads of the first three groups of wood screws are made so that they can be screwed in and unscrewed with a screwdriver, while the fourth group of screws is used for building scaffolding, is larger in size and has a hexagonal head. It is screwed in and out with an open-ended spanner. (For a detachable joint between wood and another material, a screw for fastening hardware with a thread and nut is also used, as with metal screws, so we will become acquainted with it when discussing screws for metals. A good feature of this screw is the square neck beneath its semicircular head, which enters the material when tightened and prevents the screw shank from turning during tightening.)

Figure 1 — Head shapes and designation of wood-screw dimensions.
It is important that the shape of a wood-screw head be suited to the place of use. For example, on flat surfaces we will use a screw with a countersunk head that does not project above the plane. Wood screws are also sold by the kilogram, not by the piece. Their dimensions are given by paired numbers, as with nails, for example 2 × 7 ug. This indicates a screw 2 mm thick and with a shank length of 7 mm.
The following table gives screw types with the weight of 1,000 pieces and the number of screws in a usual package — not the package weight, as was the case with nails.
| Screw dimension | Weight of 1,000 pieces | Number in package |
|---|---|---|
| 2 × 7 | 0.22 kg | 2,000 |
| 2.5 × 15 | 0.64 kg | 1,000 |
| 3.5 × 35 | 2.46 kg | 500 |
| 5 × 60 | 8.43 kg | 200 |
| 6 × 50 | 10.40 kg | 100 |
| 8 × 120 | 41.80 kg | 100 |
| 6 × 120, angular head | 49 kg | 50 |
| 10 × 130, angular head | 66.50 kg | 50 |
Preparing the material and protecting the joint
No preliminary work is required when driving nails. However, before a wood screw is inserted, the material must be prepared by drilling a hole with a diameter equal to three quarters of the screw diameter and a depth equal to half the length of the screw to be used. This “half-hole” guides the screw and prevents the wood from splitting (the screw has a conical * thread). Smaller holes can be made by driving in a nail and then removing it.
It is important that the tip and the slot in the screw head be in the same plane. A screw that is coated with soap before use is easier to insert. It is important that the width of the board be at least 110% of the screw length (unless, for any reason, we want the screw to pierce the board) so that the screw tip does not pass through the board. For example, in a board 10 mm thick, use a wood screw no longer than 8 mm.
Do not use a rusty screw! If we have no other one, the old screw should first be coated with oil. After insertion — especially on decorative items — coat the screw head with clear varnish, which will protect the screw and also guard against unscrewing.
Gluing
Gluing is a fairly common method of joining. Glue size has long been known as a bonding agent, more precisely “glutin” hot glue. Newer than this is cold “casein” glue. The newest bonding agent is an adhesive based on synthetic resins.
Hot glue
The best hot glue is obtained from a 3:1 mixture of bone glue and hide glue. It is available in sheets. The fracture surface should be cracked and shell-like. Colour does not play an important role, but the sheet must have as few bubbles as possible. If greasy spots appear on the surface of the melted glue, this is a sign that the glue is spoiled and should not be used. Always melt only as much glue as will be consumed. First allow a broken piece of glue to soak for half a day (greasy spots then appear on the surface of the water), then pour the excess water off the resulting jelly-like mass and heat it to 50–60°C so that the glue melts completely. It is best to put the vessel containing the glue into a larger vessel of water and place that on the stove. Taking care that the water temperature does not exceed 70°C, allow the glue to melt while stirring constantly. Apply an even layer of glue to the prepared surface and press the coated wooden surfaces evenly against each other. The glue sets in 5–25 minutes, and in dry, warm rooms even before that time has elapsed.
Cold casein glue
Cold casein glue “sets” more slowly. It dulls the edge of a tool when the glued part is machined. Cold glue must be used immediately after preparation. Cold glue changes the colour of some wooden materials. It is water-resistant and is prepared simply, without heating. Cold glue is a white powdered material. When it smells like hard cheese, it must no longer be used because it has spoiled. One kilogram of cold glue is dissolved in one and a half to two litres of water by gentle stirring for at least half an hour. During this process, the room temperature must be 10°C and the water at least 20°C. At the beginning of mixing, cold glue is a thick paste, but it becomes thinner after mixing, so there is no need to hurry when adding water at the start. For an area of 1 m², 50 grams of cold glue must be applied evenly. Prepared cold glue can be used for no more than five hours.
Synthetic-resin adhesives
Several newer types of adhesive make the task of joining wood easier. A common characteristic of these adhesives is that they are easy to work with, but they also have a higher price.
The most widespread synthetic-resin adhesive is the two-component Epokit. At room temperature it dries in 24 h and forms a white mass that can be cut. It can be coloured, but it is expensive and therefore suitable only for smaller and more delicate jobs.
Oho is also a universal adhesive based on synthetic resins. It bonds porcelain, wood, plastics, celluloid, metals and other materials firmly, quickly and permanently. “Oho” adhesive is non-toxic, crystal-clear, waterproof and has a pleasant smell. The surface to be bonded must be clean and dry. The adhesive is applied to both surfaces to be joined, spread thinly and allowed to dry slightly. The two surfaces are then pressed together and left under pressure for several minutes. The dried adhesive forms a thin, colourless film.

Applying adhesive to a prepared wooden surface.
There are a number of other universal synthetic-resin adhesives, such as Araldite, Boropor and others. No universal instructions can be given for using these adhesives; instead, the individual instructions supplied with each adhesive must be followed. A common characteristic of synthetic-resin adhesives is that they must be applied in thin layers and therefore can only be used for joining flat surfaces. They are not intended for gluing rough boards, and they are also expensive.
Wood-gluing procedure
The basic operations that must be carried out when gluing wood are: thoroughly and neatly cleaning the mating surfaces of both pieces to be glued, applying the adhesive evenly over the entire bonding surface, and applying sufficient pressure to the bonded surfaces. Drying is accelerated by a dry and warm room in which the gluing is performed. It is important to clean thoroughly any glue squeezed out from between the two surfaces by the pressure.
Special attention must be paid to pressing and clamping the material. If possible, pressure should not be applied directly to the surfaces being glued; it should be applied through waste pieces placed on the outside. The jaws should clamp these pieces. For gluing smaller pieces, one table with a flat top is sufficient, followed by a backing board, then the pieces to be glued and another backing board. Several heavier books or bricks may serve as weights for applying pressure.
Sawing
Choosing the saw and blades
Cutting and separating, after nailing, is the most common operation. First we must choose the means for cutting wood — the saw. Since a home workshop cannot be as well equipped as a professional workshop, we must take care to obtain only the most necessary saws (Figure 2).

Figure 2 — Types of saws, tooth profiles and positions, and the start of a cut.
For cutting larger pieces of wood, we will obtain a carpenter’s frame saw. For cutting off smaller pieces, we need a hand saw with replaceable blades, and, most importantly, we should have a hand saw with a steel frame and replaceable blades of various profiles. We will provide a larger number of blades of various profiles for this saw. In addition to tooth size (tooth height is 3 mm for cross-cutting, 2 mm for cutting grooves and 1 mm for fine work), the tooth angle also varies. For most work, an angle of 90° is most suitable because the teeth can be sharpened with a triangular file. For more precise work, we should have a blade with teeth at an angle of 110°. A metal-cutting saw blade can also be placed in the metal frame. Saw teeth usually cut on the movement away from the operator, that is, on the push stroke.
Setting and sharpening the teeth
It is important to note that, in addition to their inclination in the direction of the blade, saw teeth also have their own bend or “set”, which differs for blades intended for different purposes. Thus, for cross-cutting blades it amounts to 2 blade thicknesses, for groove-cutting blades 1.5, and for narrow blades 1.3 blade thicknesses. Setting the teeth permits unobstructed cutting without the blade becoming jammed in the material. A special tool is used to set the teeth, but with greater care, flat pliers can also be used. It is difficult to begin cutting with a saw whose teeth are set, that is, bent alternately left and right, so it is useful for a beginner to make the initial cut with a chisel or with a saw having a small set. In doing this, two cuts should be made immediately next to each other, because a blade with a greater set will not be able to enter a narrow groove. If the saw becomes dull, clamp the saw blade in a vice and sharpen it with a triangular file. The teeth should project half a centimetre above the jaws of the vice.
Tensioning and positioning the blade
The blades of frame saws can be tensioned: on a carpenter’s saw by turning the slat in the cord, and on a saw with a metal frame by tightening the wing nut. In addition, the blade can be turned around its axis, that is, moved out of the plane of the frame. A skilled person usually works with the blade inclined 35° to the right in relation to the frame in order to see the cutting line better. This, however, is not recommended for beginners because holding the saw at this angle requires some practice and tires the hand more. There are, admittedly, situations in which this position of the saw is necessary for normal work.
It is very important that the saw blade not be twisted, that is, that the saw blade have the same “inclination” on both sides of the frame.
Marking the cut
As in every job, the rule also applies to cutting: “Measure three times so that you cut only once!” Only craftspeople with long experience can allow themselves to draw the marking line exactly to size and cut along it. It is more correct for the measurement line to be slightly beyond the actual dimension and for cutting to be carried out beside the mark, so that the marking line remains visible after cutting. Do not forget to mark or hatch the part to be discarded, so that, after turning the material, we do not accidentally cut on the side that is to remain, because in that case we will obtain a smaller piece than intended.
For marking, we use a steel or wooden square. Marking is carried out by turning the marked piece through 180° and marking the opposite side of the material as well. In this way, any error that might arise from uneven surfaces or from holding the material crooked can be avoided. Even if the two marks are not parallel, the correct cutting direction will be indicated between them.
Starting and guiding the cut
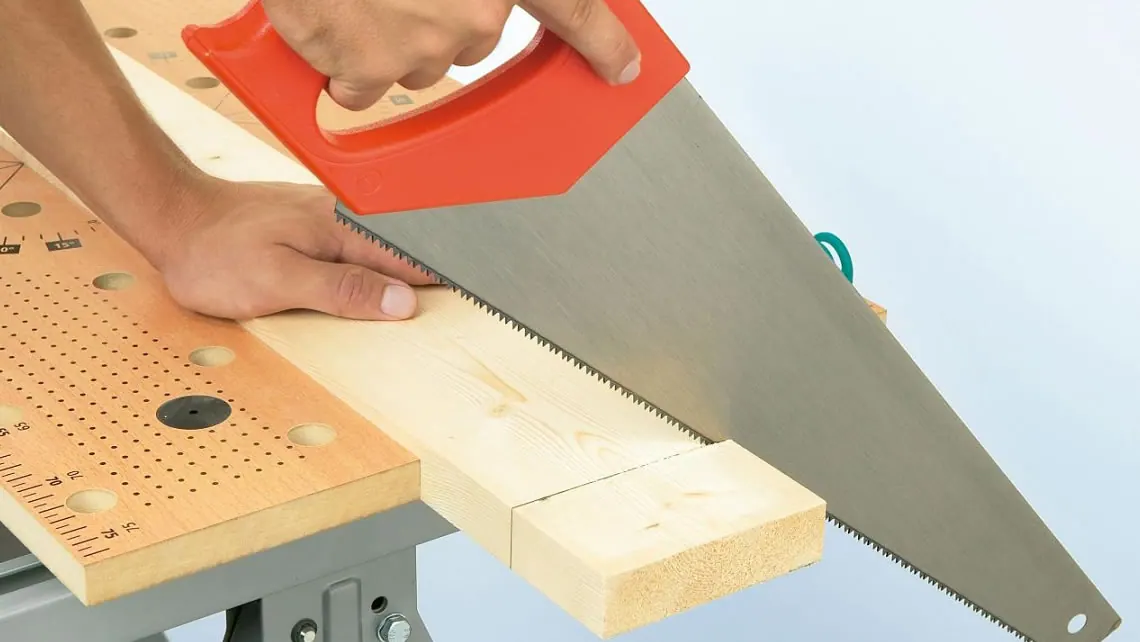
Before beginning to cut, hold the material with the left hand to the left of the marked cutting line, while keeping the left thumb bent obliquely upward and resting the saw blade against the raised thumb. Then begin sawing (Figure 3, part 1).
The base of the thumb should be about 1.5 cm above the surface being cut so that, if the blade accidentally jumps, the saw teeth do not scratch the thumb. A little practice is useful for this operation because repeated jumping of the saw can frustrate even the most patient beginner, while irritation or possibly throwing the tool does not lead to the goal. When making the initial notch, the saw should be held loosely and the cut begun by pulling the saw towards oneself.

Figure 3 — Starting the cut, guiding the saw and the position of the clamped material.
When cutting, try to use the full length of the saw and hold it so that it does not wobble left and right or up and down (Figure 3, part 2). The saw blade should travel horizontally. If we become tired, remove the saw and rest, because cutting with a tired, inexperienced hand will be inaccurate and we may cause the tool to break or even injure ourselves. The board should be positioned so that it does not hang out of the vice, and it should be clamped firmly (Figure 3, part 3).
Finishing the work and maintenance
A saw with less tooth set jams easily in damp wood. In such cases, the saw blade should be coated with grease or soap. The cut should be checked as it approaches the dimension so that a deeper cut than intended is not made. If a piece is being cut off completely, the final strokes with the saw should be made very loosely and slowly so that the lower part of the material does not split away.
A good tip: after use, coat the saw blade with protective grease to prevent rusting, and turn the teeth towards the frame.
Related topics: woodworking machines and tools, band saws, working with a chisel, drilling and planing, services and production of wooden windows and doors.