Safety note: This is an archival educational text from 2018, not instructions for carrying out sheet-metal work yourself. Sheet edges and swarf can cause serious injuries, while cutting, bending, soldering and using tools require appropriate expertise, protective equipment and a safe workplace. Work should be entrusted to qualified contractors and carried out in accordance with current occupational-safety rules and the instructions provided by tool and material manufacturers.
The use of metals is part of modern joinery production. See our wood-aluminium windows, production and services, or send a request for quotation.
Types of sheet metal and their properties
In home practice, metals in the form of plates and sheets may be among the materials used most often. Iron sheets less than 4 mm thick, professionally known as fine sheet, are used most frequently. Their dimensions are 2 × 1 m, and they are produced by hot or cold rolling. The surface of cold-rolled sheet is smoother and free of the black marks left by hot rolling. Their surface may be pickled or black, without pickling. The hardness of sheet metal varies considerably, from an elastic state to a soft state in which it can even be dented with a wooden mallet.
Black sheet up to 1 mm thick is mainly used to make rougher objects. It can also be cut easily with sheet-metal snips.
Galvanised, tinned and zinc sheet
Galvanised iron sheets are iron sheets coated on both sides, by a chemical process, with an even layer of zinc. These sheets are used most often to make horizontal and vertical gutters for draining rainwater.
Their dimensions are approximately the same as those of tinned iron sheets, which are up to 1 mm thick and measure 530 × 760 mm. Sheets thicker than 1 mm measure 2 × 1 m, making this type of coated sheet easy to handle. Once the protective layer of zinc or tin wears away, the sheets corrode. These protective layers make it difficult to apply a coat of paint to their surfaces because the paint does not adhere to them.
The proper material for exterior sheet-metal work is zinc sheet. Unfortunately, it is more difficult to obtain, although all work exposed to weather should be carried out with this sheet.
Brass, copper and aluminium sheet
Brass sheets can be obtained in various dimensions and degrees of hardness. Their great advantage is that they are easy to solder, while their disadvantage is that the tin content freezes and crystallises in places exposed to frost, causing them subsequently to break, wear and crack. A green oxide layer, patina or verdigris, forms on their surfaces. It makes brass unsuitable for making cutlery, but suitable for decorative objects, lamps and similar items.
Copper sheet is free from the shortcomings of brass caused by frost. The softer type of this sheet is an excellent base alloy material, is easy to work and solder, and conducts heat well. It is therefore used particularly in the manufacture of thermal-engineering products.
Aluminium sheets are widely used. They are produced in various dimensions and thicknesses and also have different degrees of hardness. They are easy to work. If their surfaces are not protected in some way, for example by anodising, a powder-like oxide layer forms on them.
Their particularly great advantage is that they can be polished to a mirror finish and that their weight is barely one third of that of iron sheets of similar dimensions. Their disadvantage is that they cannot be soldered, do not withstand heat and are relatively vulnerable to mechanical effects.
Tools for working sheet metal
A larger number of varied sheet-metal-working tools is required to carry out sheet-metal work.
Figure 1 shows:
- a stretching hammer;
- a planishing hammer;
- a wooden mallet;
- a flat stake;
- a ball stake;
- an edging stake;
- a folding stake;
- a rounded stake;
- hole-cutting snips;
- straight sheet-metal snips;
- a metal scraper;
- a rounded stake;
- a rivet set;
- a rivet snap;
- a soldering iron.

Figure 1 — basic tools for working sheet metal.
To shape sheets properly, we should also become familiar with the basics of the trade. Numerous specialised tools are used when working sheet metal; for example, a qualified craftsperson works with no fewer than 19 types of hammer. A much smaller number of tools is needed when this work is carried out at home. Figure 1 shows drawings of the tools used most frequently. We cannot describe them in detail, nor will we show other specialised tools.
For a home craftsperson carrying out this work, a double-ended stretching hammer and a double-ended planishing hammer are sufficient among all the types of hammer. A wooden or rubber mallet is suitable for straightening, bending and making edges on larger surfaces.
Hand stakes are needed to produce various shapes, primarily those with a horseshoe-shaped head, as well as flat and ball stakes. Rims are shaped with a rim stake, edges with a folding stake and riveting with a rounded stake. Among sheet-metal snips, hole-cutting and straight snips are the most versatile. A triangular scraper, riveting tool and soldering iron are useful assistants.
Cutting sheet metal
Cutting first requires the lines to be scribed on the sheet with a needle. A cutting line drawn with a pencil is easily erased and is therefore unsuitable. If we are cutting long strips from a sheet, the sheet should be placed on the table so that the end of the strip being cut extends several centimetres beyond the edge. We will also place a batten or board on the part of the sheet resting on the worktable.
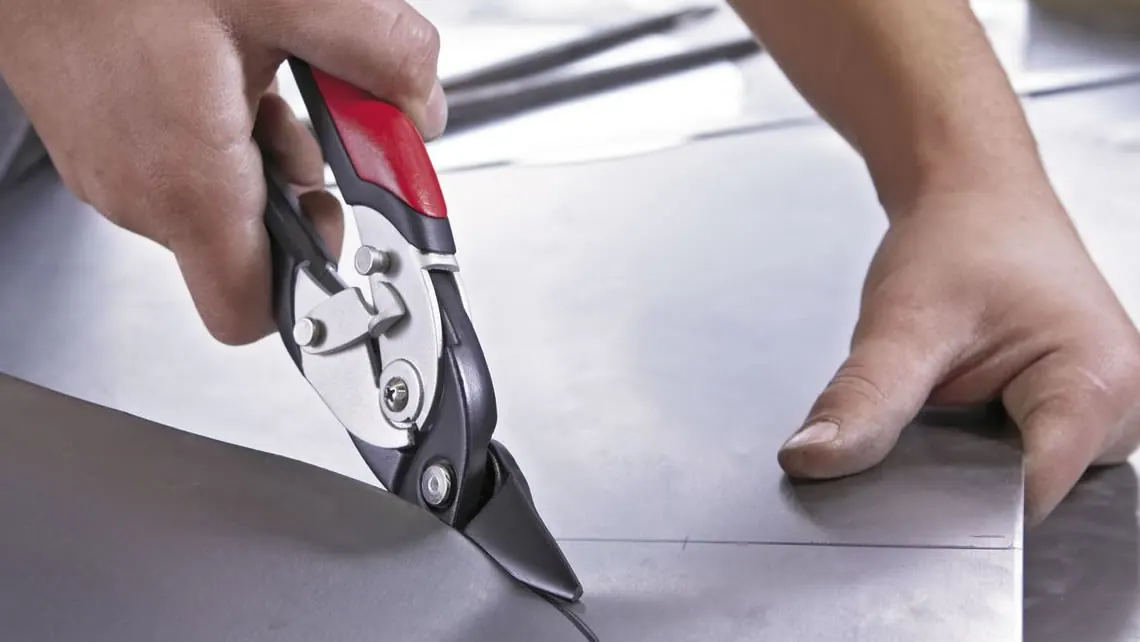
Care should be taken to ensure that the handles of the snips, tightened at the joint by a screw, are opposite and at right angles to the metal sheet. Loose or obliquely positioned snips do not cut; they bend, crumple and jam the sheet between the blades. The cut-off part of the sheet should always be on the right-hand side of the cutting line. We place the thumb between the handles so that they can be separated after cutting.
Sheets thicker than 1 mm are difficult to cut with hand snips. When cutting sheet of this thickness, it is better to make shorter, more frequent cuts and never to cut with the tips of the snips. Cutting with the part of the snips close to the joint helps prevent them from jamming. Care should be taken to ensure that the handles do not pinch the fingers or palm (Figure 2, first part).

Figure 2 — manual sheet-metal-cutting methods.
If a circular shape or circular plate is to be cut, the sheet should be positioned so that the part to be discarded is on the left-hand side of the snips. This allows us to follow the cutting line with our eyes. Cutting larger openings in sheet begins in the centre, followed by a spiral cut towards the marked curved cutting line.
If we believe that our hand strength is insufficient for cutting, we can clamp the lower handle of the snips in a vice. With the right hand, greater pressure can be applied to the free handle and therefore to the sheet between the blades.
Attention should be paid to small slivers and curled pieces of sheet. They are as sharp as a razor and can cause serious injuries. Newly cut edges should be blunted immediately, and waste should be collected and removed at once.
Sheet-metal panels can readily be cut with a hole saw. A medium-toothed blade is sufficient for cutting holes. A blade can sometimes start jerking when cutting thin sheet, with a sound like a burst from a machine gun. If we use a hole saw to cut very thin sheet that cannot be secured adequately, we must clamp it between two thinner boards that are no longer useful for other purposes. In this way, sawing will proceed without difficulty.
Bending sheet metal
If long sheet-metal pieces need to be bent, it will be very useful to make a simple device. It consists of one hardwood board measuring 80 × 40 × 3 cm, two L-shaped angle sections measuring 30 × 30 mm and 80 cm long, and two M 8 × 6 countersunk screws with wing nuts.
We drill through the iron angle sections and the board in a single operation. By adjusting the required spacing with the wing nuts, we obtain a device for clamping and bending sheet metal. The piece of sheet to be bent is inserted between the angle sections. After tightening the wing nuts, the sheet can be bent accurately and easily to an angle of up to 130 degrees by striking it with a wooden mallet. The wooden mallet should always strike close to the bending line. It is advisable to roughen the surfaces of the angle sections that clamp the sheet with a file. Care should be taken during bending to avoid injury because the sheet flexes slightly (Figure 2, second part).
Two angle sections can also form a versatile and useful sheet-metal-bending device if their two ends are soldered to the ends of a copper-sheet strip 1 mm thick and 10 mm wide. This strip prevents the iron angles from falling when the vice is opened. The simple device is placed in the vice so that the angle sections form a flush flat surface at the top, with room to insert a vertical sheet between them (Figure 3, first part).
Sheets can, so to speak, be bent easily in any direction. Care should be taken, particularly with thicker sheets, because bending can fracture the sheet if it is carried out at a very sharp angle without a radius. This can be avoided by using light hammer blows, progressing slowly and bending the sheet in the direction opposite to the rolling direction. The rolling directions appear on the sheet surface as parallel lines that can be seen with the naked eye or with a magnifying glass.
Zinc sheets are particularly prone to breaking. They should be bent carefully because they are expensive. Dangerous sharp edges are eliminated by making a rim, which is simply a fold along the edge. If we think that the sheet will crack during this procedure, a round iron rod 4–5 mm thick should be inserted into the folded part and the sheet edge hammered around it (Figure 3, third part).

Figure 3 — bending, edging and shaping sheet metal.
Edging and folding
If the sheet is wavy and needs to be stretched, this is done on a steel-plate support 6–10 mm thick, where hammer blows can produce surprising changes.
Circular plates are often edged. Examples include turning up the edge of the bottom of a coal bucket before fastening it, or enlarging the end of a sheet-metal pipe at the bottom of a connection. This work is carried out using an iron pipe clamped in a vice; the edges of the circular plate are turned upwards on it while the plate is rotated (Figure 3, second part).
Vertically positioned iron pipes secured in a vice can be used to fold the edges of a cylindrical shell. Flat seams and expansions made by stretching cylindrical hollow sheet-metal bodies are formed on the edge of the previously mentioned steel straightening plate.
Joining hollow bodies made of sheet metal is called edging or folding. This method can also be used to fasten the bottom of a coal bucket to its cylindrical body. First, the edge of the bottom is turned upwards in a circle so that it can be placed inside the expanded, hollow cylindrical part that has already been prepared. The sheet is then folded again with hammer blows and firmly worked over the edge of the cylindrical shell. The resulting standing seam is folded down onto the cylindrical part over a piece of pipe.
Before the cylindrical part of the vessel is joined longitudinally, the sheet is cut so that the overlap at the ends amounts to at least 20° of the circumference. The shell can be curved successfully with the aid of a vice and a horizontally positioned piece of pipe. The shell sections are first folded where their edges meet, after which the folded edges are joined and worked together. The resulting seam is set into the plane of the shell with hammer blows against a batten clamped in the vice.
A corner corrugation is shaped with a rectangular-section bar.