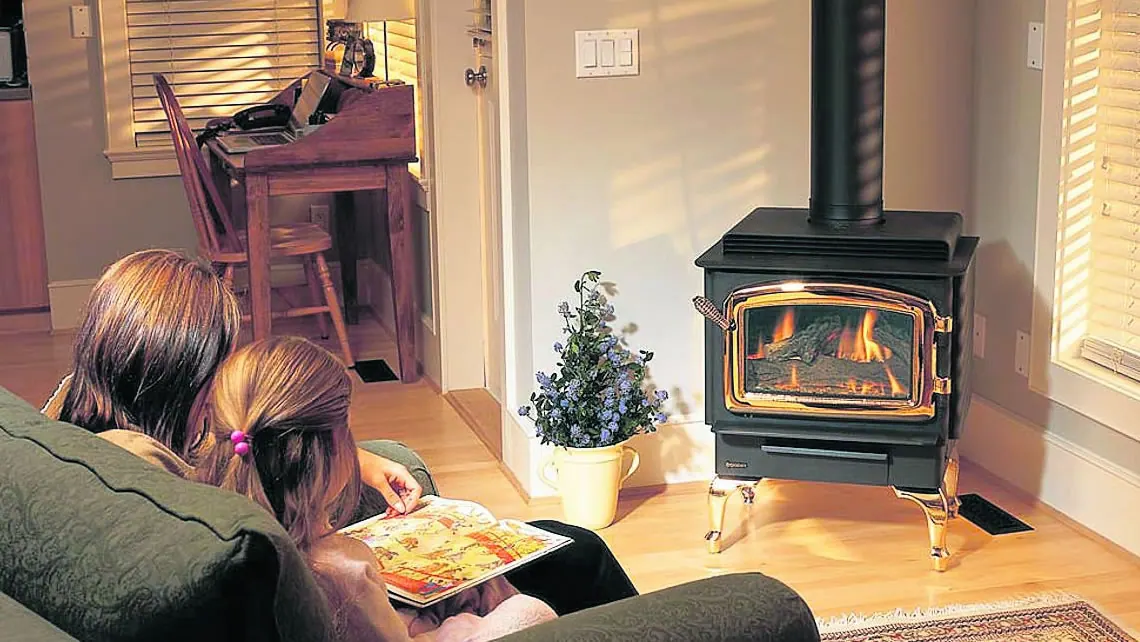
Safety note: This is an archival educational text published in 2018, not instructions for installing, repairing or adjusting stoves, chimneys or fuel-oil systems yourself. Such work should be entrusted to a qualified chimney professional, service technician or other appropriate specialist, in accordance with current regulations and the instructions for the particular appliance.
For contemporary planning of a building envelope, see our wooden windows, wood-aluminium windows and services. For a specific project, you can send a request for quotation.
Stoves, chimney and flue pipe
A detailed description of all types of stoves would require a separate professional book. Here we will describe only the main types and give tips for installing stoves and piping (fig. 1).

Figure 1 — Installation of a stove and flue pipe.
Stoves that are connected to the chimney by means of chimneys (iron stoves, fuel-oil stoves, clay stoves, etc.) it is necessary occasionally clean from soot. Cleaning is mainly about flue pipes. If we take the stud out of the wall, it can easily reach damage to the wall, and it is often the case that the sleeve in the wall is missing. In such cases, the wall should be repaired and a sleeve should be installedinto him. The sleeve can be purchased in the store. We will set it by previously covering it with pieces of brick or tile set it in place and then fix it with mortar. At the same time, we can also repair any damaged parts wall. We then place the flue pipe in the sleeve, and the decoration on top of ittive ring to cover the repaired part of the wall. Dekorative ring serves to make the joint more beautiful and protected by of flame. If we cannot obtain a suitable bushing, we can make it ourselves. You should first cut off with pliersone piece of flue pipe (wall width + 40 mm). On one at the end of the shank, a border 6-8 cm wide should be made, i.e. with blows material stretched with hammers. The other end of the flue pipe on more cut places with scissors at a length of 30-35 mm and flatbend these parts with those pliers (fig. 2). flue pipe needs then place it in the chimney opening, and the bent sheet will prevent his falling out of the wall.

Figure 2 — Making a sleeve and decorative ring.
Not only at the first kindling, but also at the kindling it often happens that the stove smokes, that there is no draft. This can to be caused by the wrong connection of the chimney and the chimney. It is also a common mistake that the cone in the chimney protrudes behind the inner chimney wall (fig. 3, upper part). In this situation, should be cut offunnecessary part of the flue pipe or pull it out of the wall for that length. It is almost common for multiple heating devices to be connected to one chimney. In these cases, the cause is a bad draft it could be that the flue pipes are placed against each othergoga or are connected to the chimney very close to each other. Care should be taken to ensure that the distance between the connections of the flue pipes and dimheight in the vertical direction should be at least 30 cm (fig. 6) The reason for reduced draft and smoke output can also be that is the chimney pipe connection angle less than 90°. In each case, the position of the stove is most ideal when is placeddirectly below the chimney opening.

Figure 3 — Flue-pipe connection and dimensions.
Causes of poor stove operation
The proper functioning of the stove can also be hindered by i the following causes:
-
Soot was clinging to the inner walls of the chimney(e.g. in the summer during the usual cleaning and maintenance of the chimney we were not at home, but we have to the missed cleaningbefore doing).
-
The chimney wall is cracked (this rarely happens, but if we notice, it should be fixed).
-
The chimney fits very loosely into the chimney or is so corroded to become porous.
-
The stove can smoke even if the outside temperature suddenly increased. In this case, the heat of the stove due to the cold the chimney does not flow upwards. Recommended here: via of the cleaning opening, heat the chimney with a burning cloth or paper.
-
It should also be checked that it is not accidentally the door for Chimney cleaning remained open. Cold air that entering through the door into the chimney reduces the temperature of the chimney, and creates a fire hazard.
The dimensions of the flue pipes should also be known (fig. 3, lower part).

Flue-pipe table
| Larger diameter D1 (mm) | Smaller diameter D1 (mm) | Length L1 (mm) | Flue-pipe weight (kg/m) | Outer-arc radius R1 (mm) | Elbow weight (kg/pc) |
|---|---|---|---|---|---|
| 99 | 96 | 250 (400) | 1,3 | 197 | 0,4 |
| 105 | 102 | 500 | 1,8 | 214 | 0,5 |
| 118 | 115 | 750 (800) | 1,54 | 226 | 0,6 |
| 132 | 128 | 1000 | 1,72 | 246 | 0,7 |
Materials and shortening flue pipes
flue pipes are made of thin steel sheet. Onemore formal ones are protected by graphite, while those in more luxurious made enameled. Galvanized are also used for gas appliancesand aluminum pipes. The knee angle is 90°.
A particular problem is the shortening of enamelled flue pipes, because it often happens that the standard length is greater than needed.
If the shortening of the enamelled flue pipes is not performed carefully, it can happen that the enamel cracks or from it otpieces fall. In order not to damage the enamel, pri when cutting such flue pipes, proceed as follows:
We mark the place of cutting and double stick on itmaybe on the chin adhesive tape (scotch tape or hanzaplast). Then with a grinding stone (belegija) with three or four sharp edgesnimo enamel on the entire circumference and in the same place with a knifecut the pipe with a pry bar (fig. 4, upper part). About enamel removal we can possibly do the cutting with a saw with thick teeth.

Figure 4 — Cutting a flue pipe and chimney height.
Combustion in the stove will only be good if the draft in it is also good if the diameters of the ends of the flue pipes are largertowards the stove, and the smaller one towards the chimney. Basic prerequisites for a good draft in the chimney, the dimensions are correctly chosenstubs and properly made connections. Chimney height from the top. of the roof should be at least 1,5 m, or from the eaves at least 3 m, and the cross-section size of the opening in the chimney uniton the surface of one brick (fig. 4, lower part). Level gap between two flue pipe connections should be at least 0,3 m, and the opening for chimney cleaning at least 0,4 m from the floor, and from attic floor 1,2 m (fig. 5).

Figure 5 — Chimney dimensions and position.
Archival description of heating with fuel oil
Sizes of oil-fired stoves, which can be obtained from trades, are very different. The effect of the smallest ones is about 2500 kcal/hour, with consumption of 0,3 liters of heating oil, so can be used to heat rooms of 30–40 m³. Najlarger stoves have an output of about 10.000 kcal/hour with a maximum consumption of 1,3 liters and can heat a room fromwho 100-150 m³.
All stoves that are produced today function on the principleevaporation chip, i.e. the oil reaches the using the feederthe bottom of the stove vessel, or of the combustion space, it evaporates there and at a temperature of 800-1000°C it ignites. Basic prerequisite for good heating is to support combustiongiving the required amount of oxygen (air). Oxygen se provided by openings in the walls of the court and by of flame deflector rings that can be placed in the interior of the court. It is very important to ensure proper draft (suction).
Combustion is then complete and good if it is the color of the flameto yellow (the color of the sun} and if the flame is even. (Napowe mention that the bluish color of the flame is not bad either, what’s more, it is a sign that it is due to unusually favorable influences of various circumstances, combustion perfect). Combustion is not complete if the color of the flame is reddish or brown and if the flame flickerswash and dry. With well-adjusted stoves, the degree of action oil burning is good (about 80-90 degrees) and so despite to the relatively high price of heating oil, this kind of heating is after alleconomical.
The fuel addition regulator can be set to positions 1-2-3-4-5-6, and at position 0 is in prisonsnom condition. In the feeder button position at 1, the stove normally sooty and therefore this position should only be used for ignition time.
The efficiency of the stove is maximum on the floor 6. Bake, next to button to regulate the amount of fuel, can close i by closing the discharge valve and quick shutter. When we want to turn off the stove, it is advisable to close the supply to all three ways.
Lighting and the fuel feeder
Ignition is done in the following order: first we open the valve tank, then the fuel addition regulator (position 1-6) and finally the quick shutter (which when opening should be pressed). Let’s set the regulator to position 6 and leave it until oil appears at the bottom of the oven, and then return to position 1 or 2. We will ignite the oil by inserting a small a piece of cotton soaked in alcohol or spirits. As soon as black smoke with a characteristic smell is billowing, it should be closed stove lid. After some time, when the combustion safe enough (heating of the oven is accompanied by a crackling soundhim due to the expansion of metal parts), gradually we can set the regulator to higher and higher levels. It is strictly prohibitedbut open the lid of the combustion chamber during operation oven, then re-ignite the hot oven, as well as filling the rezervoir hot stove! Filling should be done especially carefullyof the tank so that not a single drop gets near the tank. Because even if we clean the tank well (which is not always possibly due to inaccessibility), will still remain unpleasant smell of oil evaporation.
The most important part of the fuel-oil stove is the feeder (fig. 6, part a). Oil passes through the opening (1) and the filter (2) and at the needle valve (3) falling from the tank enters the chambers addvacha. By raising the oil level in the chamber, the main also risesfloat (4), which then closes the input needle via a levervalve (3). This prevents the adder case be overcrowded. If, in addition to this kind of regulation, it is still too much oil gets into the casing, it goes past the small partition into the chamber of the safety float (9) and raises the small float as well. This the float then releases the needle valve (3) and the quick springand full shutter (this also happens when stopscombustion). By the way, the quick shutter can also be used with the mentioned lever (10) to close and open (if we press the button then it opens, and if we pull, then it closes the needle valve). From the feeder, the oil flows through the needle valve (5) in prostor of combustion. This valve can be operated by turning of the regulator button (the regulator pin is connected by needle valve slits). At. at the bottom of the adder are cleaning plugs (7). With pin (8) can be needle move the discharge valve (“swim”). The adder is screw-on cover.
During the warranty period it must not be repaired adder, and later, in case of a possible failure, the best is entrust the repair to an authorized service center. If there is no for itpossibility, those who have some knowledge of mechanics, they can determine the cause of the failure, and possibly eliminate it. The flame going out or the stove performance decreasing is one of the signs failure occurs, but it also happens that after ignition extinguish the flame, or that the quick button cannot be pressedshutter.

Figure 6 — Fuel feeder, maintenance and stove components.
Archival description of repair and maintenance
First, we should try to determine the fault from the outside, and that’s why we will check whether the button can be pressed, whether the regulator the feeder turns and whether the pointer level is working. Then we’ll take the cover off and see if the pin split is quick shutter or shutter release. If it is intermediate, we will put it in place and re-establish the connection.
If we tilt the stove during cleaning or transport, ( onlywe can transport unfilled), it happens that the oil pours into the chamber of the safety float that rises and brings quick-closer to the permanently closed position, so that the button does not we can press. In this case, you should use rubber pump out the oil with a ball pump and the defect will be removed (fig. 6, part b). If the oil reaches the safety againchamber, and at the same time the main float sinks into the oil, means that the main float has punctured and keeps the inlet openvalve, and the safety float closes. Fixing this bug is already the work of experts. The same is true when moving regulatesthe connecting pin is not elastic (does not return) in the middle it is some internal failure and repair should be entrusted to an expert.
If the valves are open and there is enough in the tankof oil, and the oil still does not get into the feeder housing, probably is that it is a blockage. The screw should be checked immediatelythe protrusion at the bottom of the tank, where the connection of the drain pipe from the feeder. If we empty the tank, we can download tube and clean (every screw on the stove has a right hand coil). We will also be able to inflate with a rubber ball pump i into the entrance opening of the dismantled float housing (fig. 6; part c), and we will also unscrew the filter easily (unscrewing head it is shown in the picture, on the lower right part of the case).
During the repair, a larger dish should be placed (pans).ju) under the stove to prevent oil from leaking from pipes and clogged areas leaked onto the floor.
Sealants, which we removed during installation, we must not return again. Original factory gaskets onlywe can use, because otherwise we won’t have a good sealoutside. In the better case due to poor sealing it will create just an unpleasant smell, but it can also cause a fire, so our house burned down. It is very important that the gaskets under the nut pipe connections leading to the combustion space shall be of metal. Another type of sealant will due to the heat of the space for combustion, it will burn, so in the most dangerous place, the oil will leak and may cause a fire. Those who do not live in takvim places where there are service workshops, will do the bestif they dismantle the feeder and just take it to the service center. Error in the oil addition system, it is most often caused by impurity in clogging oil. This is why the tank should fill through a double filter. If our oil is in to a large container (e.g. a barrel of 200l) then oil before filling the tank should be allowed to settle. In “summer” oil always has paraffin, and paraffin is already at a temperature of +4°C it crystallizes and the crystals can clog stove pipes and valves. Therefore, if in the summer we procure all the required amount of oil for the winter, the amount needed to fill the reservoirvoara, we have to put it in a warmer the previous daythe room. It is recommended to tank at the end of the season, when otherwise, general cleaning and maintenance is performed (removal coke, filter washing) take out and wash well.
The efficiency of the stove is significantly reduced due to the hardened deposit, which is a poor conductor of heat. If we do not systematically weekly cleaning of the surface of the bed, the sediment will be captured so much that removing it will damage the stove. When is caughtin front of the entrance opening of the combustion chamber, obstructs the supply of the combustion chamber fuel. Installing a flame basket in the stove will greatly increase performance and prevent the formation of deposits.
The oil level indicator has a very simple mechanism. It can only get stuck when extracting from impact deforms the two side guide rails. This failure se eliminates by straightening the rails.
Housewives usually clean the outside of the stove very carefully, especially if the stove is nicer looking. But the stove needs to be cleaned and from the inside (when it is cold), because of its strong suction external dirt (carpet hair, etc.) it catches on the outer wall of the combustion chamber and creates a danger of explosionyawns. This danger also arises when without combustion accumulate several deciliters of oil in the firebox and light the stove. In in such cases, the oil should be pumped out beforehand!
Draught regulator
For the good functioning of the stove, heating oil is especially it is important to adjust the air circulation in it, i.e. draft. To adjust the draft, the most suitable means are the regulator drafts and a manometer for measuring the suction effect of drafts.
Optimum draft of a medium performance heating oil stove is 1,5-2 mm of water column (abbreviated VS). Adder the oil for complete combustion is dosed accurately. that amount of oil which corresponds to the amount of air that enters during this draft. The proper functioning of the adder is controlled on each to the device. Oil consumption of the stove mentioned above (effect 5000 kcal/hour) at degree 6 is 0,86 lit/hour, and at degree 1 is 0,22 lit/hour, if oil of viscosity 1,4° E is used. A draft of 1,5 - 2mm refers to degree 6 and provides with a chimney height 4-5 m.
If the chimney draft is greater than 2 mm VS, then the combustion efficiency is 80%. It is recommended to entrust the installation and adjustment of the stove to an authorized service.
The correctness of the adder can be controlled with approx accuracy if the consumed amount of firewood and time are measuredfurnace operation. If the prescribed amount of is consumed at stage 6and the flame color is yellow and the combustion is good, then the degree is useful effect about 80%. If the consumption is in framesprescribed, and the color of the flame is dark red, then it is draft small (about 1 mm VS). This kind of draft cannot provide the required amount of air for combustion and the stove works with with a reduced degree of effectiveness, which means that should be changedamount of oil. If the consumption is good and the flame color is white, then there is a lot of air, i.e. the chimney causes a large draft and the stove works with a reduced degree of effectiveness.
In the first case (assuming that the draft does not can increase) the degree of action can be improved by reducing amount of oil. In the second case, the regulator should be installeddrafts. The term “regulator” is not the most accurate, because draft care cannot be increased, but can be decreased unfavorable influence of excessive draft, i.e. it can be drafty stabilize before the ideal value of 2mm VS. Layout and the working principle of the draft regulator is given in fig.7

Figure 7 — Appearance and operating principle of the draught regulator.
The draft regulator is actually a T-piece of the shank. One end of the T-piece is connected to the exhaust pipe of the combustion chamber, and Finally, the chimney is connected. To the free end of the T piece a butterfly draft regulator is mounted. The butterfly is set on a horizontal axis and is adjusted by a counterweight, which is adjusted with a thread. If we twist the counterweight, then the butterfly opens only when there is a strong draft, and if we unscrew it, then it opens even at lower pressures.
If the draft is below 2mm VS butterfly is in the closed position. If the suction action is now increasedchimney, the butterfly opens and lets air from the room into smoke pipe and thus prevents an increase in the suction effect of the combustion chamber. In this way, therefore, the air leaves through the chimneywhich is approximately room temperature, not heated air from the combustion chamber temperature 350-400°C. In that is i economy. If the set counterweight is fixed at the value of 2 mm VS, we will provide constant and accurate value as and functioning. If the stove works at degrees 1–6, it setsno counterweight is needed (e.g. 2 mm VS on 1,5 mm) if we use less fuel, the temperature of the product will also be combustion is smaller and therefore the size of the draft will be reduce by several tens of millimeters.
The regulator is a very simple mechanism. T piece The shank is a commercial product and the connection dimensions (diameter 105 mm) are are identical to the dimensions of the stove block. The regulator se consists of a cap for closing the shank, butterfly, pin and so onmilitary spindle with both ends supplied with nuts of the same size that serve as counterweights.
Measuring stove draught
Not only with fuel-oil stoves, but also with other stoves it is useful to know the strength of the chimney draft. How is the strength drafts very small (about 1-10 mm VS) difficult to see using a manometer in the form of a U-tube. It is more favorable according to to that, to apply, the so-called water pressure gauge. “Instrument” of this the manometer has the shape of a tube with a diameter of 10 x 1 glass tube, bent at an angle 90-70°. The larger, straight leg should close an angle with the horizontal of 11,5°. The shorter arm has the form pipes. It can be placed on a wooden board and fixed with a thin with a metal tape, and should be pasted under the measuring partgraph paper. The longer arm should be longer than the plate, so that a rubber hose can easily be pulled onto it (fig. 8). (A pipe can be made from two glass tubes, but they should then be connected with a rubber hose).

Figure 8 — Archival illustration of measuring draught.
We put the other end of the rubber hose on the metal pipe diameter 10 x 1, length 100-200 mm, which we place in the shank above the knee at a height of 40 cm into an opening with a diameter of 10 mm (this opening should be closed during firing with a metal plug) so that enters by one third into the flue pipe. The metal pipe should be soldered to flue pipe
The glass tube is filled with colored water (eg ink) and on the millimeter paper it is read by how many millimeters suction water towards the smoke pipe, if the metal pipe is installedbent over. A displacement of 5 mm at an inclination of 11,5° fromspeaks to a water column of 1 mm. This meter is recommendedcheck with some basic instrument.
\