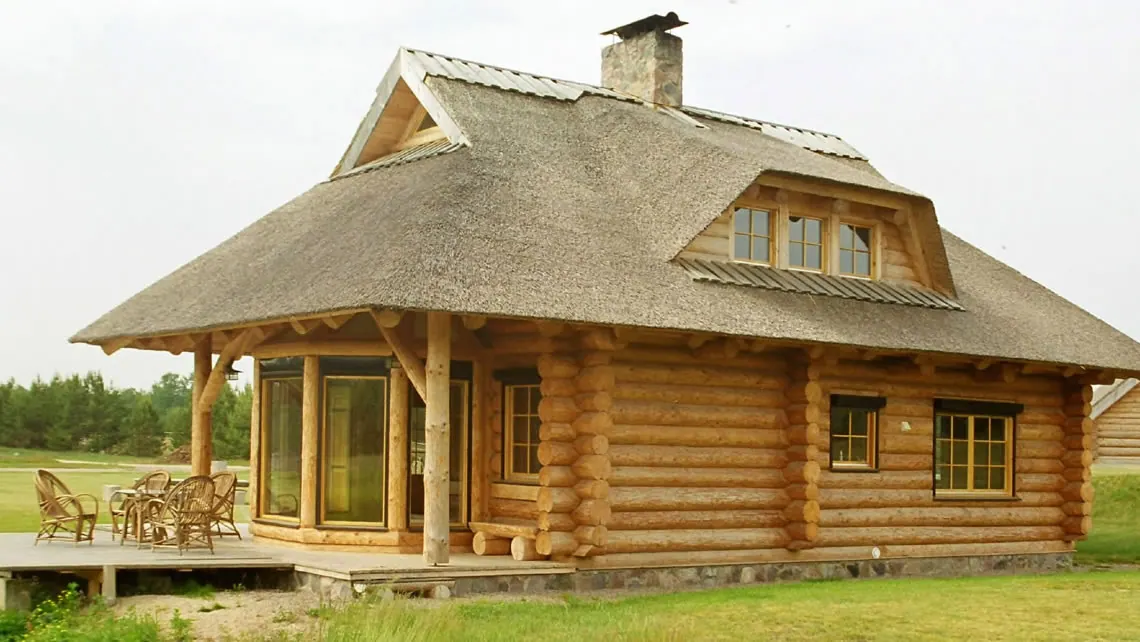
Holiday cottages are very popular, especially those made of wood. However, the price of these cottages is very high. The high prices can be reduced by making the elements on a do-it-yourself basis.
The manufacture of building elements should begin with sizing the elements. In doing so, in addition to easy handling, rational use of the available materials should be taken into account. It is also important to ensure that, during fabrication, one person can move the elements and two can transport them. The dimensions should be aligned with the building module of 30 cm, i.e. the dimensions should be integer multiples of the number 30, such as 1,20 m, 90 cm, 2,10 cm. This principle also applies to doors, windows, etc. We begin the work by making the frames of the elements. A list of the required materials with dimensions should be compiled, and the data arranged in a table. If possible, a drawing of as many elements as possible should be made at a scale of 1:1. Length dimensions should be increased to allow for tying and overlaps. The vertical supports of the frame elements at the edges are fastened with tenons, and the intermediate ones with short pegs (fig. 1).

FIGURE 1
The frame material is cut spruce, with a cross-section of 50x50 - 25x50 mm and a length depending on the strength of the cladding material and the size of the panels. The main parts of the building elements are frames. The transverse battens serve as reinforcement, so their use depends on the strength of the cladding material and the size of the elements. These battens are installed with short tenons and glue so that the main carrier is not weakened. If the cladding material used is thin, diagonal bracing should also be made. The window and door openings should already be formed during assembly with vertical and horizontal supports, taking the installation dimensions into account.
Cladding
We can clad finished frames in four ways: on the outside with curved boards and on the inside with wood-fiber boards, on both the outside and inside with wood-fiber panels; on the outside with tongue-and-groove boarding and on the inside with particleboard panels, and finally in a combined manner (boards, wood-fiber panels, particleboard and tongue-and-groove boarding). You can order particleboard and custom service cutting on the page Particleboard service cutting
Combination with boards and panels. For exterior cladding, commercial-grade round-edged boards are suitable. The boards are installed horizontally, from bottom to top, and fastened to the frame with nails. The edges of adjoining boards are formed as an overlap or in shingle form. It should be borne in mind that round-edged boards are tapered, i.e. they are not of the same width לאורך their full length, and because of the curved growth rings they deform easily. Parallel machining of the board sides should begin at the narrower end. The machining of the side edges for board joints can be carried out with a circular saw set at an angle (fig. 1).
Care should be taken when driving nails, because the boards are thin at the edges and easily split. We do not recommend the use of boards from which the bark has not been removed, although they can occasionally be found in shops. For interior cladding, fibreboard panels (Masonite) should be used.
Individual building elements can be fastened to one another with dowels, internal and external overlapping battens. The edges of the boards should be continued without gaps, and at the joint an overlapping strip of the same material should be glued to the left side of the material. The width of the strip should be ten times the thickness.
Panel-panel combination. Many years of experience have proven the durability of fiberboard. The use of these panels is versatile, and they are significantly cheaper than plywood. But we must by no means forget the stiffening ribs, which, in addition to strengthening the frame, prevent deformation of the panel. We must not leave larger sections without reinforcement, because sooner or later deformation will occur and this will spoil the appearance of the flat surface.
The panels are fixed by bonding. A prerequisite for good adhesion of the adhesive is a clean surface. The rough side of the panel at the bonding areas should be roughened further with a wire brush or steel sheet. We do not recommend fastening with nails, because the nail head may loosen due to movement and deformation of the panel, creating rust stains. During bonding, while the adhesive sets, the cladding should be secured with nail pads made from panel offcuts.
Modern adhesives are very reliable, but if necessary, it is better to use wood screws with burnished or cadmium-plated heads, as well as brass ones. (Burnishing: the screw should be heated until it changes colour and then immersed in oil; after removing it from the oil, the oil should be allowed to burn off over an ember or gas flame. Repeat this until the screw, in a dry state, has a shiny black colour. Warning! This operation is very dangerous, because it can cause fire or accidents, and may only be carried out in appropriately equipped workshops).
Elements lined with hardboard panels are also fastened with dowels. (Stepped shaping of the lining with these panels is difficult to carry out.) If we fasten strong overlap battens on the outside with screws (60x25 mm), then for flat joints of interior walls no additional overlap is required. After being coated with linseed oil, the elements are painted with oil paint on the outside and varnished on the inside.
Combination of chipboard and boarding. For interior cladding, chipboard panels are used, and for exterior cladding, the so-called boarding (cladding of planed and tongued spruce boards) with beveled edges at the joints.
Cladding boards made of tongue-and-groove boards are placed directly next to one another and fastened vertically beneath the battens. At the joints, the battens fit into one another and thus overlap. Both on the outside and on the inside, the wooden surfaces remain flat; no special overlap battens are needed, only at the top and bottom are finishing battens required, installed horizontally and fastened with screws. This solution is the most durable. The thermal and air insulation of this solution corresponds to a brick wall of thickness 12 cm. The air space in the frame further increases and improves the insulating effect. When assembling the elements, the rear grooved batten is installed only during assembly, from above, into its position.
Combined solution. This solution is in fact a combination of the three elements described so far. The north and northwest sides of the building, which are most exposed to atmospheric influences, should be clad with particleboard panels. Doors and windows should not be installed on these sides. In order to obtain smooth, connected surfaces of the elements on the inside, they should be clad with wood-fiber panels. On the outer side, which faces the garden, is best protected and is used most - where most openings are located (doors, windows) - tongue-and-groove boarding should be installed. But it is decorative and a curved board.
On the flat and continuous interior wall surfaces where furniture is installed, fiberboard should be used for cladding. On the interior wall of the entrance door, it is best to install paneling, because shelves, coat racks, etc. can be mounted on it most easily. It is a very >>elegant<< and decorative solution if the side walls are clad with smooth material and the entrance wall and the wall opposite it with paneling.
The first step in protecting manufactured elements is to apply a base protective coating of heated and diluted linseed oil varnish. The coating is applied only to surfaces that have previously been cleaned of dust and dirt and sanded. The base coat may be some oily thinner. Heating can be carried out safely by heating a clean brick and, a little away from the stove, placing the base-coat material in a tin box on this brick.
After complete drying, the surfaces should be sanded again and then coated with varnish (or exterior paint in the desired tone). The use of varnish is not always favorable because of the glare, especially on flat interior wall surfaces. On paneling, however, varnish will have the most decorative effect. For a flat interior wall, we recommend using paint in a mild pastel tone. Smooth walls can also be covered with wallpaper. Quality self-adhesive wallpaper can also be applied by us to the surfaces.
Door and window locking mechanisms
We have already described the shaping of openings for doors and windows. Their position can be determined as desired. The dimensions of some of the closing mechanisms for openings that can be obtained in stores are as follows:
Height: from 60 cm to 240 cm (in steps of 30 cm)
Width: from 60 cm to 180 cm (in increments of 30 cm)
The advantage of these closures is that they can also be easily installed in relatively thin elements. After they have been fastened and fixed, only the folding battens need to be installed and they are ready for use. The windows are single-sash, but with double glazing. The entrance doors have double walls and are fitted with a viewing peephole. Several dimensions of doors or windows:
window 60 х 120 cm
horizontal window 120 x 60 cm
large window 120 x 120 cm
Entrance door 85х202,5 cm (with a security lock, lined on the inside with brown fiberboard, and on the outside with decorative pine cladding, with a peephole and a decorative strip.)
Bathroom, kitchen and possibly hallway doors in dimensions of 60х202,5 cm (with fiberboard cladding, solid door with frame.
Roof structure
To simplify fabrication and increase the strength of the roof structure made of fir timber, we do not recommend solutions with tenons. Quality material should be cut to lengths corresponding to the span, the necessary grooves and tenons should be made, and on the opposite side from the joint they should be connected with nails and a piece of board (dense fibers) or with scraps of fiber boards (fig. 2) Some of the nails should be through-fastened. The roof slope for asbestos-cement sheets is 20-25°. On the side walls and on the roof structure, a groove 0,5 cm should be made for fastening. We fasten the roof supports to one another with battens, which also serve for fastening the asbestos-cement sheets, and to the side walls with metal plates. After covering the roof, the underside of the canopy should also be clad.

FIGURE 2
Ceiling
For the interior lining of the ceiling we recommend fiberboard, and for thermal insulation a thin layer of reeds above it. We fasten the fiberboard from below with wood screws, and line the attic space with a layer of reeds of 5 cm. The reeds, toward the attic, should be coated with cement-perlite plaster. (After plastering the ceiling must not be loaded!) After this, the roof cladding can be undertaken. Important! The timber should be impregnated for protection against fire and fungi.
Insulation
The insulation between the inner and outer wall of wooden cottages is usually some insulating material and an air gap. Such insulation is identical to the insulation of a brick wall 25 cm thick. The insulating capacity of elements made on a do-it-yourself basis corresponds to a brick wall 12 cm thick. This can be further increased by special insulation between the facing boards of the elements (fig. 3 and 4).

FIGURE 3

FIGURE 4
Perlite plaster with gypsum - made on site - with a thickness of 3 cm corresponds to the thermal insulation of a brick wall with a thickness of 10 cm. Such plaster is made by mixing approximately the same amount of perlite flour into 20 liters of thin lime milk and stirring until the mass reaches the consistency of mortar. For hardening, just before use, 1,5 m of gypsum should be added. The mixing ratio is then good if the perlite plaster, when dry, gives a sound when struck, but a finger can still be pressed into it. Adding too much gypsum will reduce thermal insulation. Suitable fillers include waste insulation materials, waste foam materials, as well as cork waste. The mixing ratio is 1 : 1.
Regardless of which solution we choose, the insulation should be applied to the inner surface of the exterior wall, because the “hairy” surface of the wall provides better conditions for adhesion and bonding. The insulating layer should be applied to the laid element even before the inner cladding is installed. Care should be taken to ensure that the surfaces on which the inner cladding will later rest remain clean. The finished insulating material should be poured out of the bucket, because this will dirty the bonding surface less. The material is leveled with a screed. A 100% filling of the gap is not mandatory; an air layer may remain. The inner cladding can be put into place only after the insulating material has completely dried. Only then may nails be driven in, if we have verified that the insulating material is completely bonded to the opposite side. After insulation, the elements may be transported only in a lying position (outer side down) (figures 3 and 4)
Pergola (trellis)
A pergola is a favorite place in the garden, with plenty of shade and air. It can be made from several types of materials. For the aesthetic requirements of the garden, a combination of iron and boards is most suitable. The material of the posts can also vary: steel pipe, eternit pipe, natural stone, or wood. The beams can be made of wood or rolled iron. The cross slats are always made of wood. A pergola made entirely of wood is very expensive, and in addition, because of its fabrication, composition, and joints, it also requires a certain level of expertise. It must be carefully assembled so that water does not collect in individual places and so that premature rotting of the load-bearing structure does not occur.

In the following, we will describe the construction of a pergola with iron load-bearing elements and wooden slats (fig. 5)

FIGURE 5
The first step is the fabrication of the iron supporting structure. The support posts are made of U channels 80 x 45 x 6 mm. The spacing between the support posts should be 60 cm. The pergolas, however, are fastened with welded profiles, at the bottom with flat iron measuring 25 x 5 mm, and at the top with a U profile measuring 80 х 6 mm. Pairs of posts should be spaced 3 m apart, and the number of pairs depends on the desired length of the pergola. Due to their own weight and wind pressure, the support posts should be set in carefully made concrete foundations marked B 70, with dimensions 120 x 70 x 60cm. The height of the posts above ground level should be 2,4 m, and below ground level 0,6 m.
The supports on which the battens are placed are made of U profiles with dimensions 50 x 38 х 5 mm. Double L profiles with dimensions 50 x 50 x 5 mm are to be welded onto these, with an axial spacing of 40 cm and a mutual spacing of the pair of L profiles of 45 mm. These pairs of L profiles carry the upper grid of the pergola, made of wooden battens (preferably oak) with dimensions 18 x 4,5 x 180 cm, which is fastened at intervals of 40 cm with M8 x 100 bolts and nuts. The iron parts should be coated with a double primer of red lead, a top coat of black paint, and varnish. The wooden surfaces should also be coated with colorless varnish (for boats).
A pergola can be placed in the garden or somewhere freestanding, and it can also be installed next to a building. The position of the pergola should be determined so that at a certain time of day it can serve as a place for resting in the shade, and at another, in the sun. It is also important that from the pergola we have a view of the most beautiful parts of the garden. A pergola in the garden has the effect of a vertical element and therefore can also define certain parts of the space. A pergola attached to a building actually extends and takes over the functions of interior spaces, because from spring to autumn it can be used, so to speak, for family
a living room under the open sky.
It is advisable to cover the area under the pergola with a durable surfacing of stone or concrete slabs. A pergola is, in fact, a developed form of support built for climbing plants and serves as a shaded passage for rest in greenery.
Fireplace in the garden
A particularly popular place on summer evenings in the gardens of holiday cottages, and also in the larger gardens of urban family houses, is the garden fireplace. Since several types of fireplaces can be built, we will describe a few of them.

The hearth beside the wall (beside the fence wall) is built so that it replaces the terrace fence and forms a retaining wall of natural stone. The stove is built of stone or, if necessary, of bricks, and the chimney should be made of sheet steel about 1mm thick. To protect against rust, the sheet should be coated with oil and the oil allowed to bake on over the flame. The chimney height should be greater than the height of the retaining wall, and sheet metal smoke deflectors must be installed on both sides. The stone surface immediately below the flame should be built so that it is porous, in order to allow air to flow from below as well. Hooks for hanging kettles should be built into the surface above the flame.
We will make better use of the retaining wall and it will be much more attractive if we build a flower opening in the longer, free section. However, at this place a space for a flame can also be built, or by placing some flat stone (if it is too rough, it should be leveled with concrete) a table-like part can be obtained (fig. 6, 1. part).

FIGURE 6
This solution can be applied in places completely detached from the building, in connection with a stone fence or a garden.
Free fireplace with metal parts
The basic construction of a free-standing hearth with metal parts is a stand made of L profiles with dimensions 30/30 mm. A hood for removing flue gases, made of steel sheets or eternit, should be installed on the supporting structure - which is assembled with rivets, screws or welding. The supporting structure, i.e. the legs, are placed spread apart in concrete blocks made on site or subsequently set on the ground. Care must be taken that the flame does not reach the eternit, because it will crack. For protection, the metal sheets should be coated with oil paint. It is advisable to dismantle these sheets during the winter.
A fire grate is placed at the bottom of the supporting structure, and a barbecue grill above it. If we drill holes at different heights in the legs, we will be able to adjust the height of the grate, i.e. the grill (fig. 7).

FIGURE 7
Free hearth made of prefabricated elements
Such elements are most easily made from concrete elements. Simpler ones can also be made and assembled from any elements, preferably from porous concrete with slag. If they are only temporary, it is sufficient to place them carefully one on top of the other, or possibly connect them with wire. On the upper surface of the hearth—which has no lid and looks like a cabinet—a dense grate should be placed, and an air opening should be left on the underside. If we also want a grill, another grate should be installed at half the height of the hearth. In the first case the fire is above the grate, and in the second between the two grates, with the grill above the fire. Of course, at the level of the flame grate an opening should be left for inserting fuel. By reducing the lower air opening, combustion can be regulated (Fig. 6, 2. part).
It is advisable to make a special mold for producing the hearth elements as well. Slag concrete is poured into these molds and, after compaction, finished elements are obtained. By stacking these elements simply one on top of another, a free-standing hearth can be assembled.
And finally, a few tips:
There must be no leafy trees above the fire site. Flammable materials should not be kept near the fire site. One should also move away from buildings and forests. After firing, before leaving the fire site, we should check whether there are embers in the combustion area, and only if we have taken all safety measures may we leave the fire site. Firewood left in the combustion area will certainly remain dry until the next firing.
Beside the fireplace, attractive seating and a path can be made from tiles of colored concrete. The seating can be used for a smaller fireplace (fig. 8).

FIGURE 8