Basic principles of joining wood
You have probably heard of wooden houses that were once built in mountainous regions without a single nail. Building such houses required considerable patience and skill when assembling the parts. These houses show that wooden parts can be “cut” so that they fit firmly against one another and remain secure. This can also be applied when joints are fastened with nails, wood screws, animal glue, cold-setting adhesive and other means.
Nailing (Figure 1, part 1) holds a joint well only when two nails are used. The same applies to a joint made with wood screws. Parts can rotate around a single nail or wood screw as if around a small axle.
Wood joints
Lap and edge joints
The simplest way to join wood is a lap joint, in which two pieces overlap and the joint is glued or fastened with a nail or wood screws (Figure 1, part 2a). The joint is more durable if an oblique layer is removed from each piece to create a scarfed Z-joint (Figure 1, part 2b). If the joint will be exposed to pressure in its direction, it is better to remove half the thickness of each piece at the joint and connect them as shown in Figure 1, part 2c. This joint can hold firmly with only one screw, while the notch prevents slipping.
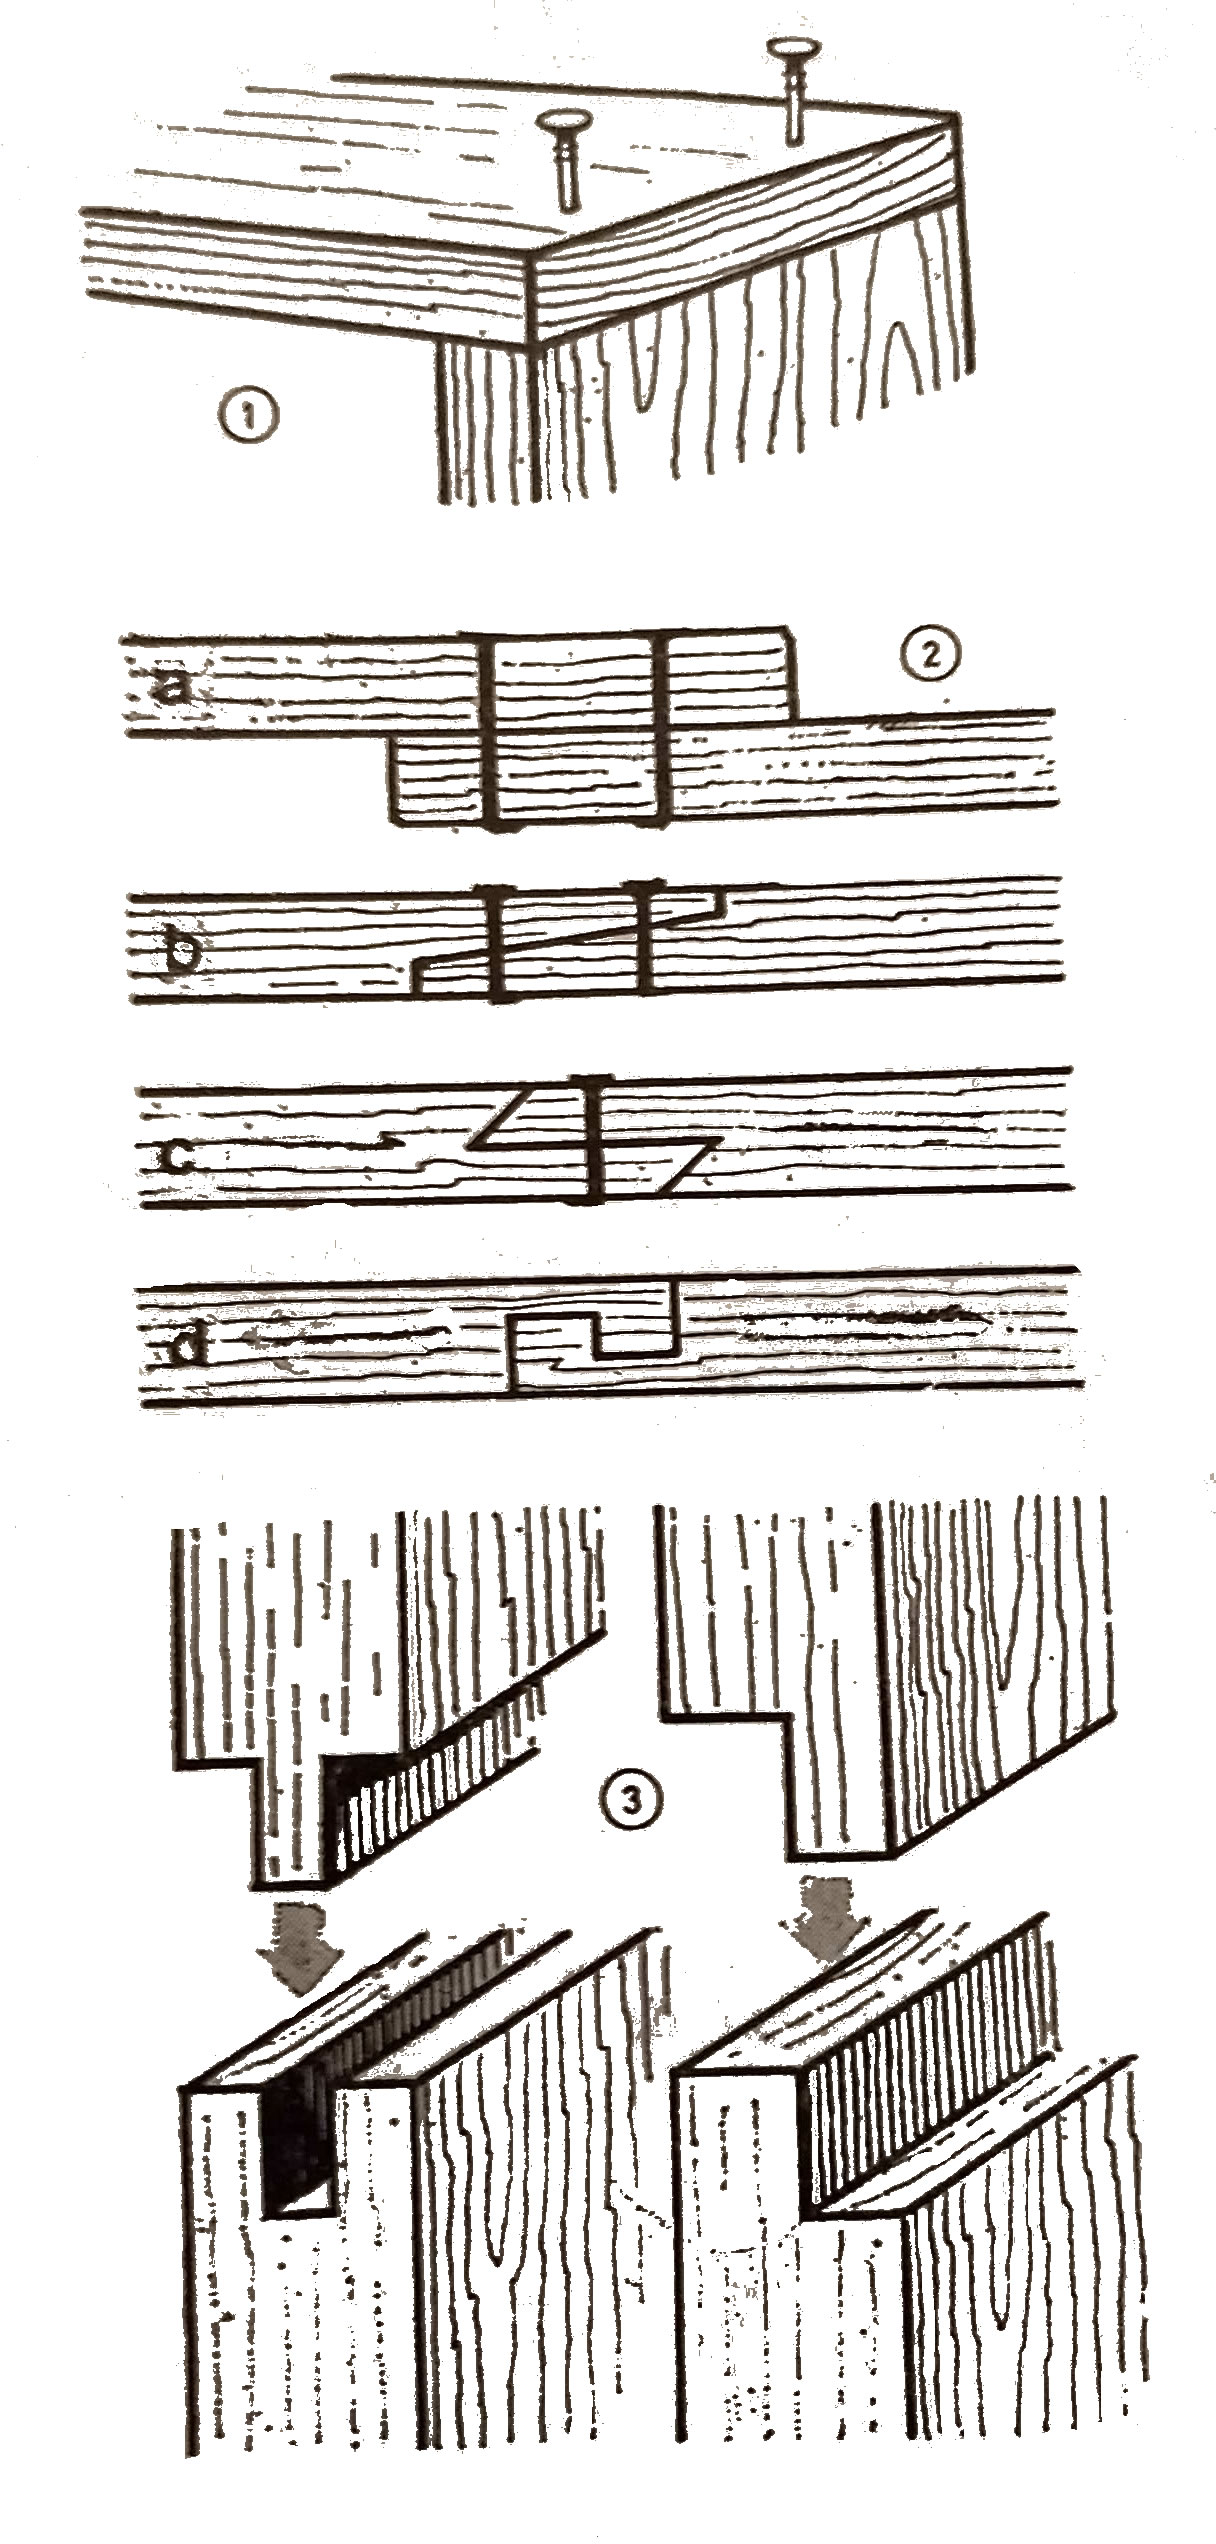
Figure 1 — Nailing and basic lap, edge and tongue-and-groove joints.
A toothed lap creates a strong joint under tension even without a screw. Its disadvantage is that the two pieces can be assembled only from the side (Figure 1, part 2d).
For larger pieces, edge-rebate or tongue-and-groove joints are safer (Figure 1, part 3). A tongue is formed on one piece and a groove on the other; such joints occur in plank floors and parquet. The fit must be exact and the parts must be worked precisely with a chisel, saw and moulding plane. The hard edge batten of a drawing board is fastened in this way.
An edge-rebate joint is simpler because both parts are cut in the same manner. Only the edge rebate has to be made with a moulding plane.
Wooden dowel and tenon joints
A wooden-dowel joint (Figure 2, part 1) is made with round or square wooden dowels. Such joints can be seen in tables and chairs. Holes are drilled in the second part for round dowels, which are whittled or made on a lathe. Holes can also be drilled in both parts and the dowels made separately from hardwood. It is important to have at least two dowels in a joint, because material can rotate around one dowel as if around an axle, and the holes must be deeper than the dowels are long. Otherwise, a dowel rests on the bottom of the hole and the joint cannot be tightened.
A tenon made with a chisel (Figure 2, part 2), and the opening required for it, are more difficult to make, but a single tenon is sufficient for this type of joint. It is used when a part must not rotate around its axis. Sufficient thickness must remain around the opening to prevent that part from breaking under load.
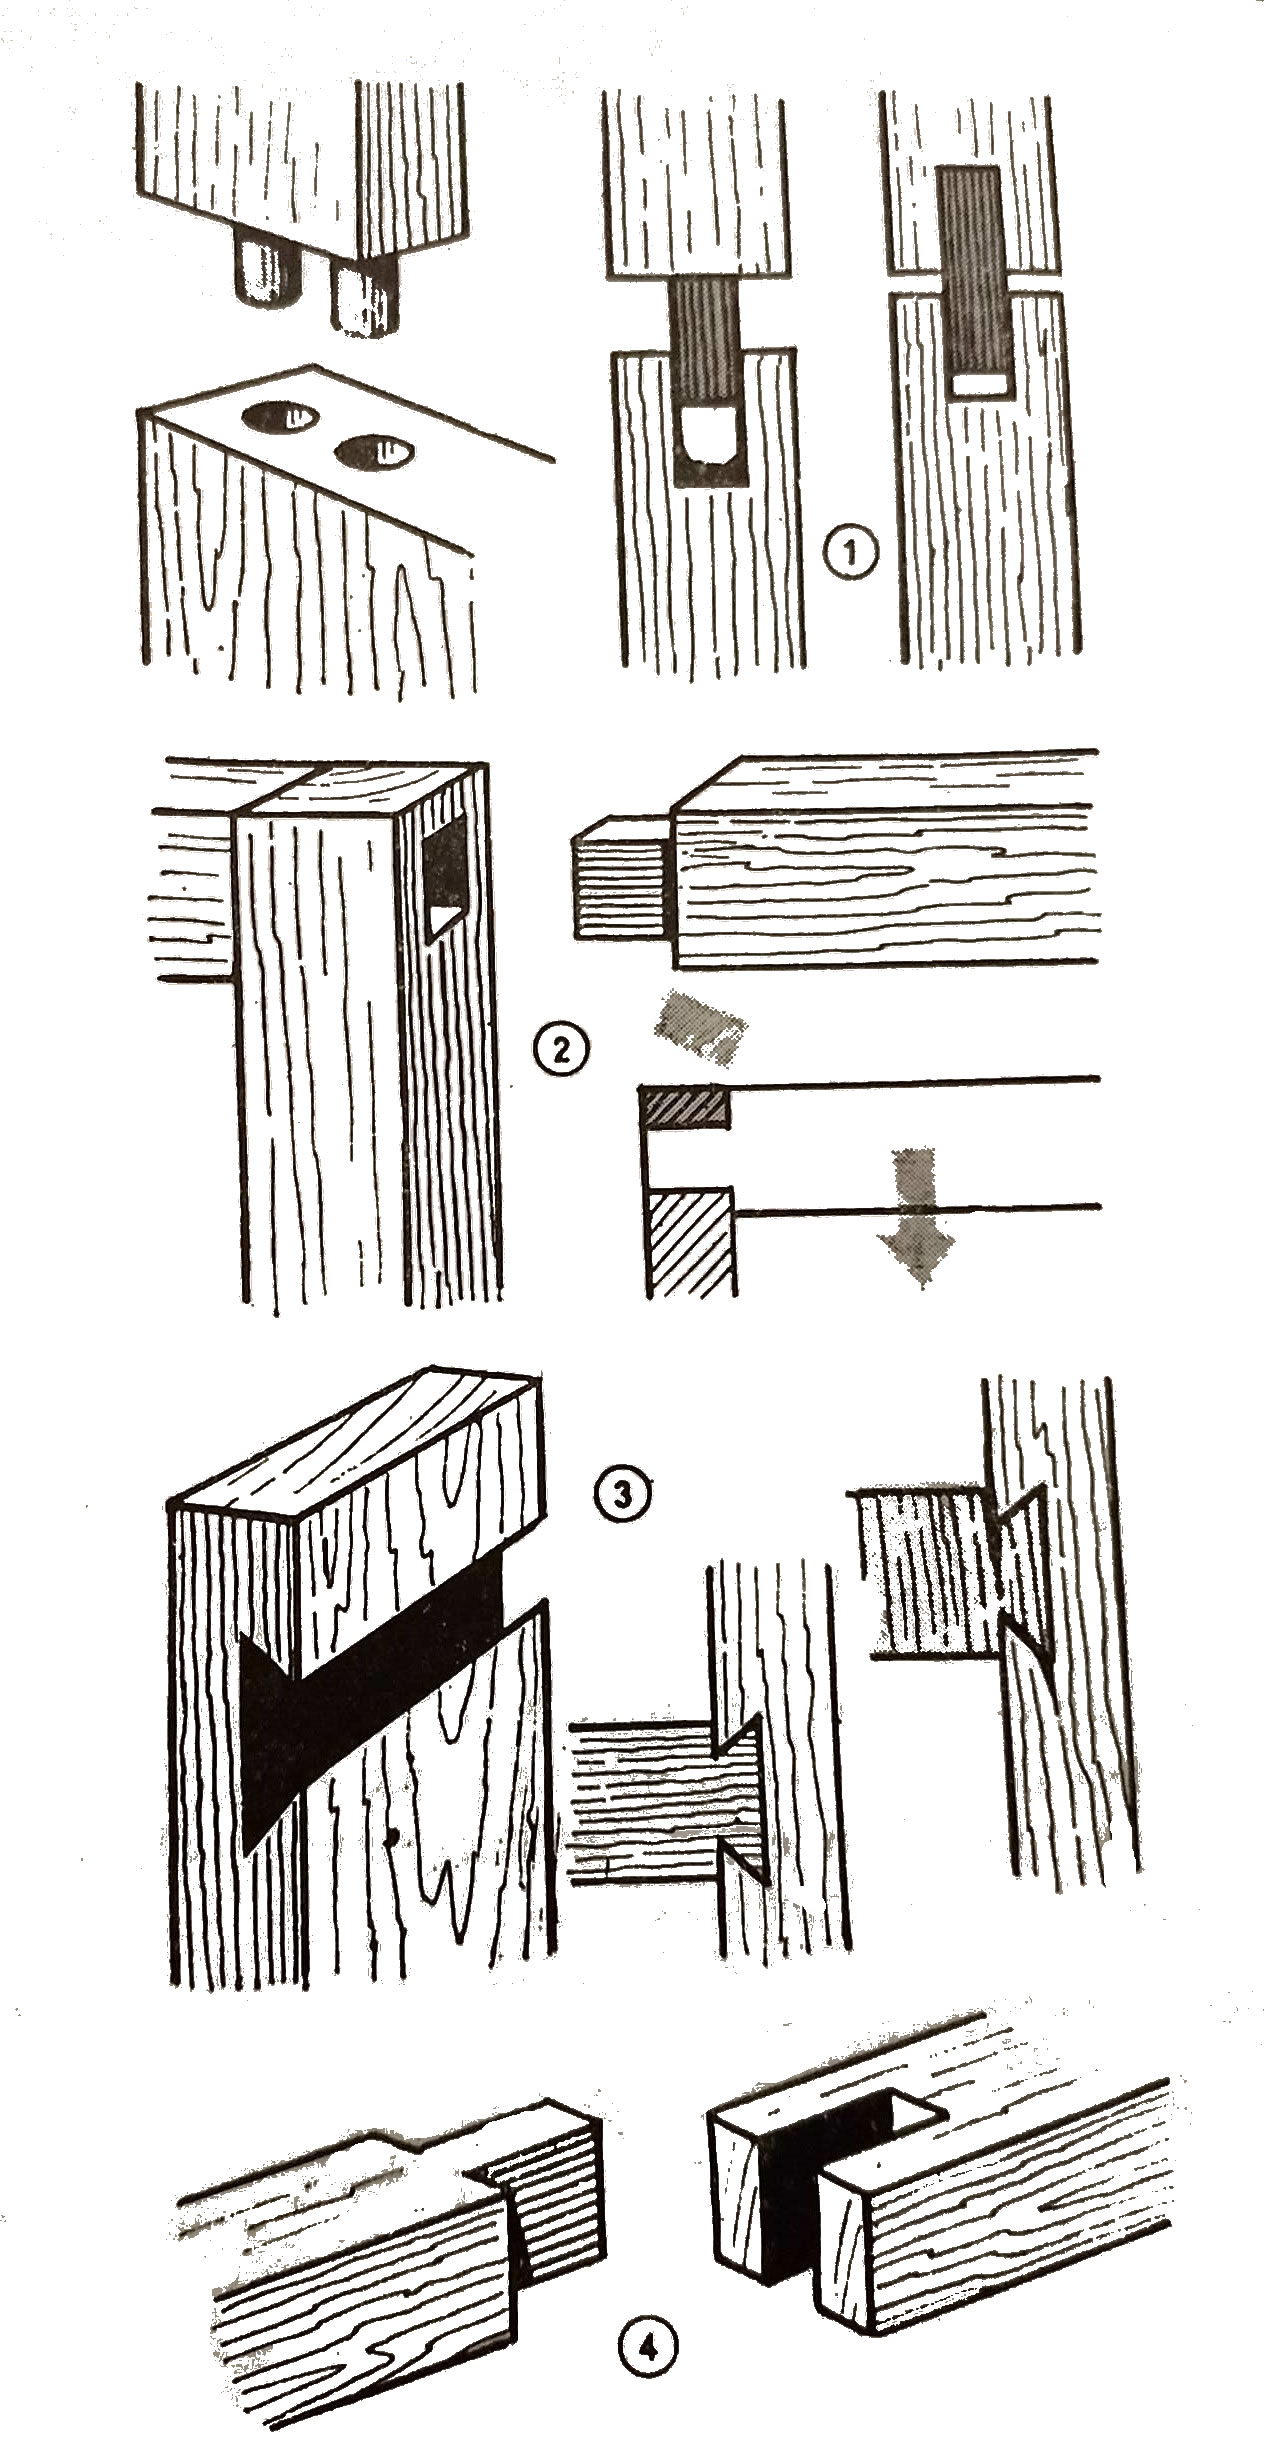
Figure 2 — Joints made with wooden dowels, a dovetail and tongue and groove.
Dovetail, tongue and groove
A dovetail joint is used to connect longer pieces along their sides (Figure 2, part 3). Making this joint requires considerable patience and good tools. It is used when joining shelves. Its main disadvantage is that the joint can be assembled only from the side. The dovetail must enter a groove that runs across the grain; otherwise, the joined part may tear or break.
Shorter pieces are connected with tongue and groove (Figure 2, part 4). These shorter joints are made in the same way as floorboard joints, only shorter. A modified form for joining longer pieces is the finger joint (Figure 3, part 1).
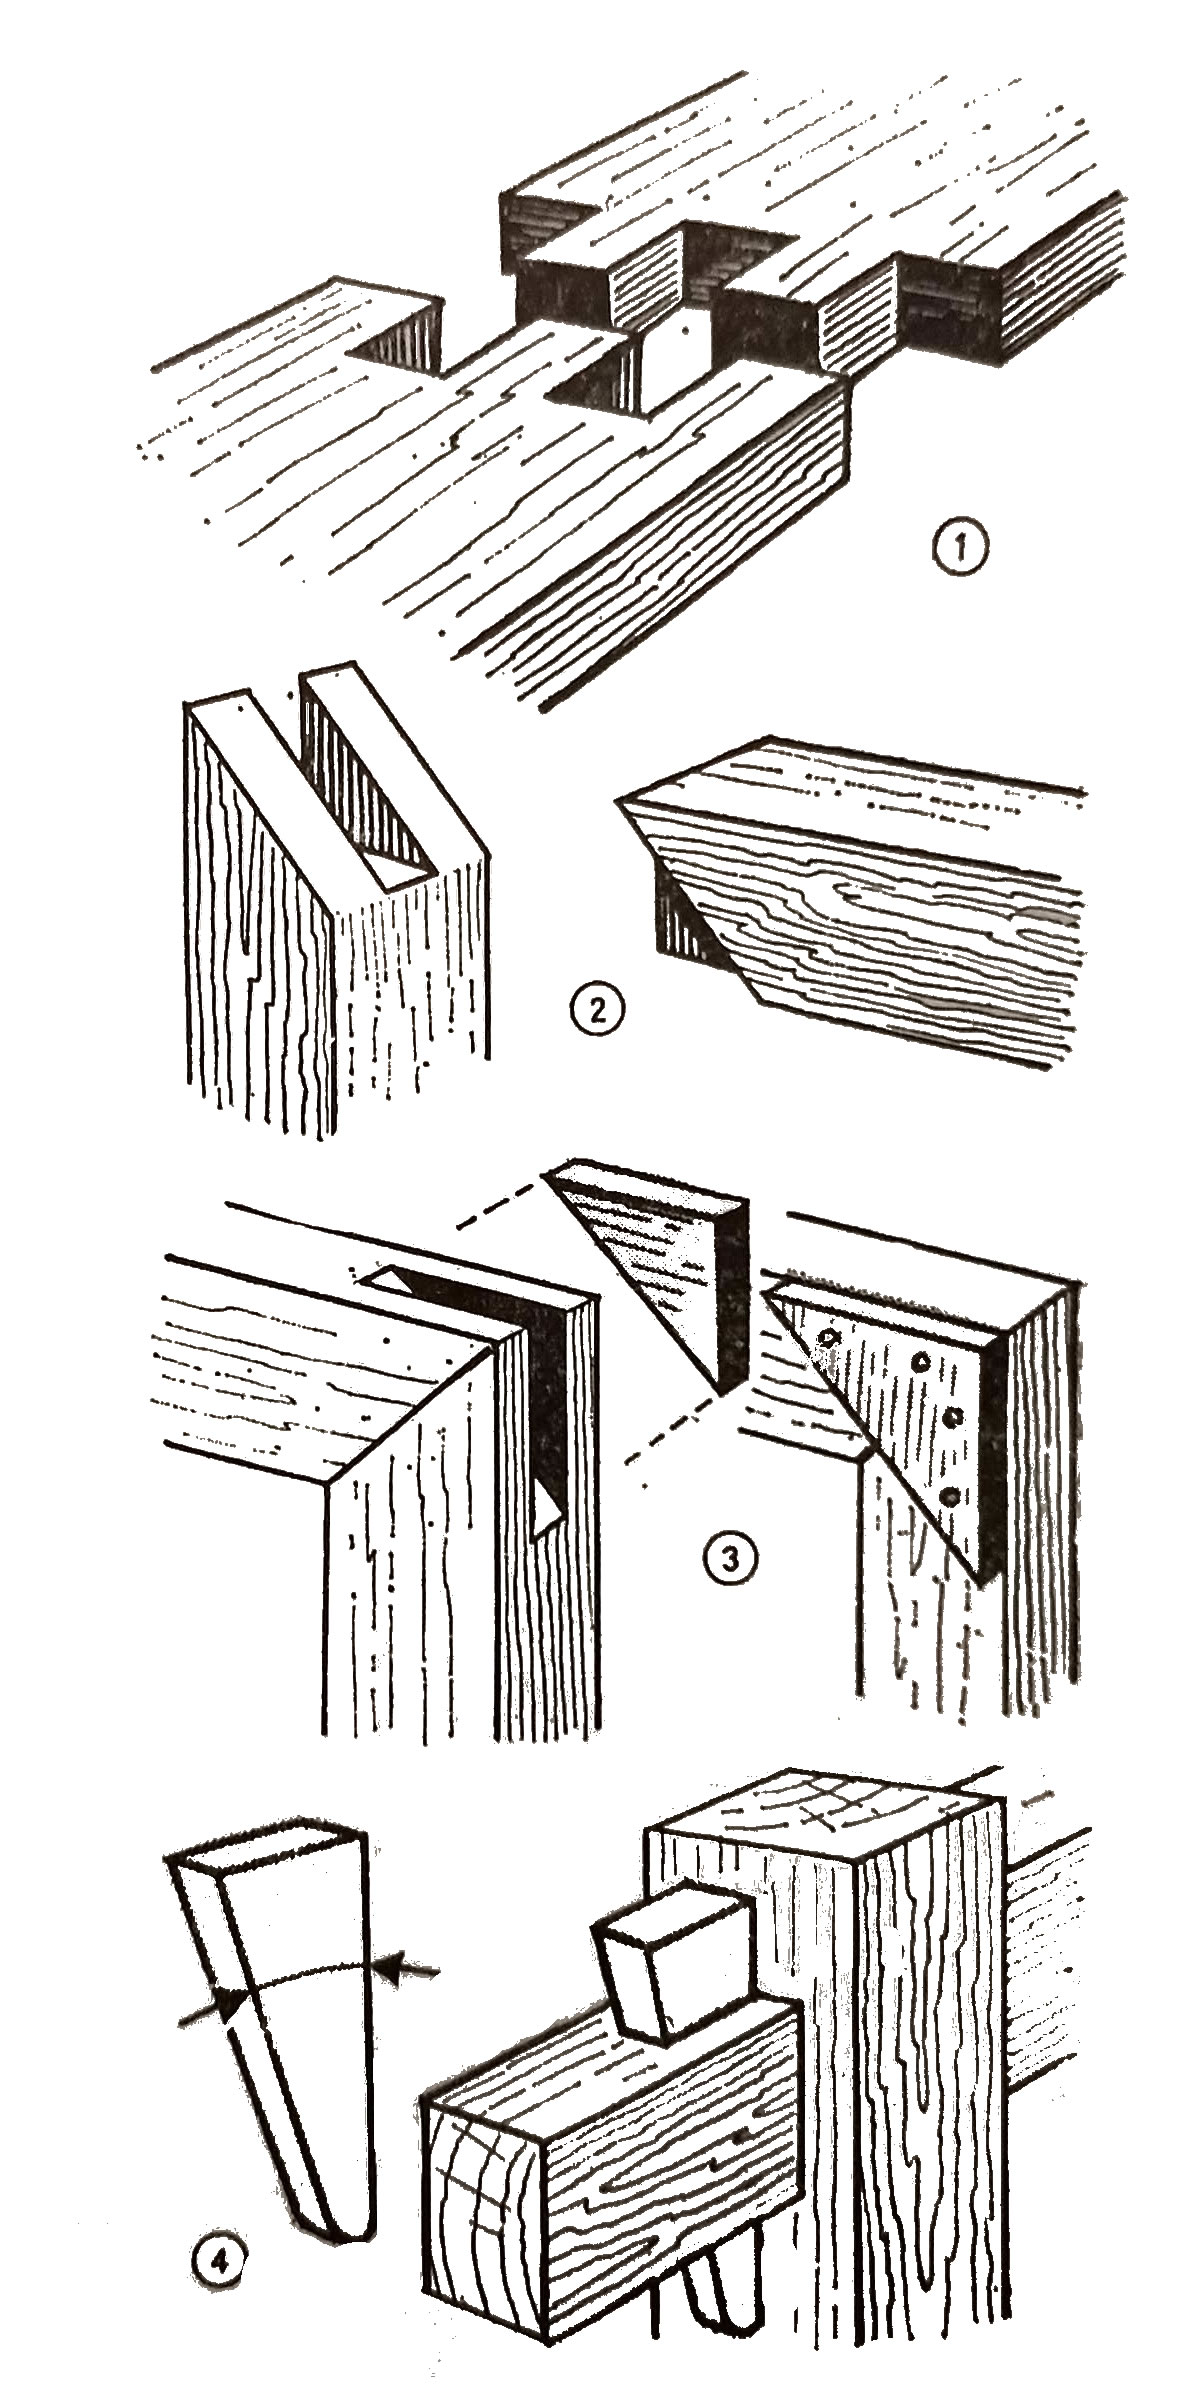
Figure 3 — A finger joint, corner joints and a tenon-and-wedge connection.
Corner and detachable joints
For corner joints, an oblique tongue-and-groove joint is used (Figure 3, part 2), or a groove with a recessed triangular tenon or an externally attached triangular reinforcement (Figure 3, part 3). It is used mainly for picture frames.
Joints that can be dismantled without difficulty are made with a tenon and wedge (Figure 3, part 4). They can be tightened and dismantled as required.
If a tenon-and-wedge joint cannot be made for any reason, a firm joint can be achieved by driving a hardwood wedge with an angle between 2 and 5°, or a metal wedge, into a tenon that has already been inserted into the opening (Figure 4, part 1). The wedge expands the tenon and secures the connection. Fastening a hammer head to its handle is an example. The sharp edge of the wedge must stand perpendicular to the grain, both in the opening and in the tenon; otherwise, instead of being secured, the joint can split easily.
Load distribution
Support and transfer of forces in beams
Finally, several examples of self-supporting construction are shown. Figure 4, part 2, shows an inclined beam. A beam cut in this way will not slip from the posts, while the forces in the supports are perpendicular to the longitudinal axis and do not cause the posts to bend obliquely.
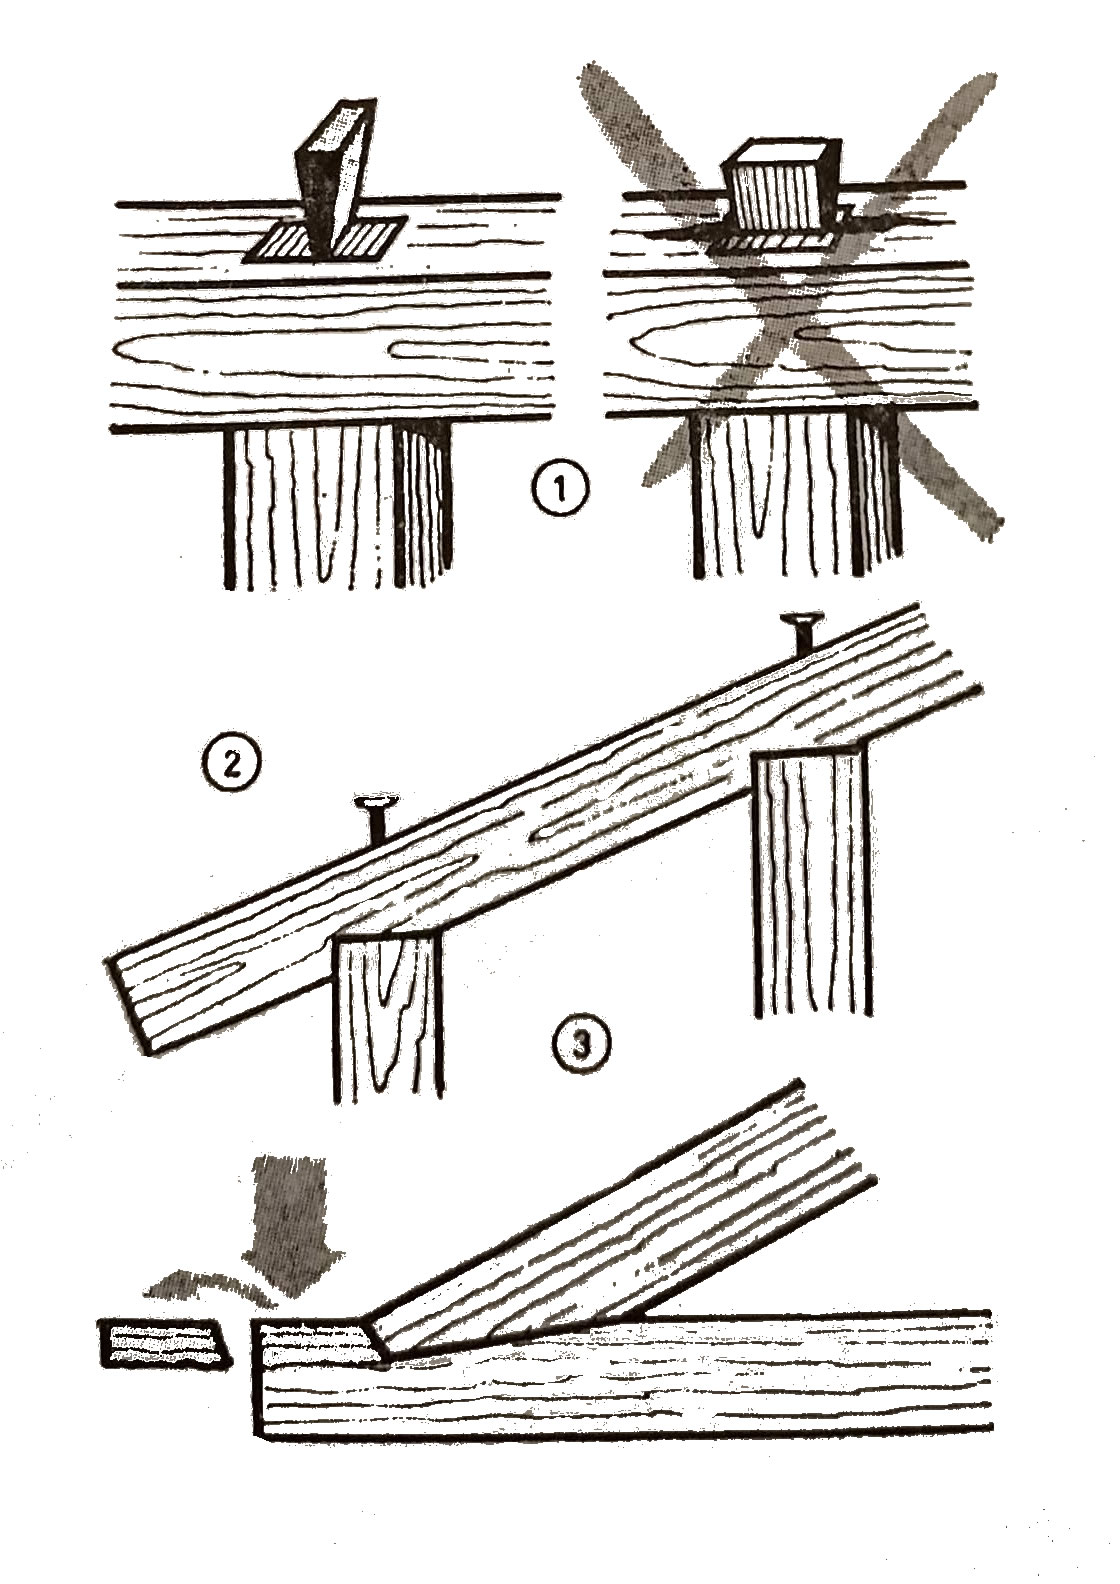
Figure 4 — Securing a tenon with a wedge and transferring forces in beam joints.
Figure 4, part 3, shows an inclined beam bearing on a horizontal one. In this joint, the inclined force is resolved into horizontal and vertical components. The vertical force acts on the horizontally positioned beam, while the horizontal force acts on the beam’s “nose”. When shaping this joint, the nose of the horizontal beam must be strong enough to avoid breaking under the horizontal force and the resulting slipping and collapse of the entire structure.
Self-supporting door construction
Figure 5 shows the “load” and the “self-supporting” construction of a door. A self-supporting construction does not need to be reinforced or supported separately.
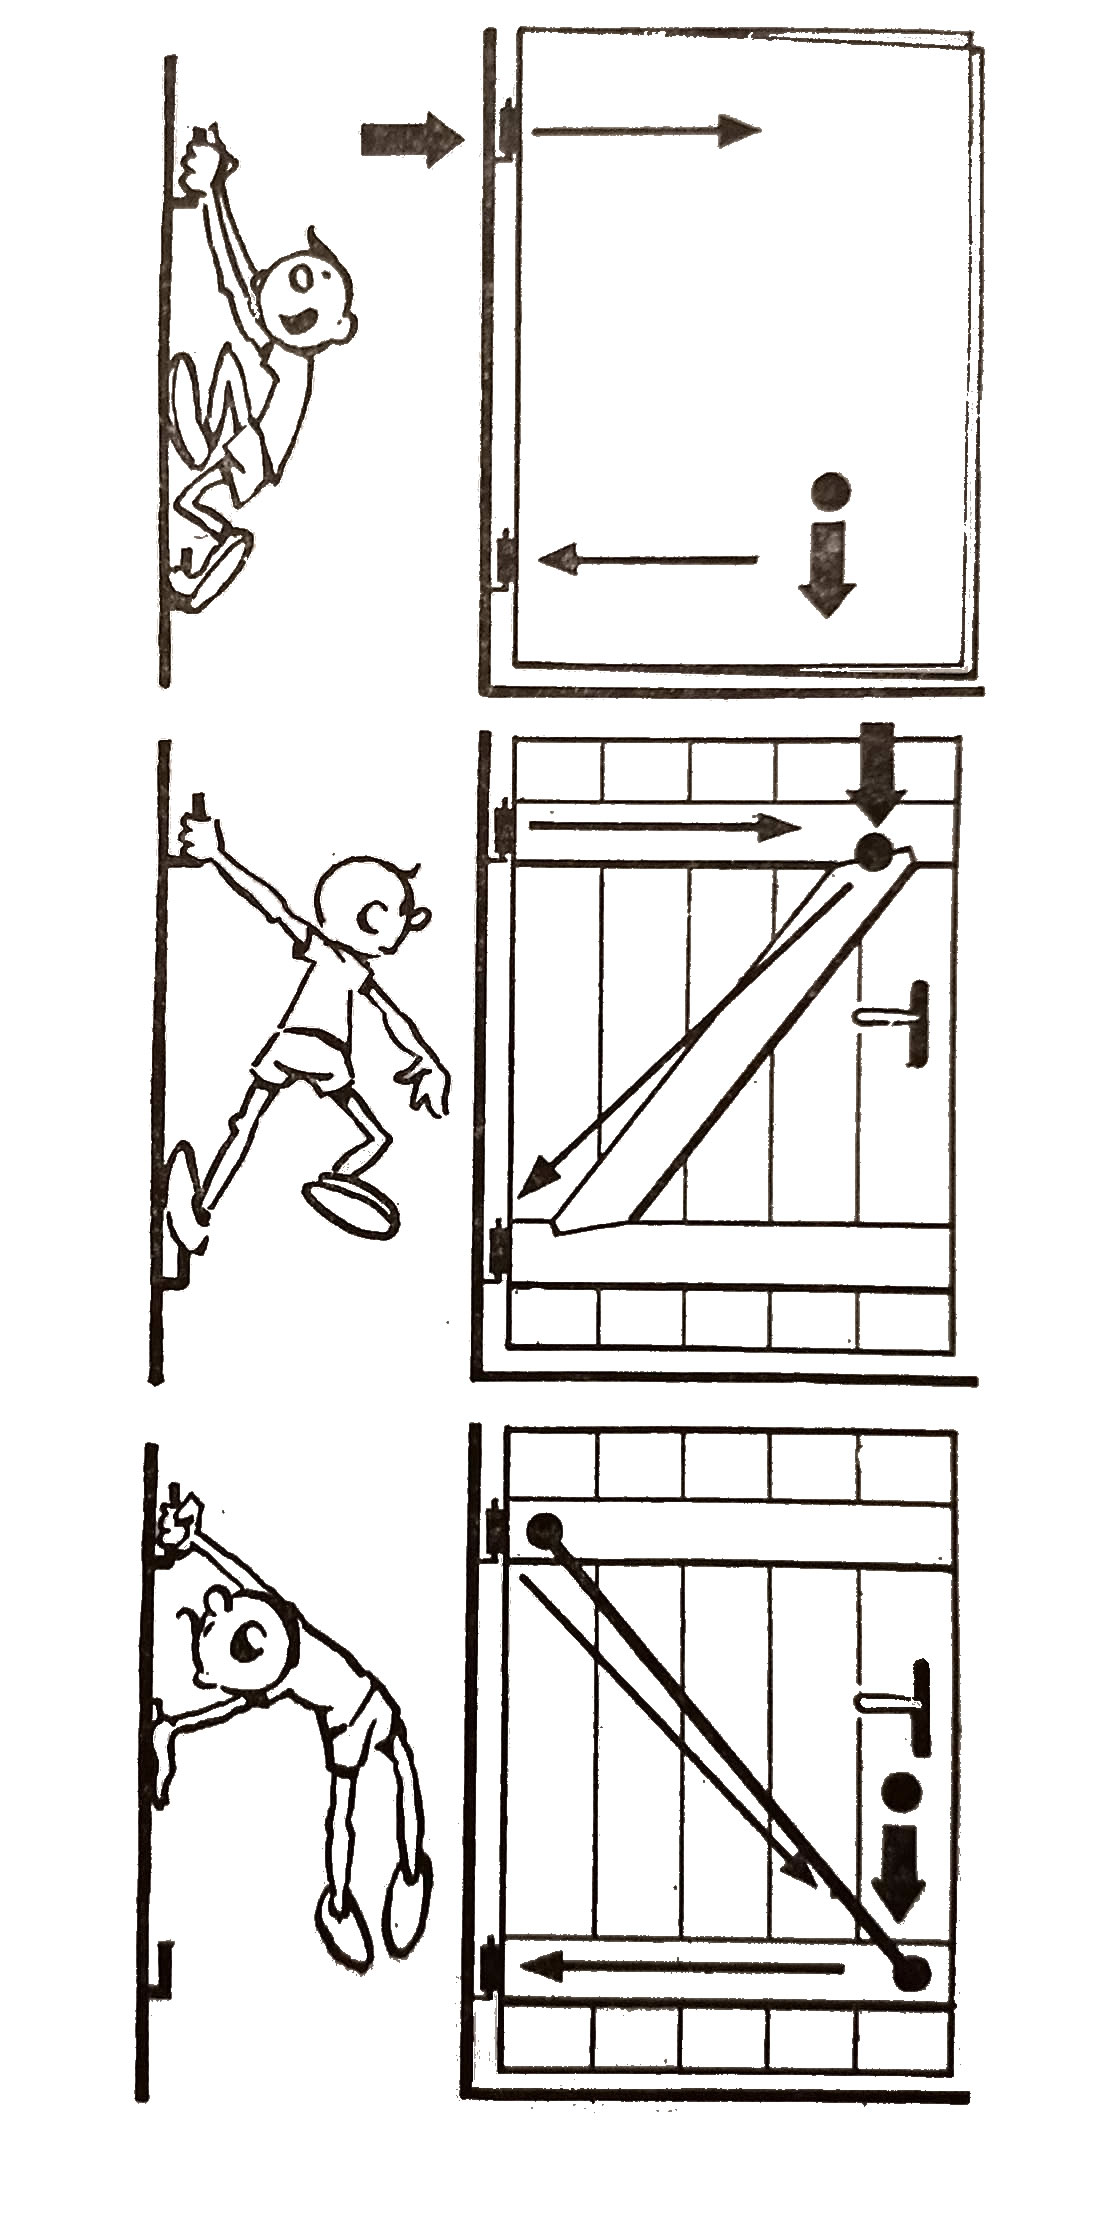
Figure 5 — Door deformation and bracing with a diagonal board or steel cable.
The upper drawing shows that the hinges deform under the weight of the door and the door drops. The upper fitting is pulled out while the lower one is pressed into the wall.
The middle drawing shows how pressure can make the door self-supporting. A reinforced diagonal Z-board takes the door’s weight and must therefore be connected to the upper and lower boards with nosed projections to prevent slipping. The lower drawing shows self-supporting construction by tensioning a steel cable.
Precise making of wood joints
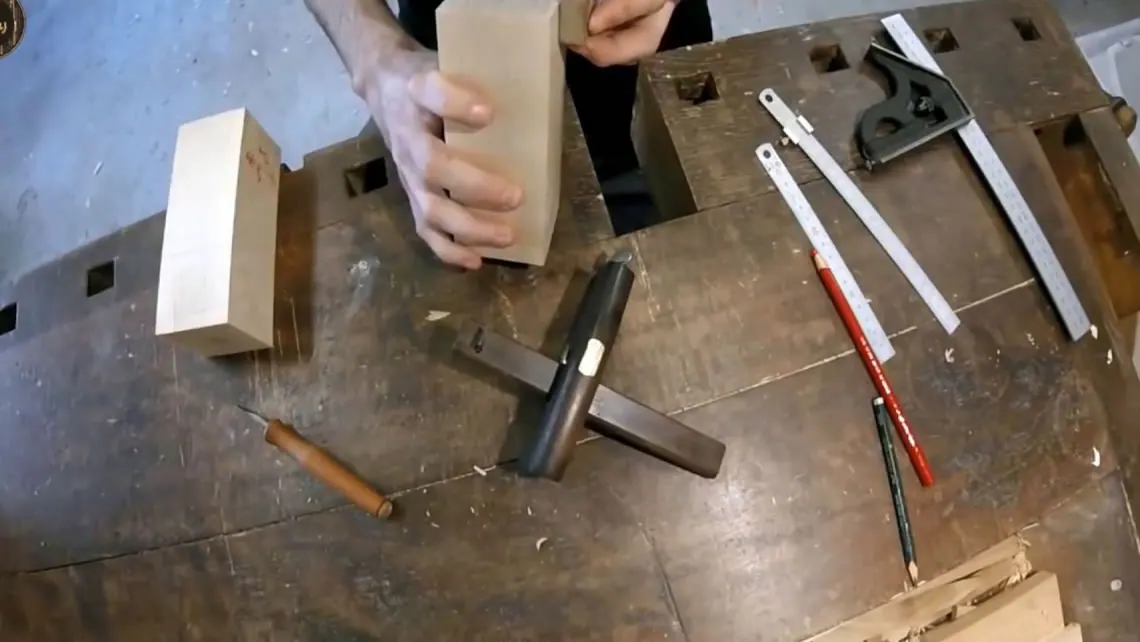
Parts for joining wood must be made as precisely as possible: the tenon must fit the opening exactly, a tooth must fit its corresponding opening, and so on. To achieve this, the parts must be measured and marked accurately, made with special tools, or produced with a template. The simplest solution is to make one part first and then use it as a template for marking the second part. In this way, even if the first part is not perfectly accurate, the second will be matched to it (Figure 6).
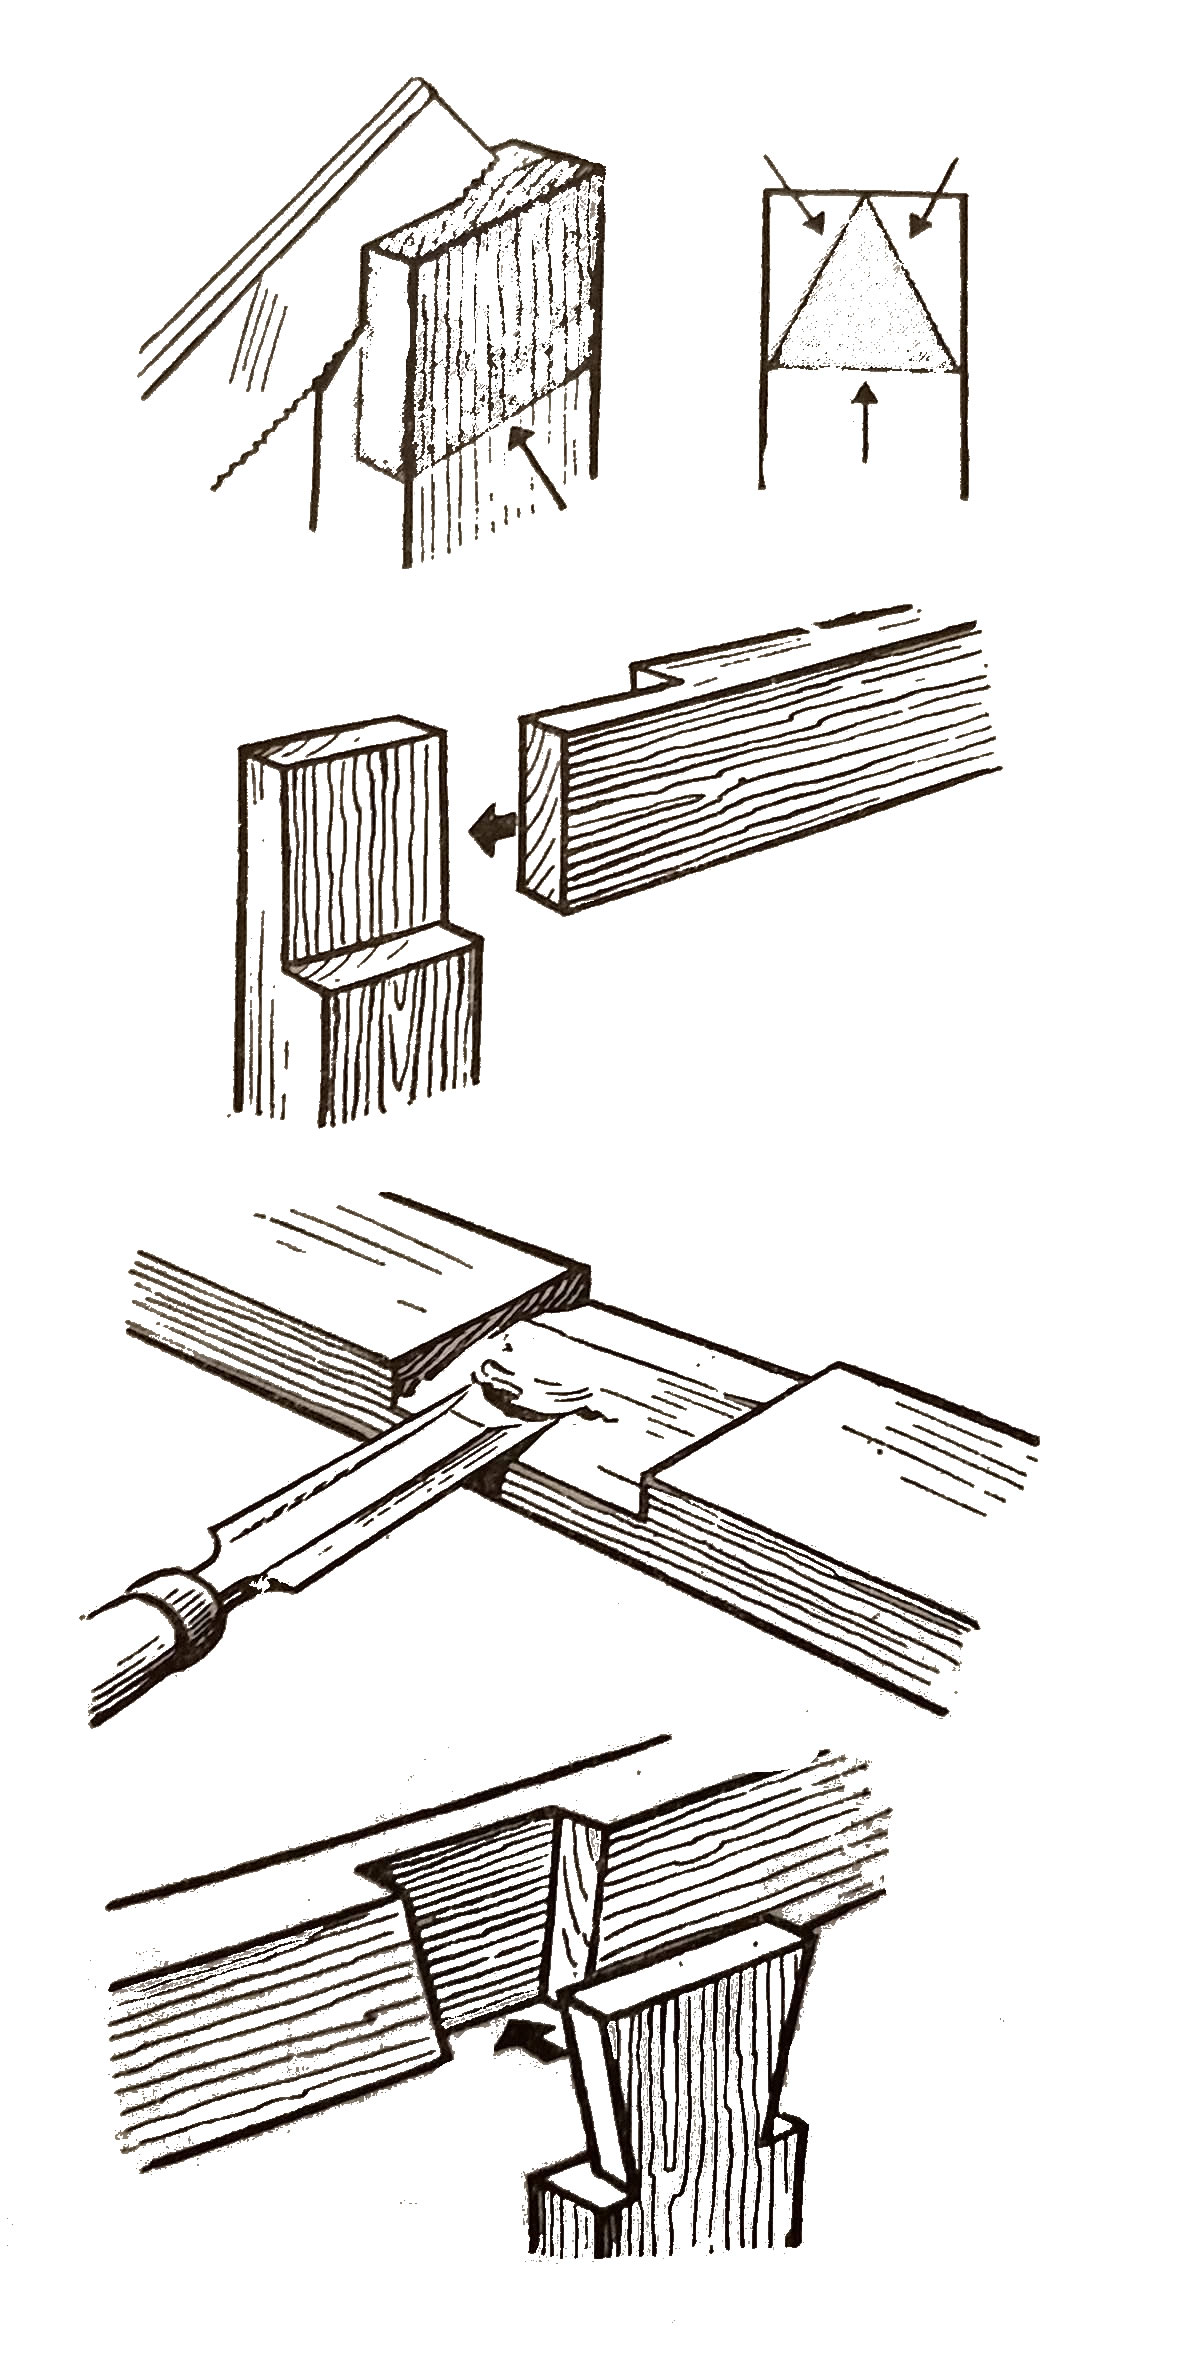
Figure 6 — Transferring measurements from the first to the second part for an exact fit.