Archival practical content: the article preserves historical procedures for working with screws, but is not a joint specification, load-capacity calculation, service manual or safety training. Type, diameter, length, material, corrosion protection, pilot hole, tightening torque and locking method are selected according to the substrate, load and manufacturer’s instructions. Structural, automotive, electrical, gas, plumbing and other safety-critical joints should be left to a qualified person.
Today, Savo Kusić is focused on wooden windows, wooden-aluminum windows, custom windows, doors and requests for quotation. This article remains a historical archive and does not constitute an offer to sell screws, tools or home repairs. The previous link to the internal sales application was intentionally not transferred to the new public site.
How to drive screws into wood
It is often necessary to drive a suitable screw into the wood, whether it is brass or mild steel. The original text emphasizes that the screw should not be hammered almost all the way in, and only then finished with a screwdriver. Such a procedure damages the thread and the fibers of the wood, which is why the joint does not hold as intended.
As a historical procedure, it is described that an awl with a conical tip is used to make an initial opening into which the screw enters approximately one-third of its length, and then the work is continued with a screwdriver. For hardwood, a manual needle drill is mentioned up to approximately half the length of the screw and with a diameter approximately half the diameter of the screw. The text explains the advantage of awls by pushing fibers instead of removing chips.
If screwed in immediately without an initial hole, the hardwood screw may stop progressing or crack, especially when it is brass or smaller in diameter. Extracting the broken part can then be very difficult.
A pilot hole is not a universal formula: historical depth and diameter ratios cannot replace manufacturer data. The pilot hole depends on the screw core and thread, the wood species and grain direction, moisture content, distance from the edge, splitting risk and required load capacity. Do not use an impact tool, the wrong bit or force when the screw stops advancing.
To reduce the effort when driving a screw, the source text mentions lightly coating the thread with soap, especially for brass screws. The explanation is that soap reduces friction between the screw shank and the walls of the hole.
Lubricant and finishing: soap is historical advice, not a universal recommendation. It may be incompatible with the material, coating, adhesive or corrosion-resistance requirement. Use only a lubricant approved by the screw and assembly manufacturer.
Screws that no longer hold
When a wood screw is pulled out, then rotated in place when re-torqued, the thread bed is expanded or crushed. Inserting matches or toothpicks into the hole is described in the text as only a short-term solution.
As a stronger historical procedure, a mixture of glue, window putty and hardwood sawdust, pressed into the bed with a thin object, is mentioned. The screw is then twisted without additional pressure and left for several days until the mixture hardens.
If that procedure fails, or the joint is in chipboard, the text suggests widening the hole to 5–6 mm, inserting a hardwood plug coated with glue, drying and making a new starting hole. A larger parallelepiped-shaped insert is also described for the chipboard joint that carries a larger load.
With a hinge attached with a series of screws directly into the plywood, it is mentioned that the hinge is moved so that the screws fit into the new sockets. A screw with a larger diameter or a slightly longer length is also mentioned as the simplest possibility, but only when the structure of the object allows it.
Load-bearing capacity is not restored by improvisation: matches, putty, sawdust, a larger screw or local movement of a hinge do not constitute proof of load-bearing capacity. Doors, window hardware, railings, hanging elements, and any joint whose failure could injure a person requires an inspection of the substrate and an approved repair system — a dedicated insert, a new approved support, a pass-through joint, or part replacement.
Cylindrical screws
Cylindrical screws can have a hexagonal or cylindrical head, with a slot for a flat or Phillips screwdriver or a socket for an Allen key. The body can be partially or fully threaded. When joining two items with unthreaded through holes, a nut of the appropriate shape is used at the other end.
Flat-pack and modular furniture may use specially shaped screws and nuts: enlarged heads, square nuts in matching recesses or cylindrical heads with a through-hole. The parts and threads must be undamaged. Loosening and tightening often require two suitable tools, one for the head and one for the nut.
The original text warns that small screws with a diameter of 3–5 mm can be damaged or broken if tightened too much.
Tightening torque: “all the way but not too tight” is not a measure for a technical joint. The appropriate torque, tightening sequence, lubrication and screw reuse are determined by the assembly manufacturer and applicable technical documentation. A damaged thread, stretched screw or deformed head is a reason for replacement, not further tightening.
Self-tapping screws
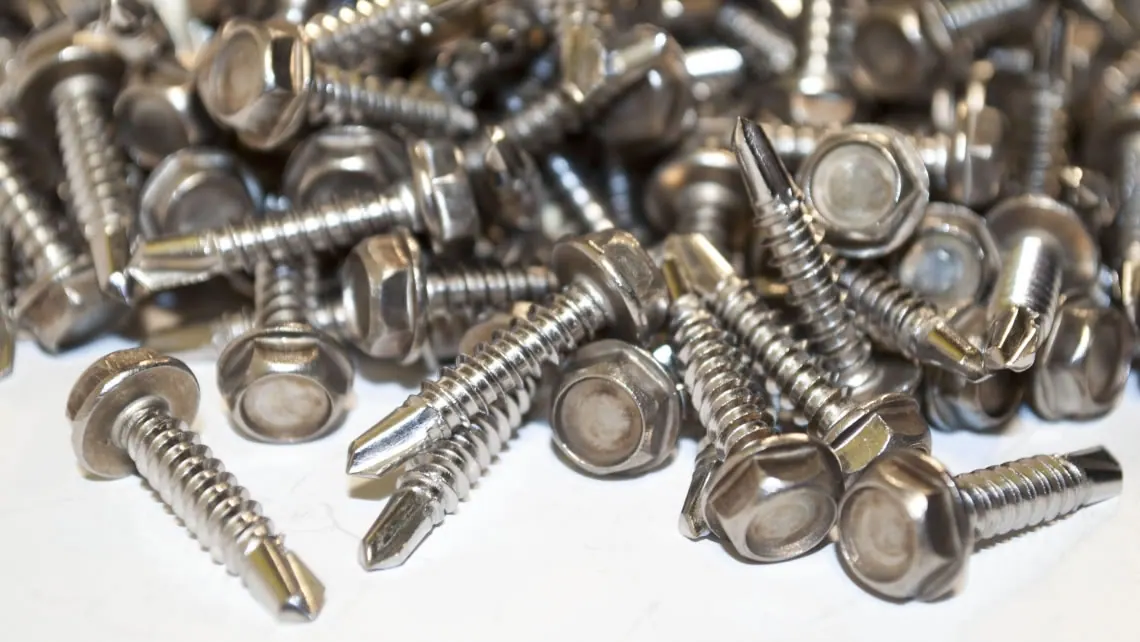
Self-tapping screws are used in appliances, vehicles and other assemblies. They are similar to wood screws but may have a cylindrical shank. In the source description they are inserted into a hole in sheet metal with a slightly smaller diameter and form their own threaded seat as they are driven.
After unscrewing, the hole may remain wide and the joint is more difficult to retighten. The historical text then mentions a screw with a slightly larger diameter, epoxy glue or, when the other side is accessible, a bent metal plate with a hole that acts similar to a nut.
Appliances and vehicles: a larger self-tapping screw, epoxy or an improvised plate must not be used as a general service procedure. Housings can conceal electrical parts, fuel, gas, cooling systems or safety components. Use only the fastener and repair method specified in the service documentation; the device must be switched off and safely isolated from its energy source.
Use of washers
The washer in its simplest form has a circular shape and an opening in the middle. The original electrical engineering text mentions small washers with an outer diameter of about 4 mm. For mechanical applications, thicknesses from 0,5 to 1,5 mm and outer diameters from 7–8 mm to 2 or 3 cm and more are mentioned.
Washers are placed under the screw head and between the nut and the object. Their role in the text is to expand the pressure zone, prevent the head and nut from cutting into the surface and facilitate clamping.
With furniture and self-tapping screws, the need for a suitable washer under the head is highlighted. Elastic, split or knurled washers are described in the text as a means of preventing loosening due to vibration.
The limited use of an elastic washer as a kind of nut for a self-tapping screw is also mentioned. In furniture, a toothed washer between two pieces of wood can help stabilize their relative position. The sequence of the described connection is a cylindrical screw, the first piece of wood, a serrated washer, the second piece of wood, a plain washer and a nut, with the note that such a connection is less efficient than the classic one.
A washer is not a universal locking method: flat, spring, toothed and other washers serve different purposes and are not interchangeable without a specification. For vibration and safety-critical joints, the locking method must be designed and confirmed for the specific screw, material, load and service conditions.
How to loosen and tighten screws correctly
For wood screws and smaller machine screws, select a screwdriver whose tip matches the width, length and profile of the drive recess in the head. A screwdriver that is too small can deform or break and damage the head. A larger flat-blade screwdriver may be used only when it seats correctly at the bottom of the slot.
With countersunk or countersunk head screws, the point that is wider than the head cannot follow the screw to the end of the seat. The wrong profile or size increases the risk of slipping and damage.
The tool must match the drive: slotted, Phillips, Pozidriv, Torx, hex and other profiles are not interchangeable. Secure the workpiece, replace a damaged driver bit and keep hands outside the tool path.
How to prevent a screw from cracking
Brass wood screws and small diameter screws can break if over-tightened, especially when the starting hole is not wide or deep enough.
If the resistance increases sharply with each turn, the source text advises to remove the screw, lubricate and try again. If the resistance remains too great, the hole is widened or deepened with a suitable awl or drill.
A smaller cylindrical screw in a blind hole can cause the body to snap without clear warning, especially if the brass screw is tightened with two wrenches. Experience is cited as a measure in the old text, but the modern technical connection requires a prescribed tool and torque.
Seized screws
With fences, gates, and larger metal objects, the screw may burn due to rust or old paint. Attempting to unscrew with only greater force often leads to cracking. If the joint is with a nut and the body is accessible, the historical text mentions cutting and replacing. Extraction from a threaded hole is described as significantly more complicated.
For a head covered in old paint, the source states mechanical cleaning, caustic soda or heating, followed by penetrating fluid or kerosene. Failing that, he describes breaking the head, drilling a smaller hole, and driving the remainder with a chisel and hammer; as a last resort, widening the hole until the body disintegrates, while trying to preserve the internal thread.
Important — do not apply dangerous historical procedures without professional control: caustic soda causes severe chemical burns; old paint may contain hazardous substances; a blowtorch, kerosene and penetrating fluids introduce risks of fire, explosion and harmful fumes. Do not heat an unidentified assembly, container, pipe, vehicle or part near flammable substances. Identify the product, isolate energy and pressure, consult the safety data sheet and provide ventilation, eye and face protection and fire controls.
Drilling and hammering the rest of the screw can damage the thread, throw off chips or move the workpiece. The part must be stably fixed, the tool centered, and in the case of a valuable or safety-important assembly, the procedure should be left to a service center with appropriate pullers and measuring equipment.
How to prevent damage to nuts and ring fittings
Do not use toothed pliers on the flat surfaces of nuts, bolts and ring fittings intended for the wrench. A fixed or adjustable wrench of the correct size with smooth jaws is required.
For inaccessible or oversized hardware, the historical text mentions placing a plasticized sponge between the serrated jaws and a soft brass or nickel-plated part, especially on a plumbing installation.
Surface protection and installation: the kitchen sponge is not a certified tool for controlled tightening and may slip. Use a suitable wrench, soft protective jaws or a tool prescribed by the manufacturer. Before working on the plumbing, gas or other installation connection, the system is identified, safely isolated and relieved, and the work is performed by a qualified person.