Today, Savo Kusić is focused on wooden windows, wood-aluminium windows, custom windows, doors and requests for quotation. This text remains an archive of home crafting and is not an offer to design or equip workshops.
Workbench and tool storage
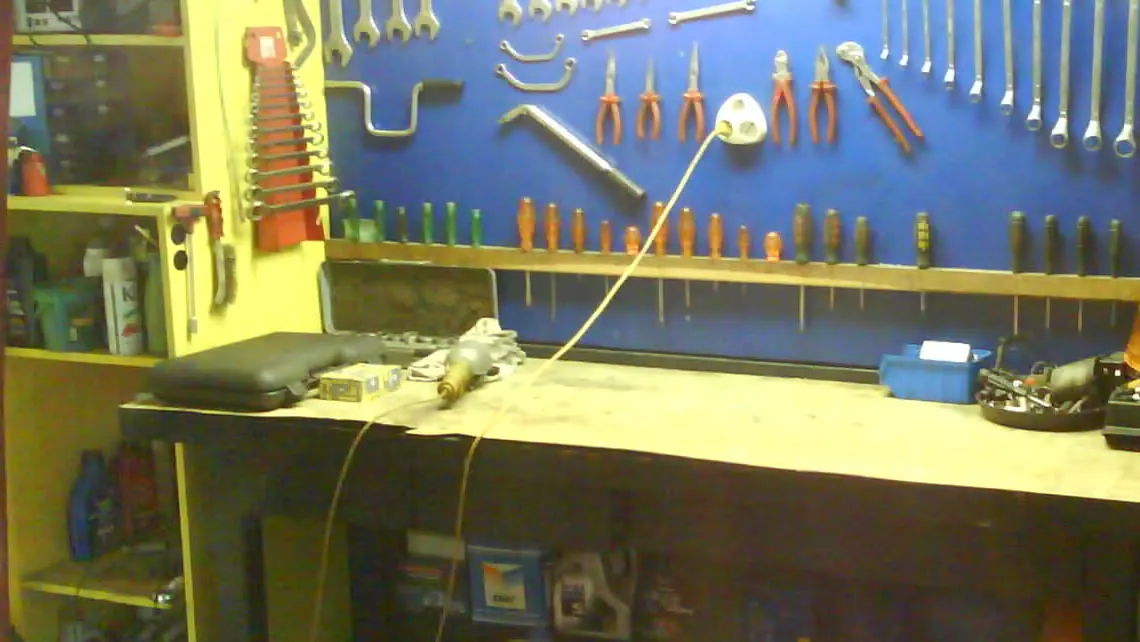
If we place the workshop in the basement, we can make the work table from rougher and stronger material (picture 1). It is best if the table rests on the wall with its left and rear edge, to which we can attach it. Smaller tools, instead of in a closet, can be placed on a bar that is mounted on the wall (picture 2). In that case, a curtain made of PVC film should be placed to protect the tool from dust and water that splashes during operation.
SLIKA 1
The drawings in pictures 2 and 3 can give us ideas on how to turn an ordinary workbench into a carpenter’s workbench, how to place tools and how to attach vertically left shelf supports.

SLIKA 2
Workshop lighting
If the natural lighting at the workbench is not satisfactory, adjustable lamps must be installed. The most suitable is a lamp with a flexible arm or a lamp with a shade and ball joint that extends like an accordion (picture 3, lower part).

SLIKA 3
Good lighting is just as important to successful work as good tools. The lighting must be good not only for the work item but also for the whole room.
Direct, semi-indirect and indirect light
An ordinary light bulb with direct light, usually hung in the middle of the room, gives even weak lighting when its intensity is high. The direct light source creates strong shadows and in front of our eyes light and dark surfaces mix with sharp contrasts. By increasing the intensity of the illumination, the contrasts increase, (Figure 4).

SLIKA 4
If we place transparent milky glass under the light source to direct the light, we get semi-indirect lighting. A significant portion of the light that illuminates the counter is bounced back and scattered from the wall surfaces, creating only softer shadows.
We get indirect lighting if the light rays from the light source do not reach us directly, but are scattered and reflected from the bright surfaces of the wall. Then there are hardly any shadows.
In order to obtain illumination of uniform intensity, we must increase the intensity of the light source in semi-indirect lighting, and even more in indirect lighting. It is best to light the room with indirect light, which illuminates the whole room evenly without strong contrasts - but the counter and work items must be lit directly. We can provide the necessary light intensity only with direct lighting.
Work objects, counters and machines should be illuminated in such a way that light rays do not enter the eyes. If we place the light source below eye level, the lighting is somewhat improved. The most favorable lighting is when the light rays are directed at the object from the direction of our eyes. Then we do not see the light source or the glare of the workpiece and avoid their harmful effect (picture 5).

SLIKA 5
For work that requires stronger lighting (for example, drafting), particular care is taken to illuminate the drawing board without the light source being visible. Glare from strongly reflected light is especially disturbing to the eyes. During drawing, such reflections also appear on fresh, glossy and raised ink lines. If necessary, at least a few minutes should be devoted to positioning the lamp correctly.
We will coordinate the lighting of the room and the counter most correctly, if we light the rooms with an indirect light source placed above eye level, and the work item, without glare, with direct light below eye level (picture 6).

SLIKA 6
Those who work with the right hand should place the lamp on the left side, so that the right hand, which is in motion, does not cast a shadow on the workpiece while working. The bright colors of the walls and ceiling also play a big role in the lighting of the rooms. The degree of useful effect of lighting in a properly lit room ranges between 15 - 45% (with indirect lighting it is lower). A degree of beneficial effect higher than 50% is hardly achieved.
With works of exceptional fineness, proper lighting is very necessary. Our drawings show the minimum, medium and maximum illumination of rooms and work objects expressed in lux (picture 7).

SLIKA 7
Finally, we give a few basic ideas for the realization of purposeful, modern light fixtures (picture 8). We will make a tabletop indirect light source from a plastic flower pot, concrete iron several decimeters long and one larger bulging pot lid. At the bottom of the pot, we place the neck of the bulb and cover it with gypsum so that the bulb, which is twisted after twisting, does not protrude from the pot. From concrete iron, we make three legs and one or two rings to cover them. We connect the legs and rings at the points of contact with rivets or soldering, and then place a pot in the middle. We fasten the cover with a screw to the flat and perforated upper ends of the legs. We paint the inner surface of the lid with a light-shiny color, because it reflects and scatters light. We paint the stand with a color that matches the color of the lamp.
Reflection of light from fluorescent tubes can be arranged with a suitably long piece of guttering that is first closed at both ends. These ends are fastened with wing nuts to the fluorescent-tube brackets.
The light source, which gives indirect light, can be made from two connected conical metal objects soldered to each other with a concrete iron holder. The light beam director should not stand upright, but with the lower part slightly inclined towards the wall, so that it also casts light downwards, onto the walls (fig. 8).

SLIKA 8
And finally, it is important to know that the higher consumption of indirect light sources (as opposed to direct ones), which is reflected in increased amounts of electricity bills, is offset by the preserved health of our eyes.
Making and strengthening the work table
If there is enough space, we can place two work tables of the same height next to each other in the workshop. On the left side of the table should be a carpentry bench and a vise bench, and on the right side, a metalworking workbench, equipped with vises and possibly an anvil.
The most important feature of the workbench is strength. It doesn’t matter if the desk is unsightly and bulky. It is only important that it withstands the pressure of great forces during operation. If we turn an ordinary table into a work table, we must strengthen its joints. The easiest way to strengthen the table is to fasten a strong reinforcement frame made of boards (thickness 10-20 mm, width 80-100mm) around the frame that includes the upper ends of the legs. Joining with nails isn’t enough. It is better to use a wood screw, preferably a steel screw with a nut, because they can be tightened if they become loose (picture 9, part 1).
After reinforcing the upper part of the table, we fix the legs with diagonally placed slats of similar dimensions. The crossbar for fixing the side legs should have a fall towards the rear leg, and for fixing the back of the table, a fall from the right to the left leg as seen from the front (picture 9, part 2). If we also install a diagonal connection fixed with screws from the front, this connection should go from left to right downwards. If the crossbar is on the front side of the table, it is often in the way, and therefore it is best to fix the legs from the side using horizontal slats, which we connect with double parallel longitudinal supports similar to a ladder (picture 9, part 3).
It is also very important that the table top is flat, strong and thicker. Sometimes it is necessary to increase the thickness of the plate or replace it with a stronger one. It is not enough if only the board is solid, it is necessary that it is well fixed. This is most easily achieved using wooden roller plugs 1-1,5 cm thick, which we insert over the plate into the vertical middle axis of the leg (picture 9, part 4)·

SLIKA 9
If we can’t get 2,5-3 cm thick boards, then we use two thinner ones that we glue together with glue, then we fasten them with screws and mount them together on the frame.
Accessories for planing and long workpieces
During planing, the boards must be supported. The table nest is of great use, i.e. a 4x4 cm opening that we cut into the table top, six centimeters from its left side edge, and 10 cm from the front (picture 9, part 5). The iron support of the counter, which is often not made of iron but of a hardwood lath with a section of 3,5 x 3.5 cm, can be inserted vertically into this opening. On one side of this support, we attach a bent strip of L-shaped steel sheet, 2 mm thick, with screws, whose cantilevered end is cut in the form of a dovetail. By pressing the planing board against this support with two spikes, we can work it without the danger of it moving to the side. On the other side of the support, we fasten a flat steel spring with an inclined washer using a screw. This spring prevents the unloaded support from dropping into the nest, i.e. holds the support in a certain raised position (Fig. 10, part l).

SLIKA 10
We can also make another tightening device that we will attach with screws to the front left side of the table top. The support should be made from a piece of hard beam, which we must fasten so that its beveled side faces the front edge of the table. Planks whose edges we plane can be fixed in this slanted slot, which would twist if they were supported with an iron support. In this way, we can also plane the boards that are placed vertically (picture 10, part 2).
If we are processing the thinner side of a long board than a large one, we use wooden support beams, which are pulled out from under the table top. These beams have a section of 6 x 6 cm, and can be inserted between the table top and an additional support plate away from the table top 6,2-6,5 cm. If necessary, we pull out the beams to the required length and place the board we are processing on them (picture 10, part 3.)
To process long objects, legs are needed, the best of which are those whose height can be adjusted (picture 11, part 1).
It should also be emphasized that it is necessary to cut a groove, 5-10 cm deep and 12 cm wide, along the entire length of the front edge of the table top, because it can accommodate tools that we do not need for a while.

SLIKA 11
Finally, we show a simple tool box that we can stand on. We can also take this box to other workplaces in the house (picture 11, part 2).
Mengele and safe work
The vices used in metalworking, based on the general requirements, should not be separated from the carpentry bench. They must be solid, strong and able to withstand pushing and pulling forces (eg filing). It is necessary to cover the mengel plate with a metal or PVC plate with a thickness of 0,5-1 mm. It should be flat and suitable for easy removal of oil and dirt. Plastic material is suitable only if we do not weld, solder or heat on the work table, and this means that this coating should not be exposed to strong thermal influences.
Parallel-jaw vices are used to hold workpieces. When buying one, remember that a larger vice can hold smaller objects, while a smaller vice cannot hold larger ones. For household use, vices with jaws about 100 mm wide are most suitable. It is best to attach the vice to the front-right part of the workbench, near the legs. A well-positioned vice keeps the workpiece at a comfortable working height.
Hand vices are used when the workpiece is held in the hand. Another useful addition to the bench vice is a small anvil on which objects can be hammered and bent. The anvil should be fastened above one of the table legs, because otherwise its weight and impact may damage the workbench assembly.
Vices should be handled carefully. Workpieces should always be clamped in the middle of the jaws. If the length of the object makes this impossible, a piece of the same thickness should be placed at the other end of the jaws. This prevents deformation of the vice spindle.
Mengele can also be used as a small anvil if there is a slot on them for straightening.
An important part of the vice workbench is a strong drawer secured against falling out, used for the most frequently needed tools and measuring equipment.
The text and drawings are transferred from a historical source and are not a project of the workshop, electrical installation, lighting, ventilation or fire protection system. Basement space can have moisture, insufficient ventilation, dust, flammable materials and increased electrical hazards. Do not improvise mains connections or lamp protection; electrical work should be carried out by a qualified person. Use machines only with proper guards, suction, personal protective equipment and according to the manufacturer’s instructions.