Archival and safety context: the text preserves a historical description of tools, measures and procedures, but is not an assessment of a specific construction site or a substitute for the manufacturer’s instructions, training, work plan and applicable regulations. Before demolition, drilling, cutting or carving, electrical, water and gas lines must be located and construction and materials must be checked. Old mortar, concrete, brick, insulation and coatings may contain respirable crystalline silica, asbestos, lead or other hazardous substances. Dust control, appropriate protection for the eyes, hearing, respiratory organs, hands and feet, a stable work area and tools intended for the specific job are required.
Today, Savo Kusić is focused on wooden windows, wooden-aluminum windows, custom windows, doors and requests for quotation. This article remains as a historical archive and does not represent an offer of masonry work.
Hammers and impact tools
All hammers, heavy or light, have two basic parts: a hammer, with a hole in the center, and a handle that fits into it. The bat is usually made of steel and the handle is made of wood. The wood must be very hard and smooth, so that it does not crack and cause blisters on the hands. In order to avoid the risk of injury, check that the handle is firmly inserted into the piston before use. In higher quality tools, the ram is attached to the shank with a pin or steel ring. For hammers where the handle is only rammed, we can fix it better by hammering in an iron or wooden peg, or a couple of larger nails.
Important: Improvised nailing is not a universally safe fix. A cracked, loose, or improper handle and damaged piston should be removed from service and repaired or replaced according to the manufacturer’s instructions. Before work, the surface of the piston, the protectors on the chisel and the safe swing zone are checked.
When using it, it should be kept in mind that the hit is stronger if the handle is held closer to the end, and vice versa, by holding the handle closer to the club, lighter and more controlled shots can be made.
Heavy hammers
Mallets, a type of heavy hammer, are of considerable weight and have a fairly long handle (about 80 cm) in order to make the blows as powerful as possible. Care should be taken to handle this type of tool to avoid injury. It is used most often to break solid material, and less often, it can also be used to hit a masonry chisel.
The mace has a much shorter handle and is much smaller and easier to handle than the mallet. Bat weighs one to two kg and is cube-shaped. When used with the appropriate tool (chisel, hole punch), it is quite sufficient for breaking medium-sized objects, for punching holes in walls, for cutting harder objects.
Mason’s hammers
A mason’s hammer usually weighs around 500–600 grams and is used for chiselling, cutting bricks and stone slabs, driving nails, etc. A 400-500 gram carpenter’s hammer can be used as a substitute. In a mason’s hammer, the face of the hammer is like that of other types of hammers, while the nose is very sharp and flattened in the form of a curved chisel. There is also a type of mason’s hammer similar to a small pick, which has a blade and a spike on the other side.

Drinks
Pickaxes can have two pointed tips on either side, or one side is pointed and the opposite side is flattened and sharpened. This last type is a classic mason’s pick because it allows the effect of the blow to be changed as needed. It is used for excavations, for breaking floors, various substrates and others.
Hole punches and masonry chisels
Punches and mason’s chisels are steel tools, round or octagonal in cross-section and 20 to 60 centimeters long. With a hammer, they are used to drill holes, chisel, etc. Drills made of special steel are used for drilling particularly hard materials. A chisel with a wide blade is used to cut bricks or stone slabs.
When handling the tool, we must hold it firmly, otherwise it will slip out of our hands after a hammer blow. The angle at which we hold it is also very important: it should be slightly inclined in relation to the surface we are working on, because otherwise the blow returns back along the axis of the tool. That’s why we always start with lighter shots.
Safety when working with impact: do not use chisels and punches with a “mushroom” head, cracks or a damaged blade. The material and path of hidden installations should be determined before impact; Pieces can fly at high speed, so eye and face protection and keeping other people away are mandatory.
Mortar, earthworks and transmission tools
Trowels
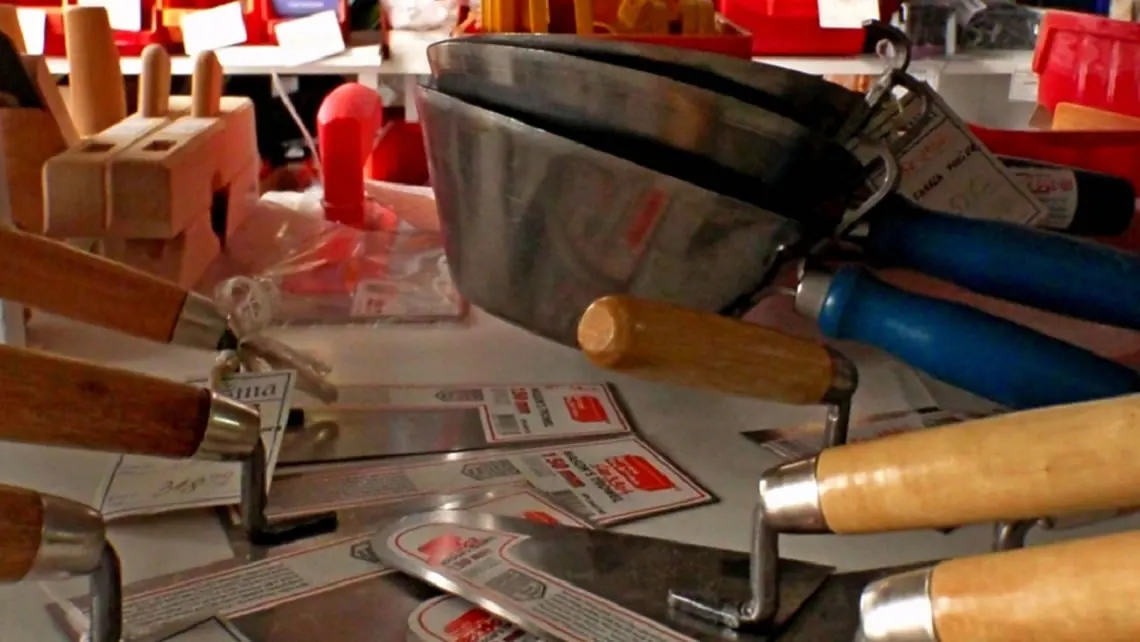
Trowels (mason’s trowels, spatulas) are steel spatulas with a curved handle, which are used for scooping and pouring mortar, and for preparing the mixture in smaller quantities. Depending on the type of work, this or that type of trowel is used. When building walls, those with a rounded top are the most suitable, because they are the easiest to fill the spaces between the bricks. A trowel with a cut-off or square tip is used for applying mortar because it can capture a larger amount of the mixture thus speeding up the work. Finishing touches and grouting require small narrow body trowels.

Irons and a board for holding the mortar
The trowel is produced in several dimensions, for rough and fine alignment of plaster. The largest ones are used for the first leveling and are not as elongated as the trowels for fine processing of plastered surfaces. They are made from both wood and plastic.
Medium size irons (10x20 and 15x45) are rectangular, elongated and have a handle on the back. They are also made of wood, plastic or steel, which are used especially when coating with plaster.
The smallest trowels are square (10x10 or 15x15 cm) and we use them to smooth the last layer of plaster. We first wet the surface of the plaster with a brush, and then iron it. There is also a sponge iron with which we can wet and iron at the same time. The plaster board is square (30x30 or 40x40) and has an extended cylindrical handle on the back. We use it instead of a mason’s fork when plastering walls and ceilings.
Ash’s
Ashes are most often made of wrought iron or pressed sheet metal (the latter are certainly less solid and resistant). They are used for excavating the ground and transferring materials over short distances, or for loading loose cargo into a means of transport. They have very sharp points and easily penetrate the ground being excavated. Aches with a flatter tip remove material better because a larger amount can be lifted at once. You should know that handling an ace (and shovels in general) is all the more difficult if we hold our hands closer to each other. That’s why we should grab the handle with one hand as low as possible, and with the other hand, grab almost the very end of the handle.
Buckets and tubs
Buckets are used to transfer and hold any bulk material, including mortar when it is not prepared on site. If necessary, small amounts of mortar can be prepared in them, using a trowel for mixing. They are made of iron or plastic, with the plastic bucket being weaker, but therefore lighter and more practical for amateur work.
Shallow and wide tubs are used to hold or prepare mortar in smaller quantities. Metal and plastic tubs are more suitable for cement or lime-based mixtures, while wooden ones are primarily used for plaster-based mixtures.

Sita
Sieves, wooden or iron, are usually sold with multiple meshes, which makes it possible to use denser or less woven meshes as needed. We sift different material through them, we separate larger grains from smaller ones. We mainly use them for sanding, but also for removing lumps from the mortar mixture, especially when putting the last layers on the walls. Special pitchforks for gravel can serve the same purpose. At the same time as transferring the material from one pile to another, we separate the smaller ones, while the larger material is separated into another pile. Pitchforks can also be used for dry mixing of various mixture components: cement, sand, lime.
Pliers and scissors for cutting metal
Pliers are not a specific masonry tool, but they are necessary for various carpentry works, for repairing wooden elements, etc. Combined pliers are the most suitable, because they can be used in the largest number of cases: for holding the object to be processed, for bending sheet metal, for cutting or bending thinner wires, for removing nails. Carpenter’s pliers work best when removing nails or studs from wood. Rebar pliers, with slightly smaller jaws, but longer handles, are used for bending and cutting sheets, iron bars, for extracting larger nails. Scissors for cutting metal are not necessary as they can often be replaced by good carpenter’s pliers, or a chisel and hammer. The simplest models are similar to ordinary larger scissors. They can be used to cut metal nets, iron bars, sheets with a thickness of 8 to 10 mm. Lever shears can cut bars of all thicknesses.
Note: claims to cut 8 to 10 mm thick sheet and “all thickness” bars are carried over from a historical source and are not a tool specification. The capacity is checked exclusively on the label and instructions of the specific model. The wrong tool can break, slip or throw out the cut piece; the workpiece must be stably supported, and hands out of the cutting path.
A trolley
Carts (points) are made today of iron, plastic and wood, with a rubber wheel.
They are used to transfer bulk or solid material. If we know their volume (most often from 50 to 70 liters), they can also be used to prepare mixtures.
Bending, ropes and hand cutters
Plate for bending iron bars
This iron bending machine is actually a flat, square, steel plate with three protruding rollers. The iron rod is placed at one end between two rollers that hold it, and is bent around the third, using a special tool.
For bending iron rods with a diameter of 6 to 8 millimeters, we can make a practical device ourselves, if we drive three large nails in the same arrangement on a piece of thicker board. Ordinary carpenter’s pliers can also be used for bending.
Important: the improvised device made of boards and nails has no proven load-bearing capacity and can fail suddenly. For reinforcement and bars, use a dedicated tool of suitable capacity, stably attached according to the instructions, with control of the return movement of the material.
Ropes
Ropes are the simplest means of lifting or lowering a load of less weight when the difference in height is not great. A hemp rope with a thickness of 8 to 30 millimeters is sufficient for manual lifting.
A good rope, in addition to being durable, should also be flexible. This property depends on the material and the number of fibers in the braid. If we want the rope to last a long time, we should wash it in fresh water and leave it hanging from a hook or peg. Before use, we should check that the rope can withstand the load and that it is not cracked anywhere. If the rope seems too thin, we can use it by doubling it, if the length allows. When connecting two or more ropes, the knots must be such that they do not buckle under stress.
However, two tied ropes cannot withstand as much as one whole rope of the same diameter. The most common noose knots used by masons are: tension hangman’s noose, man’s knot and mason’s noose.
Lifting loads: rope diameter and visual inspection are not sufficient to determine load capacity. For lifting, use certified equipment with a readable working capacity, appropriate connections and a lifting plan. Do not stand under a suspended load and do not use nodes that are not intended and checked for a specific system.

Visak
A plumb line, as simple as it is necessary, serves to establish the vertical at each point. It consists of a single weight (lead, iron), pointed at the bottom and tied to a thin string. Under the weight, the string becomes taut and always stands vertically. When using it, it should be remembered that when we want to control the verticality, for example of a wall, or a part of it, we usually take something for comparison (benchmark), some edge, which we assume is vertical. We hold the plumb line still and completely against the wall. Before we compare whether the string is parallel to the edge (benchmark), we need to wait for the plumb line to settle completely.
Saws
A carpenter’s saw, with a wooden frame and a thin, adjustable blade, allows for very precise cutting. However, a regular one-handed bandsaw is quite sufficient for smaller scale jobs. With masonry work, no special sawing skills are required. We just need to keep in mind that we use the saw on “jerk”, i.e. pulling her towards him. In order to maintain the line with longer cuts, we always start with the leaf in an almost horizontal position.
Glazier’s knife
The most common and cheapest type of glazier’s knife has sharp hard steel wheels on one side, which allow the glass to be cut thinly and the knife to be drawn along the desired line, possibly with the help of a metal ruler. It is necessary, for good operation, to replace the wheel as soon as it loses its sharpness. The most modern knives have six wheels mounted on one rotating disk, so they can be changed easily. At the end of that disk with knives are notches of different thicknesses that are used to tear off pieces of glass that might remain after cutting. Glass cutters use a knife with a diamond tip, which is much more expensive but also better than the usual type of glazier’s knife.
Knife for cutting tiles
The tile cutter has a very sharp, “vidia” blade, with which we can cut the ceramic tile glaze without cracking it. We use it, as well as a glass knife, so that we go over the same line several times until we penetrate to the bottom of the glaze. Then we can already cut the tile in half with our hands.
Cutting glass and tiles: use a tool designed for the material, a stable surface, eye protection and cut-resistant gloves. The piece does not break with unprotected hands; chipped edges and dust are controlled and safely disposed of.

Measuring and marking tool
Almost every work requires measurement and marking, and the tool used for this purpose should be the more precise the smaller the tolerance limits. However, for the work that we usually do alone, the simplest one is enough. A carpenter’s folding meter is usually divided into five or ten sections 20 centimeters long. It is usually made of wood, but also of plastic and aluminum.
It is a much smaller metal measuring tape, rolled into a round or square box, from which it can be pulled out to the desired length. After use, it is automatically rolled back into the box. Due to its high flexibility, however, it is not the most suitable for vertical measurements.
A cloth tape measure is used to measure longer sections. The tape, made of stronger canvas or nylon, 10 to 20 meters long, is wound on a single wheel in the box. After use, the tape is easily returned by turning the wheel with one handle.
The spirit level with an air bubble is the most commonly used instrument for measuring the horizontality of vertical or horizontal surfaces. It consists of a glass or plastic tube containing a liquid with an air bubble. The spirit level is generally made of wood or aluminum, and is 30 to 40 centimeters long. There are usually two or three more tubes in such a position that both the vertical direction and the direction at an angle of 45 degrees can be read.
When the level is tilted to one side, the bubble moves to its highest point. The spirit level is horizontal when the bubble is in the center of the tube, which is marked. When we want to control the horizontality of longer sections, we place the instrument on a sufficiently long measuring rod. To determine if a surface is horizontal we will repeat the measurements along the main lines - along the diagonals and the perimeter (circumference).
Masonry laths, of constant and regular section, are made of wood or aluminum. They are very precisely processed and are difficult to deform. They are used in many masonry works: for leveling plaster on walls, as guides when making edges, when leveling floors and substrates, as a support for marking.
The special flattened shape of the mason’s pencil makes it more resistant. The flat lead makes it possible, among other things, to leave a fairly fine mark even after use on rough materials.
Lifting and mechanical preparation of the mixture
Lever and reel
The crowbar is one of the oldest and certainly the most famous tools for lifting a load. It is actually a steel bar (crow) that is pushed under the object being lifted. By exerting downward pressure on the opposite end of the bar that rests on the support, it is possible to lift even very heavy objects, to a height sufficient to place holders or rollers. The steel bar is from six feet to six feet long. One end is rounded in the shape of a nail, and it makes it easier to insert the lever under the object to be lifted. A reel is a grooved wheel that rotates around an axle fixed to a steel frame. An iron hook, attached to the same frame, serves to hang the reel on any suitable support. To lift an object, a rope of suitable diameter is passed through the groove and one end is tied to the load and the other is pulled by the hands. The effort is the same as a rope-only lift, but the lift is made easier by being able to do it from both the top and the bottom. In addition, the work can be made easier by resorting to a system with two or three reels.

Important: reel carrier, hook, rope, lashing and all connections must be dedicated and have sufficient marked load capacity. A cargo path plan and no-person zones are required. The lever can slip or throw off the support; the load is not secured by the body and is not left resting only on the lever.
Mixers
A mixer is a machine that is used to prepare the mortar mixture and especially for making concrete. In addition to the usual ones, which are used in the construction industry, much smaller mixers are also made, which eject up to two cubic meters of mixture per hour. The components of the mixer are a round vessel - a cauldron - that can be tilted to the side, and a small electric motor that can be connected to a 220 volt household electrical network. The motor rotates the boiler and at the same time the paddles attached to it. The whole mechanism is mounted on a steel base with rubber wheels, for easy moving. The fact that the boiler tilts to the side makes loading and especially unloading easier. The prepared mixture can thus be poured into a trough, or directly into already placed molds.
The good sides of the mixer come to the fore when preparing significant quantities of mortar or concrete, such as when plastering walls, concreting floors, etc. In addition, the mixer not only saves energy and time, but also the mixture is more homogeneous, and therefore the work is done better.

Electrical and mechanical safety: historical 220 volt mains reference is not a connection guide. The mixer must have the correct cable, grounding and protection provided for a wet construction environment, and the connection should be protected by a suitable differential device. Switch off and secure the machine before cleaning or removing jams; hands, clothing and tools must not enter the movement zone while power is present.
Sprinkler
A sprayer, as the word itself suggests, is used to apply mortar by spraying. It is a metal box with a handle and an opening on one side. Inside the metal box is a roller, which is turned with the help of a handle and on which numerous elastic metal plates are attached as combs. When we put in some mortar and start turning the handle, the metal plates push the mortar hard against the wall, which should eventually be sprayed evenly. The thickness of the plaster applied depends on the speed at which the handle is turned and the distance of the sprayer from the wall. It is best to first check the final appearance of the work on a part of the wall.
Final note: choose the tool according to the material, the declared capacity and the working conditions. Before use, check the condition, the protective parts, the working area and the manufacturer’s instructions. Dust, noise, flying parts, electricity, manual lifting and working at height require special precautions that this historical overview cannot replace.