Important health, safety and regulatory notice: This is an archived educational text from 2017. year, and not a project, a valid technical standard or an instruction for the construction of water supply, sewerage, septic system or electrical grounding. All original measurements, flows, diameters, drops, materials, distances, connection methods and claims are transferred without checking according to today’s regulations. Do not apply historical grounding instructions over water pipes, asbestos-cement pipes, lead, DDT, minium, makeshift repairs, or pipe thawing. Work with asbestos and other dangerous materials belongs exclusively to authorized experts; DDT may not be used under this text. Drinking water, waste water and protection against electric shock must be designed, approved and carried out by the competent utility service and authorized plumbing, sanitary, geotechnical and electrical experts, according to the specific facility and location.
Water, sewage and septic installations are not part of the new public offer of Savo Kusić. The current focus is wood windows, wood-aluminum windows and custom doors. For a specific window or door project, you can send a request for quote.
Domestic water supply and sewerage
When a piece of land is said to be communally settled, it means first of all roads, then electrification, then water supply and finally, sewerage and the possibility of connection to central heating.
There is almost nothing the landowner can do to improve the roads, and electrification will be discussed another time. That’s why now we will only give information about water supply and sewerage, and the most important ones.
After we have finished the walls and roof of the residential building or weekend house, it remains to implement the plumbing and sewage system, which can cause us a lot of worries. We can solve the water supply relatively easily and cheaply if there is a water supply network on the street. However, we have to handle the complete plumbing installation on our land and in the house ourselves.
Water meter and water supply network
The general regulation dictates that the manhole for the water meter be made at a distance of 0,5 m from the boundary edge of the land. This manhole should be the lowest point of the home water system because during repairs water is lowered into it and collected in it. The dimensions of the shaft are: width 80 x 100 cm, and depth 130 cm (fig. 1). The manhole cover must not wobble or leak water, and if possible, its thermal insulation should be provided. Stairs must be installed to access the water meter, and permeable taps must be installed in front and behind the water meter. It is necessary to “bridge” the finished faucets with a soldered copper wire, because usually the water network is used for grounding electrical appliances, and it will be perfect only if we exclude the possibility of oxidation.
The previous statement about grounding through the water mains is conveyed purely as historical content and must not be applied. The protective earthing must be solved by an authorized electrical expert according to the applicable rules.

Image 1
The water pipe in the free space should be placed at least 1,20 m below the ground, which means below the freezing point, and outside, on the wall, every 2 m should be fixed with clamps. The distance between the hot water pipe and the cold water pipe must be at least 16 cm. The hot water pipe comes from the upper side, and for horizontal installation from the outside (picture 2).
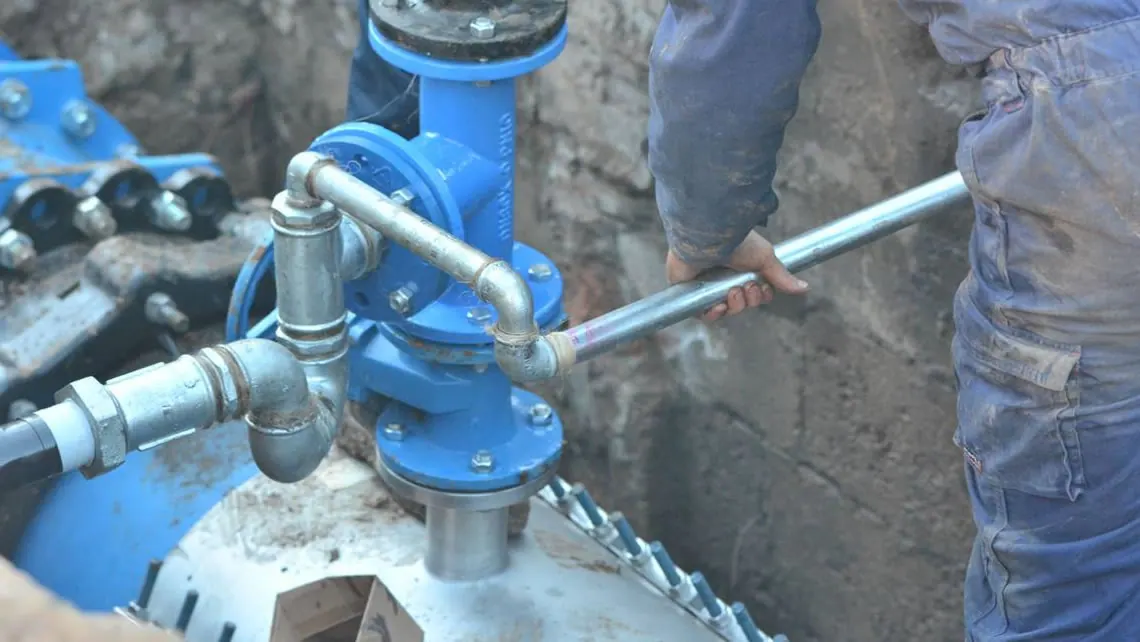
Today, steel pipes are mostly used for plumbing purposes, and cast iron fittings in the form of T, V, Y, L and U are used for branching and changing directions (picture 2).

Image 2
The pipes should be cut to the desired length with a saw and with the help of a thread (threaded valve) a thread is cut on their ends, which is controlled by means of shaped parts. Then seal them with a strand of tow soaked in tallow, join them, clean the joint from excess tow, apply minium and wrap it with a felt cord.
Source data on the amount of water and pipe diameters
For family buildings and cottages, it is usually sufficient to drain the water from the water meter using a one-inch pipe. The cross-section of the other parts of the network is determined based on the water demand in the discharge pipes.

Image 3
The daily need for water per head is: for drinking 3-5, for cooking 4-5, for washing 8-12, for washing 10-15, for showering 40-50, for bathing 150-250, for toilet flushing 8-10 liters (fig. 3). For watering, 2 liter per square meter is needed. For the wall faucet, the discharge of 7 liters of water per minute and the pipe diameter of 3/8“, and for the sink 12 liters and the pipe of 1/2“, for the bathtub 20 liters and the pipe of 1/2”, for watering in the garden 50 liters and a pipe of 3/4”. If the number of discharge pipes is 1-2, then the diameter of the water meter pipe should be 1/2“, if the number of discharge pipes is 3-6, the pipe diameter should be 3/4“, and if it is 7-25, then a pipe of 1” (fig. 4).

Image 4
It is recommended to install drain taps in several places in the network so that, in case of need, individual verticals or the entire domestic water network can be emptied (fig. 5). When repairing steel pipes, the damaged part should be replaced. First, the damaged part is emptied, then the part of the pipes or the shaped part is made and replaced. Smaller damages can also be repaired in this way if we smear the crack with bitumen and portland cement and place felt, rubber or plastic on this and tighten it with a clamp. If the pipe freezes, then the ends should be heated with hot water first, because if the middle part of the pipe were heated first, the water would turn into steam and, due to the ends being blocked with ice, the pipe would splash.

Image 5
Connection to public sewage
Complete comfort is obtained only by draining waste water, i.e. sewage. This is a relatively easy task if the building is built on an area where sewers have already been built. It should be known that public sewer pipes are usually installed in the middle of the roadway. The part from the public sewer pipe to the fence of the building is called the house connection and this part should be made by the owner himself. From the fence, or boundary edges of the land, the house sewerage begins. The house sewer and the house connection should have a drop of 1-2 degrees to the public sewer, so that the connection of the house connection and the collection pipe of the public sewer is at 1/3 height of the collection pipe (fig. 6).

Image 6
The following passages mention asbestos cement pipes, lead and other historical materials. The references are kept for faithful archiving, but they are not a selection of materials or work instructions. Do not cut, drill, break, remove or reuse material that contains or may contain asbestos.
Domestic sewage pipes must have an internal diameter of at least 30 cm. For these purposes, asbestos-cement pipes are mostly used, which can be easily cut with a saw and, due to the expanded shape of the ends, easy to join. The end caps are sealed with tow and after joining, they are smeared twice with bitumen and covered with bitumen cement. Asbestos-cement pipes (eternite) for connections, similar to water supply steel pipes, are made with shaped elements, forks, connecting and other elements. The length of the pipe ranges from 0,5-4 m, the inner diameter from 0,05–0,5 m, and the wall thickness proportional to the diameter is from 6-13 mm. The connection pipe, which leads to the main collection pipe, is placed at a depth of 1,2-1,5 m to avoid the risk of freezing. It is advantageous if the asbestos-cement pipe is not placed directly in the ground, but in a brick channel, U-shaped, in which dry sand is filled before placing the pipe.
The sewage system should be dimensioned depending on the expected amount of waste water. Ordinary wall taps release 1/3 liters of wastewater per second, sinks 2/3 liters, sinks 1/6 liters, normal bathtubs 2/3 liters, and toilets 1-2 liters. Correspondingly, the inside diameters of the drain pipes are in the order of enumeration 50, 50, 40, 50 and 100 mm (see fig. 4 right side). Parts of the sewer network from the outlet to the main sewer pipe represent the so-called the horizontal network, and the vertical parts - vertical lines. The horizontal main should also be built with a gentle slope to the vertical line.
Some vertical lines are extended to the attic space with ventilation pipes. In addition to ventilation, ventilation pipes also provide the required amount of air in the network and prevent the creation of vacuum and water plugs that prevent drainage.
A water seal (siphon) should be installed under each sink to eliminate unpleasant odors. Siphons are made of lead, cast iron, eternite and plastic (fig. 7).

Image 7
Pipes of horizontal and vertical lines are made of asbestos cement (eternite), lead, cast iron or plastic. Plastic pipe can only be used where there is no hot water, because plastic deforms under the influence of heat. Plastic pipes are joined by welding or gluing. The advantage of plastic pipes is that they can be bent well after heating.
Historical description of clarifiers and purifiers
The following description is not a septic system project or proof of safe wastewater treatment. The location, watertightness, capacity, discharge, ventilation and protection of groundwater must be determined by competent authorities and authorized experts.
In an area where public sewage has not yet been solved, it is much more complicated to solve the waste water drainage of family buildings and cottages. It is best that the so-called “clean” waste water (water from the sink and bathtub) and water from the toilet and sink into special sedimentation tanks, or purifiers. A clean wastewater clarifier can consist of two wells placed next to each other, built from well rings. In the first one we introduce waste water relatively high, and on the other side by 10 cm lower, we place a discharge pipe through which we introduce waste water into the second well. On the second well, similar to the first one, for 10 cm lower, we place a discharge pipe through which we drain the now purified water in the garden, installed and drilled drainage pipe. (picture 8). Wastewater solids settle in the wells, which, if filled, can be emptied by removing the lid. Precipitators should be placed at least 20 m from drinking water wells and in the opposite direction to the direction of groundwater flow (fig. 9, upper part). Waste water from the kitchen can be settled with at least three clarifiers.

Image 8
In an area without public sewage, it is best to build a separate toilet. We will build it relatively easily from standard elements - well rings and standard covers.
A layer of clay with a thickness of 15 cm should be placed under the lowest ring, which does not allow water to pass through. The inside of the rings is plastered with waterproofing mortar, and a ventilation pipe leads from the space under the seat to the roof. The toilet can be cleaned from the outside through the lid. The toilet should be painted inside and out and periodically sprayed with a disinfectant containing DDT (fig. 9, lower part).
The previous allegation about DDT is historical and must not be applied.

Image 9
Before building a domestic water supply system and a domestic sewage system, it is necessary to obtain the appropriate building permit from the competent authority. On that occasion, information can also be obtained about local regulations regarding the installation and construction of wells, clarifiers, etc.