Today, Savo Kusić is focused on wooden windows, wood-aluminum windows, custom windows, doors and requests for quotation. This text remains as a historical technical archive on wallpapering works and is not a current offer of wallpaper, adhesives or performance of painting and wallpapering works.
Preparation of the room, wall and wallpaper
Among the many good features of wallpaper, the most important one is that the walls covered with wallpaper are more durable, they can be cleaned and therefore - despite the apparently high price - they are cheaper.
While painting is an everyday, so to speak, technology known to everyone, covering walls with wallpaper is less well known. Of course, there are certain technical reasons for this. Namely, wallpapers are only permanent on completely dry walls and only decorative on completely flat walls.
First we need to measure the length, width and height of the room we want to wallpaper (4 side walls and the ceiling) and calculate the area, deducting the areas of doors and windows.
It is very important to know that only completely dry rooms are rationally covered with wallpaper! Damp wallpapered walls will become stained over time and the wallpaper will separate from the wall.
Let’s choose the pattern and quality that best suits our taste (at the same time, we can also choose plastic wallpaper).
We need to buy “Tapetol” “Tap” (or other) adhesive for wallpaper. The method of use and the ratio of mixing with water are explained in text on the box.
First of all, we need to arrange the furniture in the middle of the room. Let’s pay attention to the fact that as little furniture as possible remains in the room, because when covering the ceiling, it will be necessary to reach the entire width of the wallpaper of 50-70 cm. Furniture, which remains in the room, should be carefully covered.
After this, the surfaces of the side walls and the ceiling should be wetted well with a broad wall brush. During this operation, we must close the windows and doors because in this way the old coating will quickly soften due to water vapor. We will now easily scrape off the old, softened coating with a scraper. After this, we will open the windows and doors to speed up the drying, and the removed paint scraps will be cleaned immediately. After the walls have dried, they should be cleaned with a broom.
Sizing the wall surface is the next operation. We have to boil a kilogram of animal glue with about 5 liters of water and apply it lukewarm to the walls. The sizing solution should be applied with a brush with short bristles without dripping onto the wall. Sizing is a very important operation, because it binds the sand grains of the wall and thus prevents the separation of pasted wallpaper from the wall. After sizing, the unevenness and holes on the wall should be filled with plaster. So that the plaster does not set quickly, mix it with water containing a small amount of sizing solution. The plaster should be applied with a spatula and a leveler. After these preparatory works, wallpaper cutting can follow.
As with painting, we start measuring from the ceiling. The length of the ceiling should always be measured from the windows (e.g. if the windows are in a room of 5 x 4m on a 4m wall, you need 8 pieces of wallpaper with a length of 5,05m and a width of 50 cm). Please note that you can also get the so-called English wallpaper width 70 cm!
Before we cut the wallpaper for the side walls, we need to determine the height first. Namely, in high rooms we can’t glue the wallpaper of the side walls all the way to the ceiling, and vice versa, in modern low rooms we can’t glue the wallpaper of the ceilings all the way to the side walls (fig. 1, 1. part). Before we install the wallpapers, we should mark the upper edge of the side wallpapers. Marking can be done with a string smeared with graphite, and the measurement should always be made from the ceiling down (not from the floor up).
Once the cutting is complete, we need to prepare the adhesive.

FIGURE 1
Hanging wallpaper
Next comes the gluing, which should also be started on the ceiling. The back of the wallpaper is thinly spread on the kitchen table (fig. 1, 2. part), so that the glue does not leak out on the edges. Then the wallpaper should be folded, making sure that the edges match exactly. This is very important because in the next operation, the white edge of the wallpaper should be cut evenly next to the edge of the table top. Let the folded wallpaper stand for 3-4 minutes so that the paper softens completely from the glue. Then we need to put a soft brush in our pocket (for example, a soft household brush) and take a stable position on the ladder. We unfold the softened wallpaper, starting from the longer fold, and place it on the ceiling with two hands. We support the hanging part with our left hand, and with the right hand, using a brush, we first smooth the middle of the placed part, gradually moving towards the ends. We will perform this same operation with the shorter bend.
When installing the lower strips, the next one must not overlap the previous one by more than half a cm. If we reach the chandelier on the ceiling, the started strip should be brushed up to the chandelier and then the wallpaper should be cut with scissors, normally up to the place of the chandelier, so that the started strip can be placed and smoothed over the entire length (fig. 2).

FIGURE 2
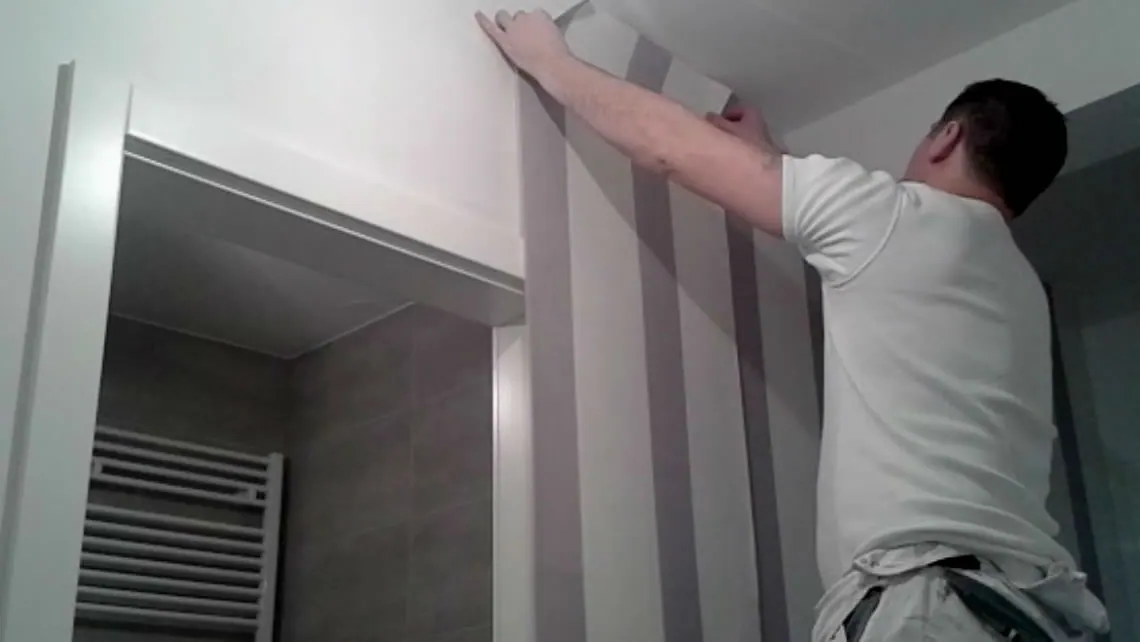
After the ceiling, the side walls follow. Sticking the strips should always start from the light side (from the walls next to the window) (fig. 3). Spreading and bending the strips is the same as for the ceiling. If the wallpapers for the side walls are thicker, then they should be left for a little more time to soften after applying the glue. After unfolding, rest the end of the greased strip on one foot so that it does not tear under its own weight. When we reach the next edge with the placement of the tape, we place the tape next to the wall with one hand, with half a cm overlap, and with the other hand we adjust the required overlap lengthwise up and down. On the side walls, we need to remove the switch covers (if any) and, when smoothing the wallpaper, make an opening by cross-cutting the appropriate size (fig. 2). After that, the removed covers should be placed and the triangle parts of the wallpaper should be smoothed (fig. 2).

FIGURE 3
Important! During the wallpapering and painting “wet” works, electrical switches and plugs should be hermetically covered or turned off in order to exclude the possibility of electric shock!
If we have applied the adhesive material thicker than necessary, then we should carefully wipe the smoothed edges of the wallpaper with a clean and dry cloth. Let’s choose pale, inconspicuous patterns that we will be able to place with the overlay without difficulty.
Wallpaper with geometric patterns must be aligned carefully at the pattern repeat and the joints, which requires precise work.
The quality of wallpaper is very different. Installing cheaper but at the same time thin types of wallpaper (which tear easily) is a difficult task for inexperienced beginners. But also for other reasons, it is better to take thicker and stronger wallpaper, possibly plastic and washable. It is easier to work with them, and the result of the work is more stable.

The main types of wallpaper
Natural wallpaper. They tend to turn yellow, they are not waterproof, they leak air, their weight is 75-90 g/m2. They are made in pale tones and are quite cheap.
Natural wallpapers with patterns. They have the same features as the previous ones, but they also have printed patterns.
Cast (fond) paper wallpaper. They are made from better quality stronger paper, weight 85-100 g/m2 with rich tones and tasteful patterns.
Silk (or Metaxa) wallpaper. These paper wallpapers are particularly strong, weighing 80-90 g/m2. Their surface is silky shiny with embossed patterns, embellished with mica, aluminum pigments and bronze colors. They have excellent tone retention, are breathable but cannot be washed. They belong to the higher quality types of wallpaper.

Velour or flock wallpapers. They are made of strong paper on which small pieces of silk and cotton thread are glued with elastic glue. In this way, the wallpaper gets a characteristic look of fabric, ie. velvet. They are made in different pastel colors and either only the patterns are stitched with silk threads (semi-velvet) or the entire surface (full velvet). They can be washed with care and are very durable and high-quality types.
Salubra wallpaper. They are made of parchment-like paper in rich and tasteful tones, with embossed prints so as to fill the pores of the paper with oil paint. In this way, durable wallpapers are obtained that meet even the most extreme requirements and can be easily cleaned by washing. The use of these quality wallpapers is very widespread.
Lacquered wallpaper. Paper wallpapers of lower quality are previously colored with water dispersion binding agent (eg with glutolin-tutkal) and after drying they are coated with colorless varnish.
In this way, a lot of high-quality wallpaper is obtained, which is durable and easy to clean with water. After a long time (8-10 years) the varnish coating tends to age and get cracks.
Contact (sticky to the touch) wallpaper with a base made of artificial material. They are made in different tones and with different patterns. Their basic material is paper (or artificial resin), their surface is previously impregnated with artificial resin, and the back is made of sticky plastic with a protective film. Their width is usually 0,56 m and they are sold in rolls. Gluing of these wallpapers is done in such a way that the protective film is removed and the wallpapers are placed on the wall and smoothed in the usual way. No special expertise is required to install these wallpapers. They are among the most modern and high-quality types of wallpaper that meet even the most stringent requirements.
Self-adhesive wallpapers
The most modern types of wallpaper are self-adhesive wallpapers that can be cleaned with water.
Since these wallpapers are very expensive, covering larger wall areas with them would not be economical. However, it is still recommended and cheaper to cover parts of the walls in the kitchen and bathroom - instead of tiles - with these wallpapers.
Attention should be paid to the fact that self-adhesive wallpaper cannot be placed directly on a painted wall when loose grains in the coating do not ensure good adhesion, so the wallpaper would separate from the wall.

Self-adhesive wallpapers can only be installed on carefully plastered and sanded walls that have been painted with semi-oily paints. We will save ourselves from unpleasant surprises if we try gluing with one thin tape. If the test tape can only be removed from the wall with greater effort, or if we can hardly reach under the wallpaper with our nails, then we can start covering the entire surface (fig. 4, part a).
Applying self-adhesive wallpaper
If the surface of the wall that we want to cover is large, then gluing the wallpaper should start from the top and continue downwards. We need to use our nails to remove the protective film from the back of the wallpaper over the entire width to about 70 mm in length and stick this part to the upper part of the wall that we want to cover. Attention should also be paid to the fact that the wallpaper is exactly vertical. Then we take the roll of wallpaper in the left hand as well as the unrolled part of the protective film and slowly lower it down, and with a soft cloth, which we hold in the right hand, we press and align the wallpaper on the wall (fig. 4, part b). About 100 mm overlap is required for proper corner shaping (fig. 4, part c).

FIGURE 4
Wallpaper dimensions (rolls)
Name — Width (m) — Length (m) — Area (m)
Normal (standard) dimensions 0,50 7,5 3,75
Medium dimensions 0,57 10,5 5,97
Salubra - dimensions 0,80 10,5 8,40
Rib dimensions (10 strips) 0,50 7,5 3,75
Auxiliary material for wallpapering
Fillers
Wallpaper lining. According to its physical state, the lining can be solid and liquid. Most often, solid waste paper is used, i.e. old newsprint. The larger the newspaper and the older it is, the better it will adhere to the wall. Newspapers printed in color, with bold letters, then magazines with pictures are not suitable for this purpose, because the colors will show through plain paper wallpapers.
Waste paper in rolls. These are ordinary printing papers without printed letters, usually white in color, less often lightly colored. Namely, the printed letters of simple paper wallpapers in case of getting wet can penetrate the paint and can cause various stains. The width of waste paper is usually 0,5 m and the length of the roll is 20-50 m.
Gypsum plaster with glutolin
You should take 500 parts by weight of glutolin solution, add 1000 parts by weight of stucco plaster, 3. parts by weight of finely ground wood flour and 1-2 parts by weight of talc. Mix everything well with water to make it thick enough to spread. The mortar should be used within 2 hours, otherwise it will set.
Plaster with animal glue. You should take 6 parts by weight of bone glue diluted with 5% potassium soap in a ratio of about 1:1 and mix it with 1 parts by weight of linseed oil varnish and add enough chalk for it to be applied evenly to the wall with a straightedge. This mixture will give a layer that dries quite quickly and is not prone to cracking.
Insulation materials
Asphalt paper is waste paper or slightly thicker paper that has been soaked in an asphalt solution. It is sold in rolls with a width of 1,0 m. In use, the impregnated and glossier side is placed against the wall, tightened and fixed with nails.
Adhesives
In addition to the already mentioned adhesives of our production - Tapetola and Tapa, cellulose glues (glutolin, methyl-cellulose, carboxy-methyl-cellulose, etc.) are also used. They can be easily dispersed in water, they are not susceptible to mold, they are easy to work with, and their adhesion power is satisfactory. In some countries they are sold in granular form, so by adding the correct amount of water they can be dispersed after 2-3 minutes. They usually contain additives to prevent the formation of fungi and mold.
Artificial resin adhesive. Usually, these adhesives are commercially available in such a form that they can be used immediately. They are used for better quality plastic wallpaper. With these adhesives, it is possible to stick wallpaper on such substrates that have a lower absorption power (eg marble, artificial marble).
The mentioned procedures, materials and names are transferred from a historical source. Before work, check the moisture, mold, bearing capacity of the substrate, the composition of the old coatings and the instructions of the manufacturers of modern wallpaper and adhesives. Provide ventilation and appropriate personal protection; work with knives and scrapers on a stable surface, and use ladders only when properly positioned. Before removing switch covers, surface treatment around installations or working near a light fixture, disconnect and secure the electrical supply, check for no voltage with a suitable tester and hire a qualified electrician when necessary.