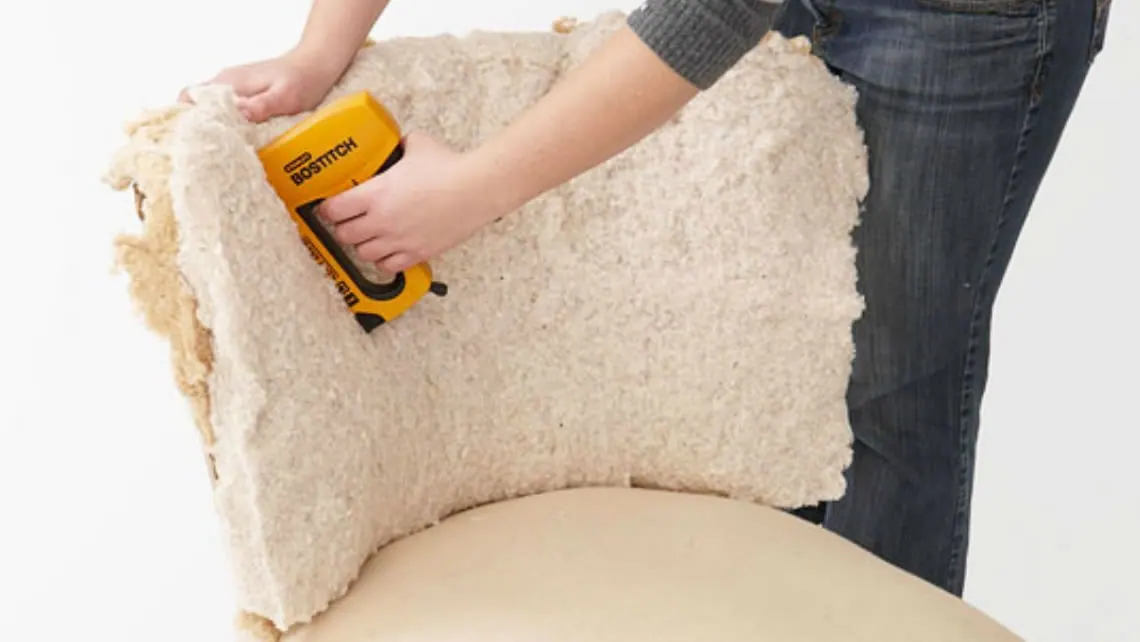
Important security note: This is an archived educational text from 2018. year, and not a modern instruction, material evaluation or product recommendation. The original materials, measurements, tools, adhesives and procedures were transferred without checking according to today’s regulations and manufacturer’s instructions. Old upholstery and fillers may contain dust, mold, allergens, pests or previously applied chemicals; springs, pins, nails, blades, staplers and tensioned straps carry the risk of injury, and adhesives require proper ventilation and protection. Doors that have a fire, smoke, safety, evacuation or other certified function must not be coated, drilled, made difficult or changed without the written approval of the manufacturer and an authorized expert, because the clearances, fittings, closing and safety properties can be changed.
Upholstering of furniture and coating of existing doors are not part of the new public offer of Savo Kusić. The current focus is wooden windows, wooden-aluminum windows and production of custom-made doors. For a specific window or new door project, you can send a request for quote.
Furniture upholstery
Upholstering procedure - this not at all simple and therefore only recommended work for those with dexterous hands - we will explain in one more common job, armchair upholstery.
The work begins with disassembling the old armchair. When unfolding, you should be careful and remember the structure of the upholstery, and also be careful not to ruin the material, because we will use it again. But let’s see, what kind of material is needed for upholstery? First of all, suitable fillers are needed: sea grass, flax straw, chicken, cotton wool, a quantity of various animal hairs or, what is used the most: laticel and foam materials. You also need supporting strips (textile, rubber and metal), inner fabrics (twill, molino, lining cloth), springs and other wallpapering props (paper, string, thread, decorative string, decorative nails) and finally fabric, leather or artificial leather for covering. Of course, you also need the right tools: a hammer, a puller and nailer, a tape tensioner, a straight and curved needle, a double-pointed needle, pliers, scissors, a measuring tape, sewing thread and sheet metal shears.
How should the upholstered furniture be unfolded? First, we have to take out the decorative and wallpaper nails one by one, and then remove the covering fabric. If the fabric is still in good condition, then it needs to be dry cleaned, and if it is already worn out, then we have to buy a new one. After this, the molino (the fabric covering the wadding) should be removed as well as the wadding. (It is advisable to replace the old wadding with a new one.) Then we have to remove the canvas, sea grass, springs and supporting straps. The removed afro (hair) needs to be thoroughly cleaned of dust and scraped again, or if this is not possible, then processed by hand. Finally, the springs should be inspected and those that are broken and stretched should be replaced. We also have to replace old and insufficiently strong belts.
Armchair upholstery
After disassembly, preparation of tools and procurement of new material, the upholstery can be started. How can we re-upholster an armchair? Upholstered armchairs are usually equipped with high springs. The seat part needs a 9-12 spring, and if the old upholstery did not have that many springs, it should be supplemented. (An armchair needs the same number of springs, just smaller heights.)
Bearing straps and springs
Strips should first be attached to the cleaned wooden frame. Place the end of the tape on the lower edge of the frame and nail it with three nails at a distance of 2 cm from the end. Then return the 2 cm section and firmly fix it with five nails. Individual strips should have a distance of 3–5 cm, and a transverse row of strips should be placed on the last row, so that the vertical and transverse strips are intertwined. It is very important that the straps are well tensioned and therefore, before we fix the free end, they should be tensioned with a tensioning tool. If we don’t have such a tool, we can also use a sawn wooden slat with a round section. We insert the tape into the cut opening of the slat and by twisting the slat, which we previously pressed against the side of the armchair, we tension the tape. Certainly, before straining, you should place some soft fabric between the armchair and the slat, so as not to damage the armchair’s polish.
After tightening the straps, the springs should be attached. Springs that have 5-6 threads are best. The springs should rest on the places where the strips cross, because this way their carrying capacity will be greater, and they should be placed so that the hooks at their ends in one row look to the left, and in the other row to the right. Correctly placed springs should be sewn to the straps at the lower end, then nails should be driven into the frame, in the same direction as the row of springs, and ropes for tying the springs should be tied to these nails. One end of the string should be tied to a nail, then on each spring, tie the string in two places, braid it to the spring and finally tie it to the nail on the other side. In the same way, the springs should be tied in the transverse direction so that they are fixed in four points.

Downstairs and padding
The tied springs should be covered with spring cloth (jute cloth) and the covering should be loosely attached with upholstery nails to the frame. A “filler” is placed on the canvas for springs, e.g. freshened seaweed. The filler should first be placed on the edges of the seat, then in the middle, in such an amount that the springs are not felt when sitting. Having evenly placed the filler, we place the lower canvas, cut from twill, and temporarily tighten it with pins. The final fixing can be done in two ways: 1. pin the canvas under the side edges and sew by forming the edges: 2. we fasten the sargia to the frame with nails. The nails, which need to be driven in every 6-8 cm, we first drive only halfway, tighten the canvas and pull it over the nails and only then drive the nails completely into the wood.
To prevent the filling from shifting, the entire upholstery should be stitched with evenly spaced stitches. For the first seam, the edge of the upholstery should be accepted between four fingers and the thumb and the first seam should be placed about 5 cm from the top finger, and the others at an even distance from this one. Then comes the finishing of the edges around the seat, on the vertical sides and on the backrest. The filling should be placed once again, adjusted and where necessary, the filler should be pressed in with a needle. Upholsterers are familiar with several types of edge stitching. We will describe only the simplest ones. First you need to form the edges at the corners to prevent the filler from slipping and then start with the first stitching at 4 cm from the edge. The needle should be inserted with the right hand from bottom to top, and with the left hand, squeeze the material and at the same time remove any existing unevenness. After the first stitch, we continue sewing moving from left to right with straight, 4-6 cm long stitches.
Upper upholstery and upholstery
We start the second stitching at a distance from the edges, by 2-2,5 cm moving from left to right with similar stitches. Now the distance between the individual parts is only 2 - 3 cm. While sewing with the right hand, we form the edges with the left hand and flatten the filling. For both sewing, you should use a good and strong string and after 4 - 5 the bottom side, tie the sewing so that later, if necessary, you can tighten it. With this, we have finally completed the lower upholstery on which the upper upholstery is placed.
The filler cannot always be adjusted so that the bottom fabric is completely flat after sewing. The remaining bumps and unevenness are removed with the upper upholstery. The final shape of the upholstery can also be formed by the upper upholstering. Therefore, a new layer of filler should be placed on the bottom layer. This ensures the softness and flat surface of the upholstery. First, the depressions that were created during the sewing of the edges and quilting should be filled, and then a new layer of filler with a thickness of 2-3 cm should be placed. For this purpose it is best to use fine hair, laticel or foam material. At the end, a thin layer of cotton wool should be evenly placed on the filler layer and the edges of this layer should be tucked under the filling material so that the filler does not later penetrate through the “furniture fabric” fabric.
The next task is to put on the lining cloth tailored from moline. The simplest way to attach this lining is to sew it to the edge. Tailored molino, the dimensions of which correspond to the upholstered surface, should be gathered at the edges by about 1 cm and attached to the four corners of the upholstered part with pins. Then carefully straighten the armchair, possibly even sit on it, so that the molino adheres well to the upholstery and tighten it again with pins. A completely flat molino, without wrinkles, should be sewn to the edges with open stitches.
It is best to cover the upholstery on the underside with some densely woven material to prevent particles of the filler from falling out and thereby soiling the floor.
Now the internal works are already finished and we can proceed to covering, i.e. installing the upholstery. First, the fabric should be cut to the required size and stretched well on the table so that it does not stretch and create wrinkles immediately after installation. The stretched fabric should be placed on the surface to be coated and fixed with one nail at each of the four corners. Then fasten the two sides with nails, and tighten them on the opposite sides and hit them with your hands. When tightening and straightening, work from the center to the edges to avoid creases. Tightening should be continued until the surface is completely flat. At the corners, the fabric should be gathered so that the folds are even and treated with hidden stitches. Attention! The surface should be flat here as well.
If we want to place a decorative rope on the lower edges of the armchair, then the fastening of the fabric should be done without vomiting, i.e. nail it with upholstery nails to the wooden frame and cover all around with the desired width. If we want to use decorative nails, the fabric should be attached to the lower part of the frame so that a part of the width of about 1 cm is recovered from the edge of the fabric and nailed well with upholstery nails. Finally, we hammer decorative nails into the lower edge all around, making sure that they are at the same distance.
Door upholstery
Door upholstery can be done in two ways, depending on its construction. One of the ways requires that the door, which we want to upholster, be completely flat, because then the upholstery can be placed directly on the surface of the door.
Required material
Insulation: soft foam material, 20-30 mm thick plate with dimensions corresponding to the dimensions of the door (possibly from several pieces). Lining: soft, elastic sky with dimensions that are larger by 10 cm than the dimensions of the door. Glue: some kind of quick-drying synthetic glue. Nails. wallpaper decorative nails, fixing nails dim. 16x16 (fig. 1, part a.)
Straight door
The door handles and metal locks should be dismantled and then removed and placed in a horizontal position. With a pencil, draw the frame 1,5 cm from the edge (fig. 1, part b). If you want to upholster only the side of the door that faces the frame, then before removing the handles, you should close the door and mark next to the frame how far the upholstery will go. A new frame should be drawn from this mark for 1,5 cm towards the inside. Cut the sheet of foam material exactly according to the dimensions of this inner frame and cut out the place of the lock sheet on it (fig. 1, part c). The surface of the door and the surface of the foam board should be smeared with glue and carefully place the foam material on the marked place and stick it (fig. 1, part d.).

Image 1
Then (by raising the edges) glue should be applied to the sides of the foam board and the lower surface of the door next to the frame in a width of 3 cm (fig. 1, part e). We have to wait for the glue to “catch” a bit and with a flat tool (e.g. a wider screwdriver) carefully press and adjust the lower edge of the foam material and then glue it (fig. 1, part f.) On the base prepared in this way, the sky coating material should be placed, tightened and fixed at every 5 - 10 cm with nails, so that the nails are only driven in halfway. Then the skirt is cut, leaving 1 cm from the drawn frame (fig. 1, part g).
With the lock, cut the edge a little, then cut out the place of the handle and the opening of the key (fig. 1, part h.) The edge is fixed on the lower side by gluing, and then the lock sheet is mounted. The fixing nails should be taken out individually (fig. 1, part i.) and with continuous turning of the edges of the skirt and tightening, they should be fixed halfway with nails driven in again. After this, with the continuous removal of the fixing nails, nail the decorative nails (fig. 1 part j) The corners should be fixed first. The maximum distance between nail heads can be 1-2 mm. Care should be taken to ensure that the edge is smooth, or nail, do not be outside the marked frame.
Doors with inserts
If the surface of the door is not flat but with inserts, the upholstery should be made on a special basis. The additional material required for this method of operation is: plywood or wood fiber board 3-5 mm thick for the base plate with dimensions 3 cm smaller than the door dimensions. Binding twine: linen thread or thin twine, decorative buttons with skein wrap.

Image 2
First, draw a grid for placing buttons on the base and on the foam board (the distance between the horizontal lines should be 10 cm, and the vertical lines should be 7,5 cm). At the intersection of these lines, holes with a diameter of 5 mm should be drilled on the base plate, and holes with a diameter of 30-40 mm on the foam board. Holes can be drilled on the foam board with a leather punch (or in the absence of that, a scone mold with sharp edges with pressure and turning, fig. 1, part k.) After drilling the holes, the foam material should be glued (without gluing the edges), place the edge and, while returning the edges, fix it halfway with hammered nails. A strong linen thread should be inserted into the buttonholes and a sewing awl or a double-pointed needle should be passed through the openings - (fig. 2). After inserting the buttons, the string should be wound on the nails that are driven in halfway and then fixed by driving the nails. Now we can take out the nails with which the sky is attached and attach the base plate to the door with screws. Further operations are identical to those previously described. We will achieve a similar effect if we buy special nails whose heads we cover with scaly. We draw a grid on the skirt with tailor’s chalk, pierce the appropriate points with an awl and hammer the nails with the tool to the desired depth.